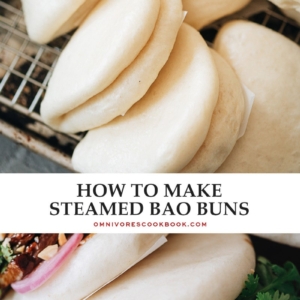
Love bao buns? They’re perfect for making sandwiches with an Asian flair, and they’re made with such simple ingredients – it’s even better than getting them at the bakery! {Vegetarian}
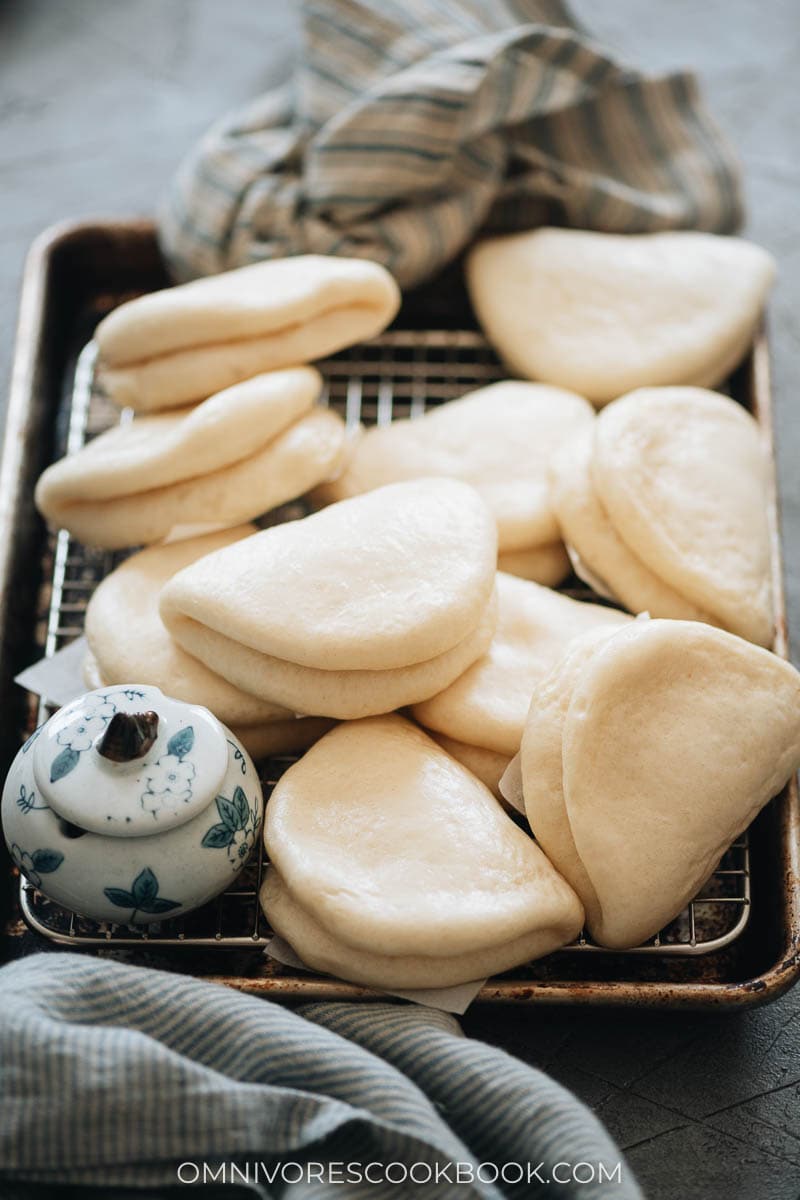
Bao buns are such a great thing to have around. I personally love making Gua Bao, and that’s where these bao buns come in. They are the essential ingredient for making gua bao, though plenty of other goodies can be stuffed into these buns.
I love serving moo shu chicken and braised beef in the bao buns. You can get really creative with the fillings. For example, stuff the buns with Chinese fried pork chops and hot sauce to create a fancy restaurant-style sandwich.
The light, fluffy texture of the bao buns comes from steaming them. Since they’re made from such simple ingredients, you should already have everything you need to make them in your pantry.
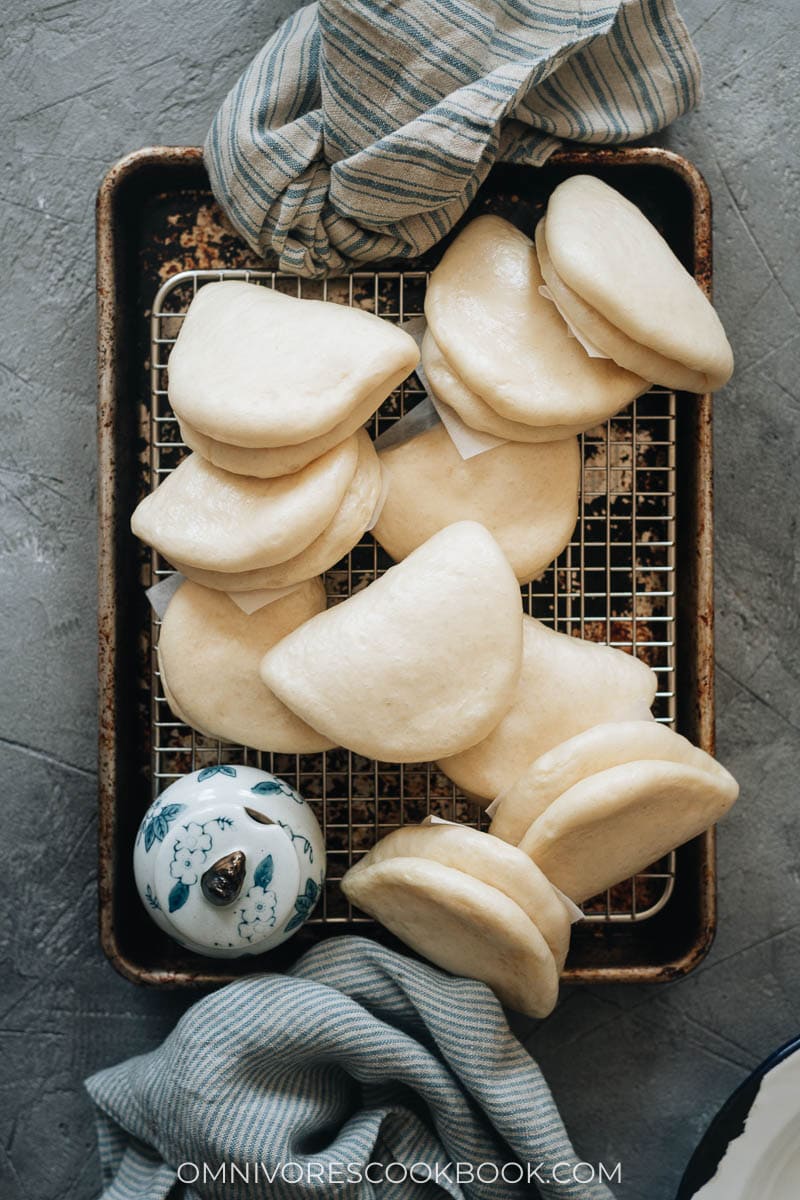
Bao Buns cooking process
However, despite the simplicity of the ingredients, the process of making steamed bao buns can be a bit tricky. That’s why, when you look below, you’ll see I’ve prepared super-detailed step-by-step instructions, complete with photos and a video, so you’ll feel like I’m with you in your kitchen making these bao buns. I’ve also attached notes for troubleshooting below.
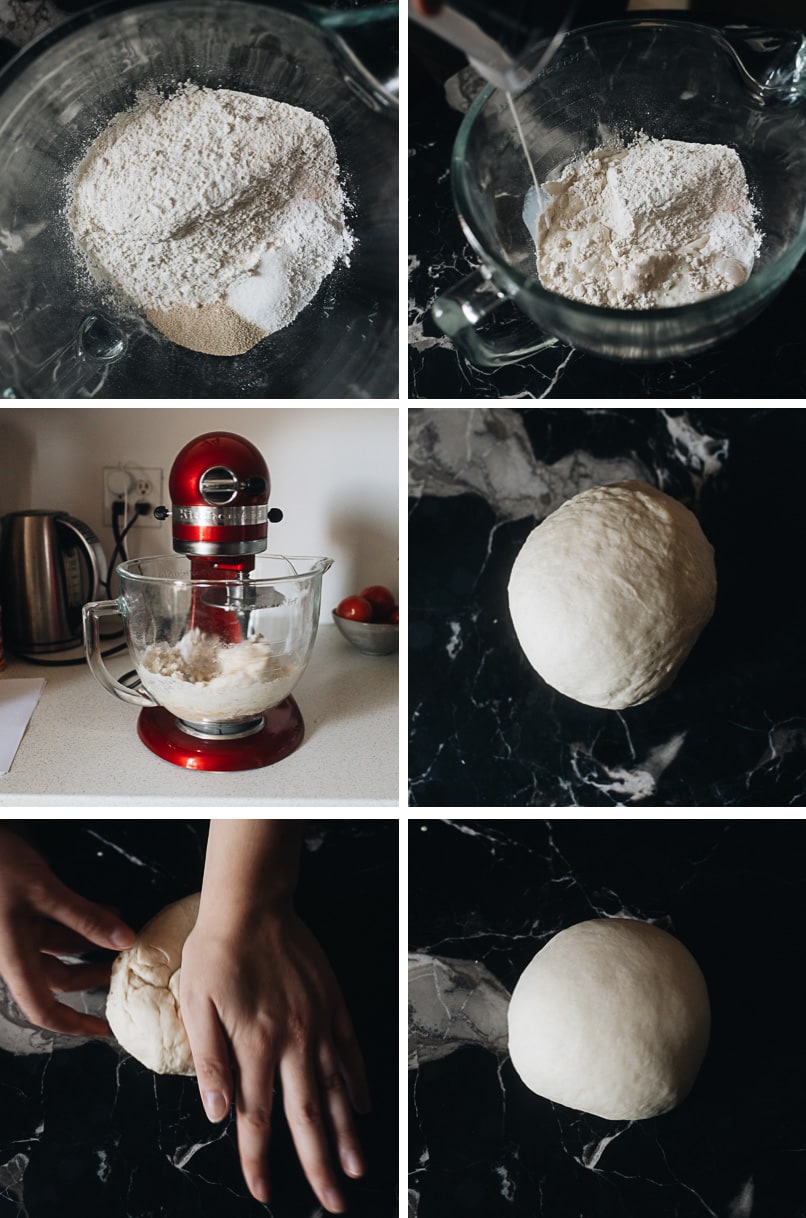
Part 1 – prepare the dough & 1st rise
- Combine all the dry ingredients in a mixing bowl
- Add the wet ingredients
- Knead the dough with a mixer (this step can easily be done by hand, as well)
- Cover the dough and let it rest for 10 minutes
- Knead the dough for a minute
- Let the dough rest again for about 1 hour
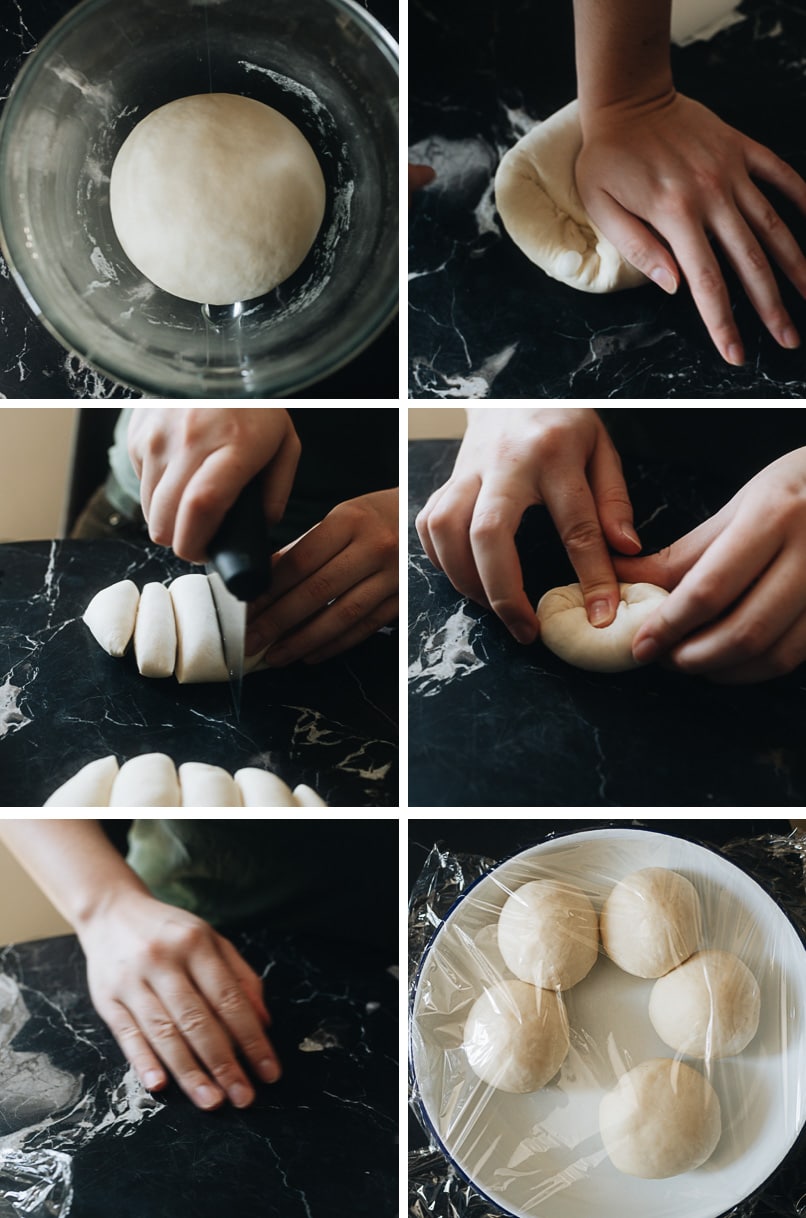
Part 2 – divide the dough
- The dough is ready after the size has doubled
- Gently knead the dough one more time
- Cut the dough into even pieces
- Pull the dough together into a ball
- Roll the dough to further form it into a dough ball
- Always cover the dough with plastic wrap when working on the rest of the dough
Part 3 – form the buns, 2nd rise & cook
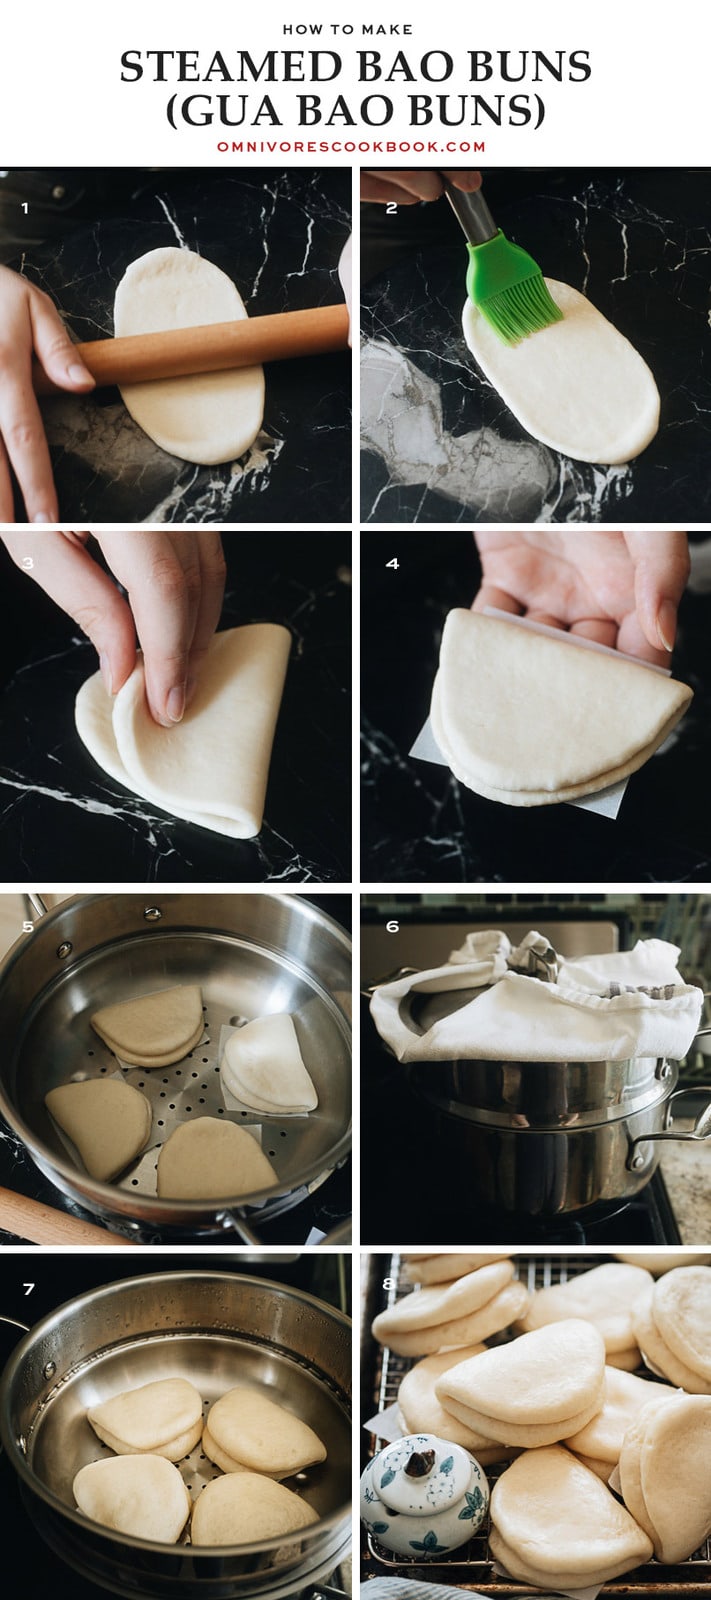
- Roll each dough ball out into a long oval piece
- Brush oil onto it (so the bun will separate easily later)
- Fold the oval dough to shape the bun
- Place it on a piece of parchment paper
- Let the buns rise again before cooking
- Lay some towels under the lid if you’re using a metal steamer, to prevent the water from dripping onto the buns
- Steam the buns, then rest them, covered with the lid, before serving
- You can serve the buns immediately or store them for later use
The keys to making bao buns and troubleshooting
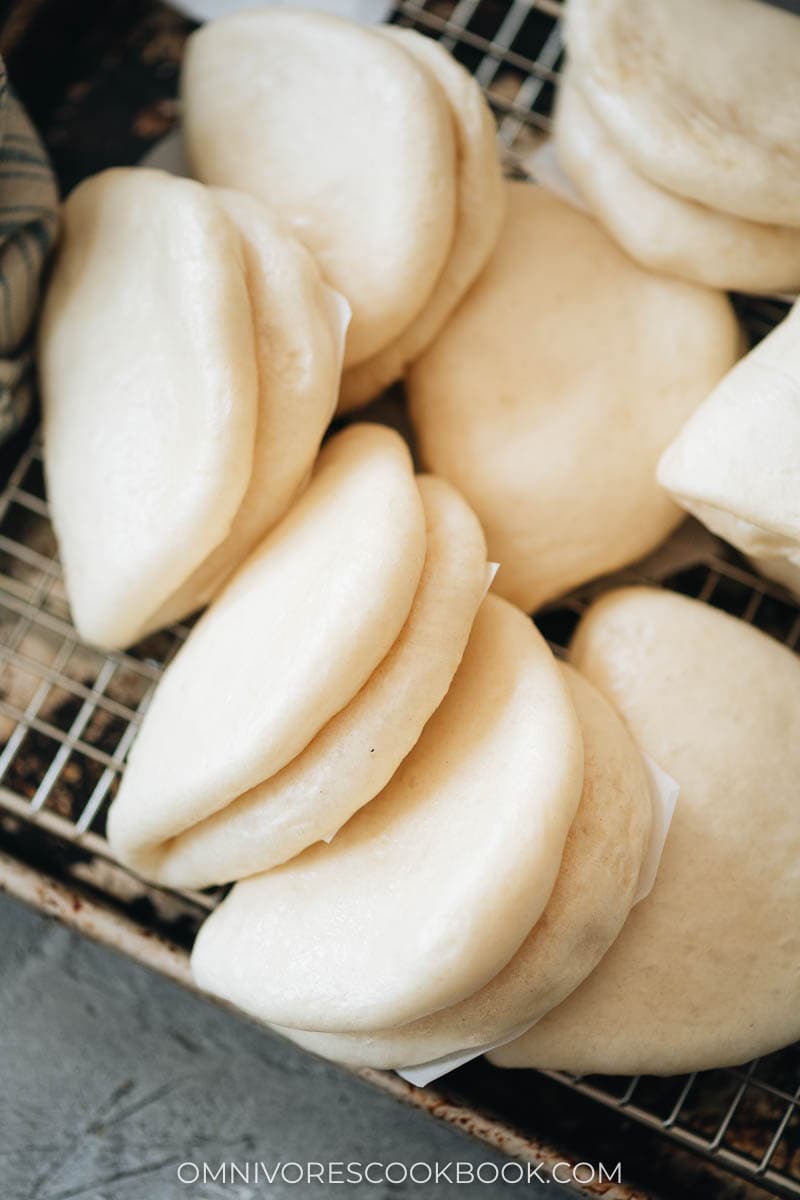
Some parts of the buns have brown and yellow spots after steaming and the texture is chewy
This is a very common issue for steamed buns and it’s usually caused by a sudden increase and/or decrease in pressure while steaming. To avoid it, you should:
- Slowly heat up the bun dough in the steamer. Do not boil the water in the steamer and add the steaming rack directly. Instead, place the steamer over the water, then start cooking. So the temperature of the steamer rack will rise gradually.
- Use medium or medium-low heat during steaming. High heat and rapid steam might also cause the buns to scorch.
- Rest the buns without lifting the cover for at least 10 minutes after cooking. This is very important. So the pressure in the steamer will drop gradually.
The buns deflate after steaming
This is usually caused by over-proofing. If the dough has risen too far, it will expand then collapse during cooking.
The tricky thing is, the proofing time can vary quite a lot depending on your environment and the ingredients you use (e.g. how fresh your yeast is). Our recipe uses instant yeast instead of active dry yeast to prevent this issue. However, you will still need to keep an eye on the dough and use your judgement and experience to decide if the dough has risen enough.
For the 2nd rise, if you’re taking time to shape and prepare the dough, you can store the rest of the dough covered in the fridge to prevent over-proofing.
The buns have expanded too much and look weird
This issue can also be caused by over-proofing. The buns will come out extra fluffy and this doesn’t affect the taste, but they will not look as pretty. You can refer to the above paragraph for the solution.
Afterthoughts
Making perfect bao buns does require a bit of patience and some practice. But the result is very rewarding.
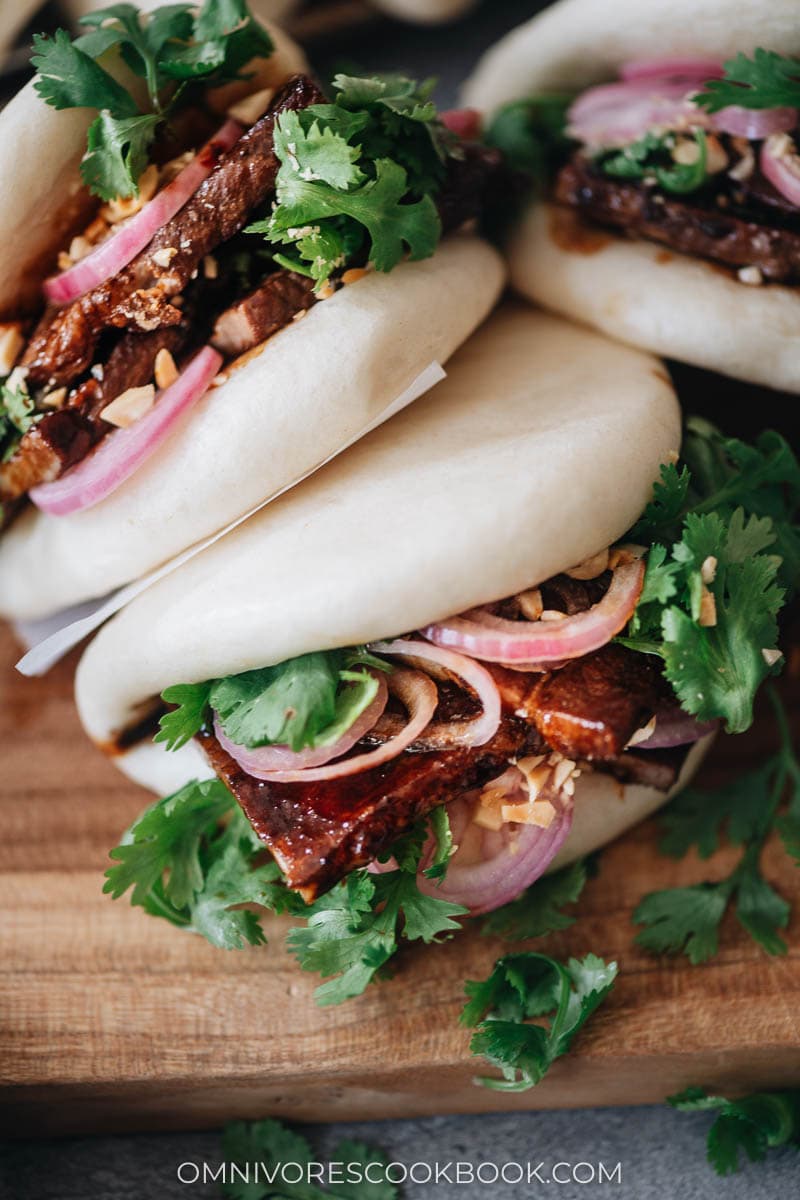
Once you make them, you’ll find countless ways to put them to use. Turn them into sandwiches with leftover meat from dinner and fresh veggies and take them for lunch. Add some quick pickled shallots to them for more zing. Trust me, you’ll find ways to make bao buns a staple in your kitchen.
Because bao buns can be a bit of a process to make, you can (and should!) make more. They are fridge- and freezer-friendly so you can have a stash of them ready to go. Then it will be easy to enjoy bao buns whenever the craving strikes. Look for my recipe for Gua Bao to see one of the best ways to enjoy your bao buns!
How to use bao buns
Try out these recipes below for the stuff to make fancy Asian sandwiches in your own kitchen!
- Char Siu (Chinese BBQ Pork, 叉烧肉)
- Chinese Bang Bang Chicken (棒棒鸡)
- Chinese Pickled Peppers (Quick Pickled Pao Jiao)
- Crispy Chinese Duck Breast
- Moo Shu Vegetables
- Homemade Hoisin Sauce
Want to learn more about Chinese Cooking? Sign up for my newsletter to receive the 5-Day Chinese Cooking Crash Course and recipe update!
How to Make Steamed Bao Buns (Gua Bao Buns)
Ingredients
- 290 g (2 cups) all-purpose flour
- 3 g (1 teaspoon) instant yeast
- 3 g (1 teaspoon) baking powder (double-acting)
- 10 g (2 teaspoons) sugar
- 1/8 teaspoon salt
- 180 ml (3/4 cups) full-fat milk , cold or at room temperature
- Vegetable oil , for brushing
Instructions
Form the Dough + 1st rise
- Combine the flour, yeast, baking powder, sugar, and salt in the bowl of a stand mixer. Slowly pour in the milk while using a spoon or spatula to mix with the flour. Once the liquid is fully combined, turn on the mixer and knead for 5 minutes until it forms a firm and coarse dough ball. Alternatively, you can use your hands to knead the dough and it should take about 10 minutes.
- Cover the bowl with plastic wrap and let the dough rest for 10 minutes.
- After 10 minutes, knead the dough using your hands, for another minute, until smooth. Cover with plastic wrap. Rest the dough until it doubles in size, about 1 hour.
- While the dough is rising, prepare 10 pieces of square parchment paper about the size of your palm, to hold the buns while steaming.
- (Optional) If you’re making the gua bao filling and quick pickled shallots on the same day, prepare them during this time.
Divide the dough
- Once the dough has doubled in size, punch the dough gently with your hand to release the air bubbles. Knead for 1 minute.
- Cut the dough into 2 equal pieces, then further divide each piece into 5 smaller pieces. For a more accurate result, use a scale to measure the dough to make sure it’s 48 g per piece.
- Work on the dough pieces one at a time, forming them into balls by pinching the loose ends into the base until taut and round. Then roll the dough on the table using your hand shaped like a dome, lightly pressing the dough so it forms a round ball. Place the dough balls on a large plate and cover them with plastic wrap to prevent them from drying out.
Shape the buns & 2nd rise
- Place the dough balls pinched side down onto a clean working surface. Using a rolling pin, roll each ball into a 1/4″ (1/2 cm) thick oval that’s twice as long as it is wide (about 2.25” x 4.5”/ 5.5 cm X 11 cm). Flip the dough oval over and lightly roll again to smooth it out,
- Brush the top of the dough oval with a thin layer of oil (*Footnote 1), fold the oval in half, and place it on a piece of parchment paper you prepared earlier.
- Place the shaped buns in a steamer basket, leaving at least 1” (2.5 cm) between the buns. Cover and let rise for another 15 to 30 minutes before cooking, or until the size is 1.5 times bigger.
Cook the buns
- Right after you finish forming the first batch of buns, prepare the steamer by adding water into the base. When the buns have risen the 2nd time, add the covered steamer rack with the risen buns over the steamer. If using a metal steamer, use two layers of clean kitchen towels between the steamer rack and the lid to prevent water from dripping. Cook covered over medium heat until steam starts coming out of the pot, then turn to medium-low heat. Steam for another 10 minutes.
- After 10 minutes, turn the heat off but leave the lid on for another 5 minutes. Do not open the lid at this time! The buns might deflate without the proper resting.
- Once done, remove the buns onto a wire rack to cool. Then you can use the same steamer to cook the rest of your buns.
Workflow note
- You probably will need to cook the buns in batches depending on the size of your steamer. While you’re steaming the first batch of the buns, the second batch or the third batch might have been formed and rested. In this case, transfer the buns onto a big plate and cover them with plastic wrap. Transfer the buns into the fridge to slow down the rising. Wait until the previous batch of buns is done. Remove the rested buns from the fridge, let them return to room temperature for 2 minutes, then start steaming them. It’s important to NOT allow the buns to rise too much. If the buns are rested for too long, they will deflate once steamed.
Serve, store & reheat
- Once the buns are steamed and slightly cooled, you can use them to make gua bao, serve them with moo shu chicken, or stuff them with any braised meat.
- You can store the steamed buns in an airtight container in the fridge for up to 4 days, or in a tightly sealed ziplock bag in the freezer for up to 3 months.
- To reheat the refrigerated buns, you can place the buns on a plate and cover them with a layer of wet paper towels, then heat them up in the microwave. You can also heat the buns in a steamer, which will create a softer result.
- To reheat the frozen buns, place them directly in a steamer without thawing them and steam until fully heated through. If you want to reheat them in the microwave, you should thaw the buns first.
Notes
- The oil will prevent the buns from sticking together and can be easily separated after steaming.
Video
Nutrition
If you give this recipe a try, let us know! Leave a comment, rate it (once you’ve tried it), and take a picture and tag it @omnivorescookbook on Instagram! I’d love to see what you come up with.
More homemade dim sum recipes
- Baked BBQ Pork Buns (Char Siu Bao)
- Chinese Scallion Pancakes (葱油饼)
- Pineapple Buns (Bolo Bao)
- Wonton Soup
- Chinese Turnip Cake (Lo Bak Go, 萝卜糕)
Lilja Walter is a part of the Omnivore’s Cookbook team and worked closely with Maggie to develop and test this recipe.



This is wonderful that you have a recipe and I was almost going to try it and then remembered that frozen baos are readily available at the chinese supermarket. Maybe on a more ambitious day!
A couple of quick questions, please! Is it correct that you put the steamer basket full of buns into the pot while the water is cold so that the buns are warming as the water is warming? Second, once you turn the heat off and allow the buns to sit for 5 min. covered, should the pot stay on the hot burner or take it off? I ask because I unfortunately have an electric stove and the heating coil stays very hot for quite a while. Lastly, have you ever tried this recipe with a plant based milk? If not, do you think it would mess up the dough to use oat milk? Thank you!!
Hi Caitie, to answer your questions:
(1) Yes, you should add the buns to the pot while the water is cold. It helps the pot to increase pressure gradually so the buns won’t collapse due to sudden change of pressure.
(2) When you rest the buns after cooking, you should take it off from the burner.
(3) I think it’s totally find to replace the milk with a plant based milk.
Hope this helps. Let me know if you have more questions and happy cooking!
Hi Maggie. So I made the buns and the pork and the shallots. I did have some trouble with the buns – had to throw out the first lot of dough because it just didn’t come together or rise. But 2nd time went well and we ended up eating 3 Gua Bao each for supper! Delish! But might try to find frozen bao for next time 😉 Thanks for making these dishes so accessible for the rest of us!
Could I stuff this with bbq pork prior to steaming?
Yes you can.
Made these last night for the gua bao. Followed the recipe exactly (using my scale for measurements) and it turned out perfectly. I slightly overproofed them on the second rising but the extra fluff didn’t bother me !
Thank you so much for this detailed recipe – my first batch did unfortunately deflate a bit but the second turned out better. Everyone loved the texture.
I made these over the week-end and I was impressed by the result. The recipe is easy to follow and the step-by-step photos were very helpful. I served them with pulled jack fruit, marinated cucumbers and a red cabbage slaw and it was a real hit. I will make bao again, thank you for this recipe!
Do you have recipe for sweet bean buns? I like them better than pork buns.
I don’t have one now but I’ll add it to the to-do list 🙂
My dough came out crumbly. What could I have done wrong?
The steamed bun is a bit finicky and many factors can affect the dough texture, such as the brand of flour you use and your environment (temperature, humidity etc). The dough is on the drier side, so if the dough come out crumbly at the beginning, you probably need to add more liquid.
Can you make the dough in advance and store it in the fridge or freezer before steaming?
I recommend cooking the bums and freeze the steamed ones. They freeze pretty well and will be tender once reheated.
I’ve never tried freezing the dough. I’m afraid that the freezing process will mess up the rising and make the texture less desirable once thawed and cooked.
Hi, quick question – can we replace the milk by dairy free milk or water to make the baos vegan?
I think you can use dairy free milk without any issues.
This was the closest recipe to getting the texture and feel of the gua bao bun I was looking for. I used fine milled flour and added 3 grams more of flour to make the dough less sticky. I also prefer my gua bao a bit sweeter so will add another teaspoon of sugar. Otherwise, totally great recipe!
I need to confess that I am way too lazy to make the buns myself, so I bought some frozen buns. What I would like to prepare is the pork as shown on the video, so it would be nice to have a written recipe for it (I don’t see one), perhaps in another page linked to this one. Thank you.
Oh, never mind. I found the link, sorry. But perhaps it would be best to put it at the end of the instructions in the recipe container or next to the video, it kind of gets lost at the end of the long text.
The recipe and instructions were perfect. Our buns came out light and fluffy in our bamboo steamer. I really want to find a sauce for dipping since this was my son’s idea and he loved the sauce he tasted in a restaurant dish featuring bao buns. We used lamb and just used its natural juices.
Good recipe I recommend it. I’m doing this for an exam could your recommend a good filling recipe?
This is the Gua Bao filling: https://omnivorescookbook.com/gua-bao/
That being said, you can totally use a very different filling as well such as https://omnivorescookbook.com/thai-basil-chicken/ and http://omnivorescookbook.com/char-siu
Made it today for the first time and it turned out so good! So yummy with peking duck!! I doubled the recipe to make 20 and doubled all of the ingredients. Thanks for the recipe 🙂
This turned out very tasty. I substituted pork belly with Korean style galbi and a mung bean radish salad for crunch. I am curious about one thing. Is there a reason you suggest that the milk be cold or at room temperature? The instant yeast generally does better with a little heat. I ended up putting my dough in a warm oven with a light on to get it to rise. So in the end, it was fine. Thank you!
Thanks for this recipe, Maggie! I had to make it twice as my first attempt did not rise, despite following the instructions exactly and having fresh yeast and baking powder. Maybe it was the temp of my kitchen. After waiting for many hours and no rise, I decided to start over. The only thing I did differently was to warm the milk slightly and dissolved the yeast and sugar in it. Other than that, I followed your directions and they came out great! Will definitely make them again.
Thanks for leaving a positive review! I think the reason your first attempt didn’t work was because you used active dry yeast, which requires activating. I slightly prefer using instant yeast for steamed goods because the result is more consistent, but I’m happy to hear that active dry yeast worked out as well 🙂
Hi Maggie!
I actually have both kinds of yeast and used the instant both times. I love how soft and fluffy they were not only initially but warmed up (resteamed) the next day. Love your recipes!
I was feeling adventurous one day and decided to try these… well, they turned out amazing! They’re a labour of love, but well worth it. (I use oat milk and they’re perfect)
Hi, I can’t wait to try this, but do you think I can make this dairy free by using canned coconut milk instead?
I’ve never tried it with coconut milk but I think it should be OK!
We roasted our first duck today and I decided on a whim to make these buns as an accompaniment. So easy and delightful! Would definitely make again, look forward to playing with more filling options!
Hi! Has anyone tried these with gluten free flour? If you had success what type of blend did you use?