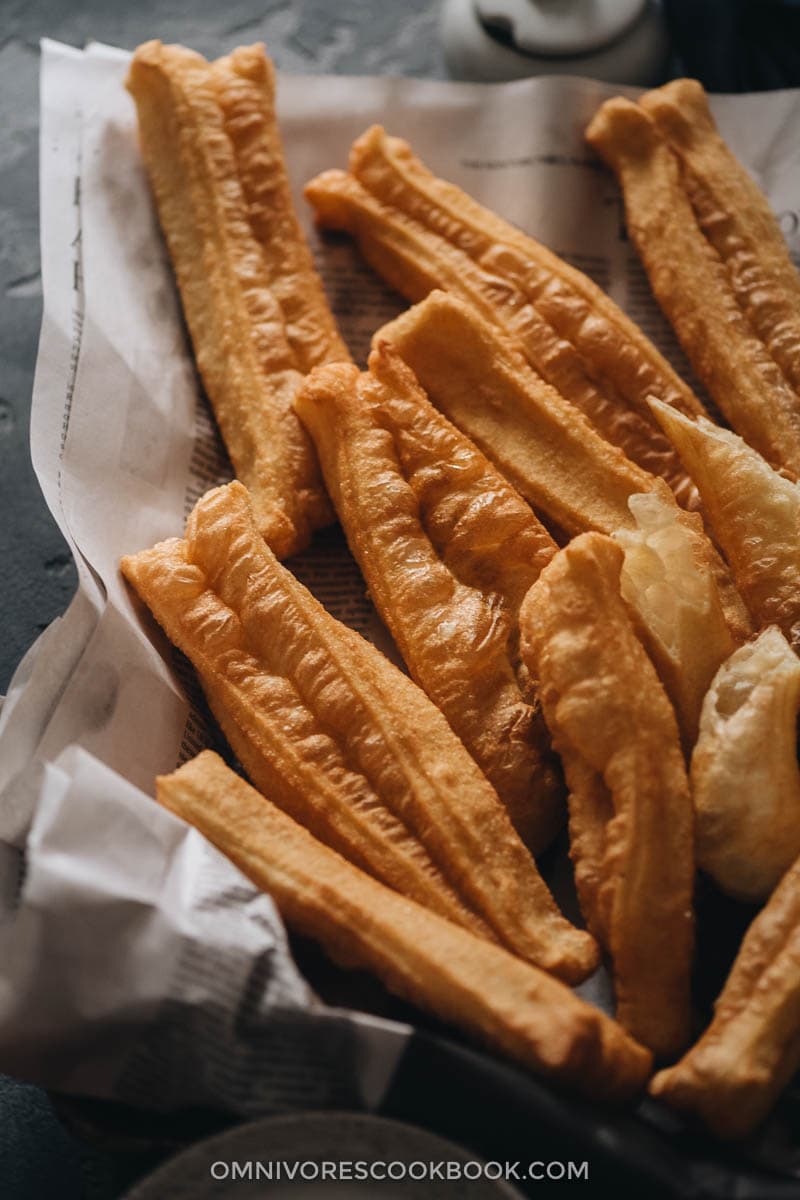
Homemade You Tiao (Chinese Donuts) are crispy on the surface, extra airy, fluffy, and tender inside. Learn how to make the classic Chinese breakfast staple with safe ingredients while achieving the best texture, just like the street vendors.
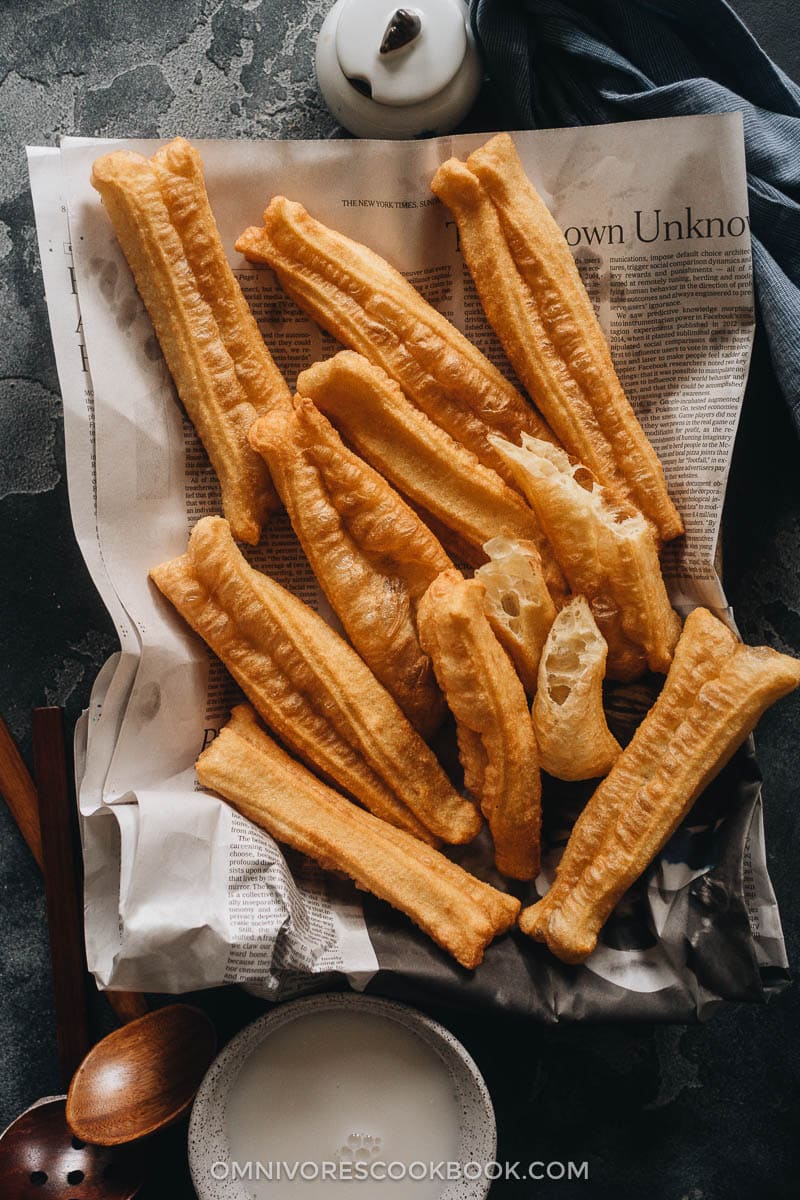
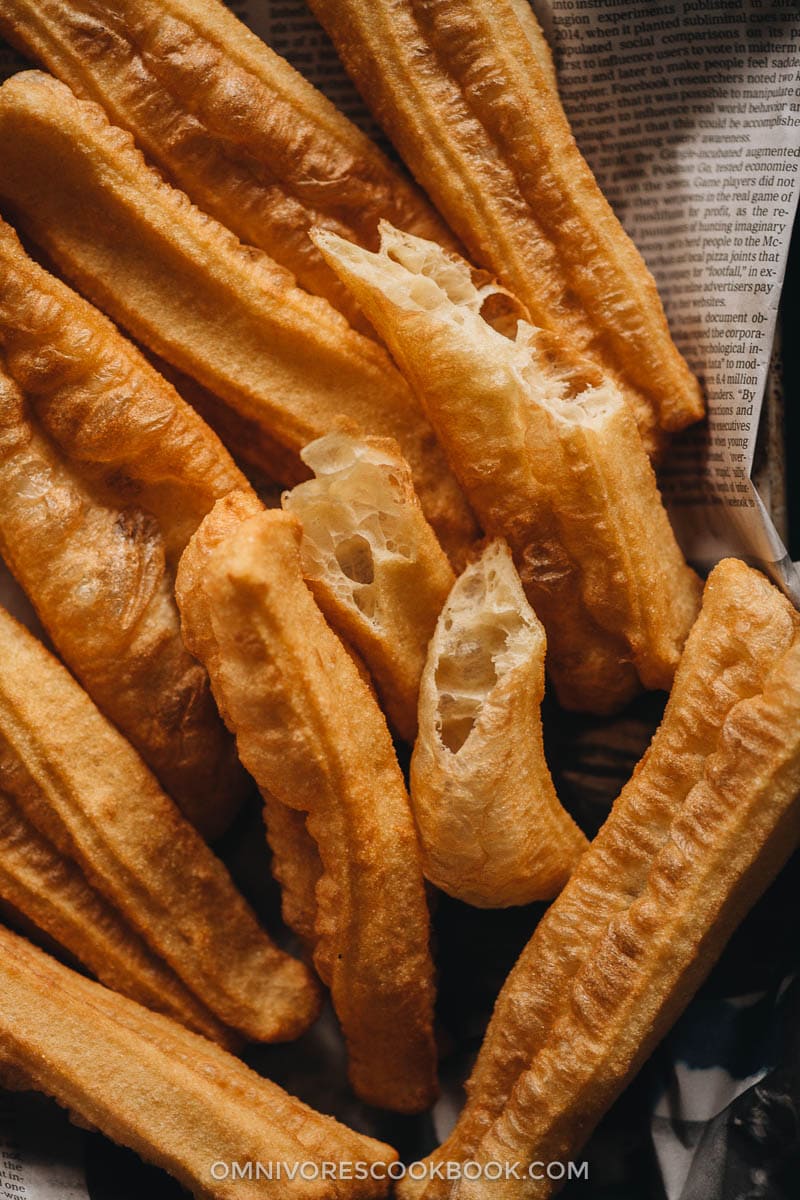
You Tiao is a savory donut that has a beautiful golden color, is lightly seasoned with salt, with a crispy crust and super airy and fluffy interior that is mostly air. It is addictively TASTY!
These savory fried donuts are usually served with soy sauce, rice congee, or douhua (dou fu nao in Northern China) to create a breakfast that is hearty and delicious. It’s something I ate all the time growing up in Beijing and is one of the things I’ve missed the most since moving to the US.
In the old days, you could easily find You Tiao everywhere, mostly sold by street vendors with a small cart by the side of the road. It was common practice for vendors to use chemicals that did not comply with food safety regulations in order to achieve the perfect texture. In recent years, most of the street food vendors have disappeared and you need to go to a breakfast place or a restaurant chain to find You Tiao. However, none of them are as fresh, crispy, and fluffy as the unsafe ones that the street vendors used to produce.
Why this recipe
We tried to develop a dough that has a golden ratio of crispy outer layers and light and airy insides, using common ingredients that you already have in your pantry. The challenge was to recreate the very light texture without using the hard chemicals that street vendors use. After many tests, we eventually did it!
- You only need four ingredients.
- The dough is very easy to handle and does not require any equipment to knead it.
- This recipe makes shorter donuts, which require less oil and are easier to make in your home kitchen.
- The result is perfectly crispy and light You Tiao just like the street vendors serve.
Definitely give this recipe a try if you’ve been missing the authentic taste of China.
Ingredients
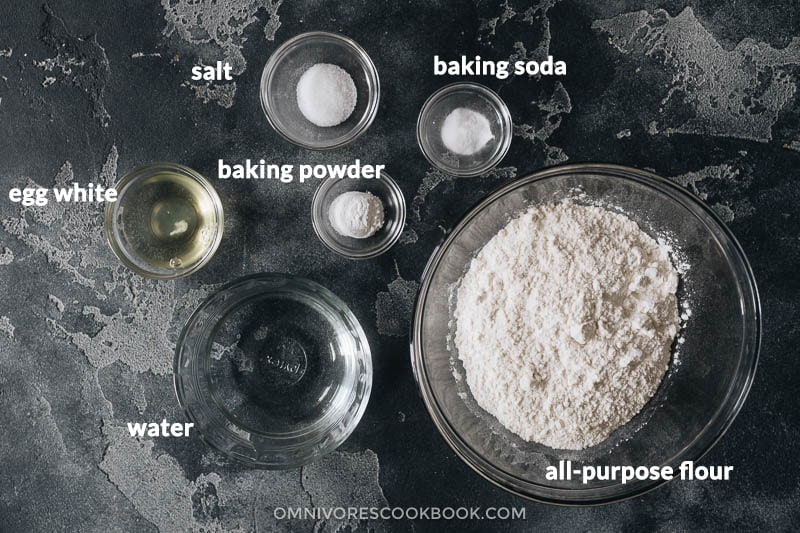
The ingredients for You Tiao are super simple. You probably already have them in your pantry.
Cooking equipment
I hate deep-frying food, but there’s no way around if you want to make the best donuts. I found the best practice is to use a smaller pot (mine is about 9” / 22 cm across and 4.5” / 12 cm tall), so you can use less oil. The dough will be easier to work with and it will cause very little splatter on your counter.
Cooking oil
I usually buy a 48 oz. (1.4 L) bottle of cheap vegetable oil and use the whole thing. Once I’m done cooking, I wait until the oil cools down completely and pour it back into the original bottle. Depending on my upcoming cooking plans, I’ll either throw away the bottle of used oil or reuse it for other fried foods.
Cooking process
There are 4 steps to making You Tiao.
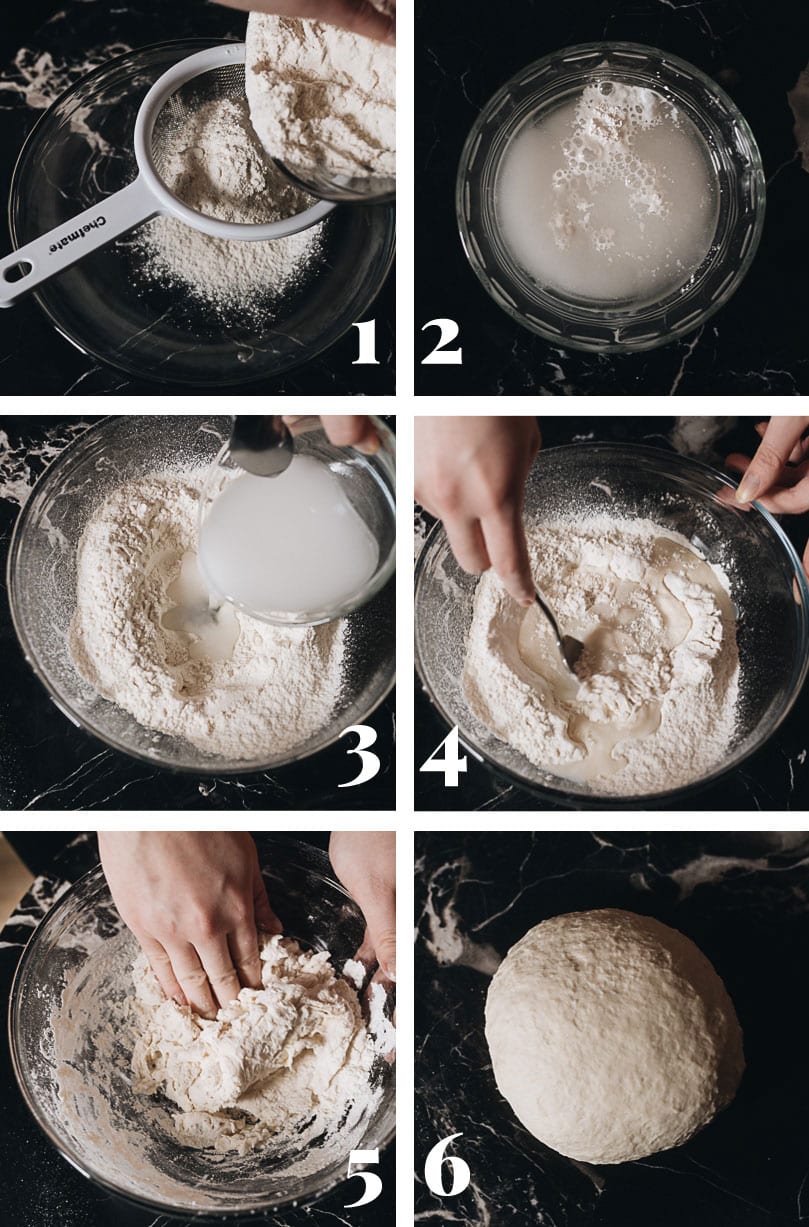
Step 1 – Prepare the dough (1st rise)
- Sift the flour
- Dissolve the baking soda and baking powder in water to activate them
- Combine the liquid and dry ingredients
- Mix until it forms a coarse dough
- Knead the dough for 5 minutes
- Rest the dough for 30 minutes
Step 2 – 2nd rise
Once the dough is rested, knead it a couple of times. You’ll notice the dough is much smoother now. Cover the dough again and rest it for the 2nd time.
NOTE: The 2nd rise is crucial for the final texture. We found that the dough that rests overnight in the fridge has the best taste and texture. But if you’re short on time, you can rest the dough at room temperature for 2 hours.
Step 3 – Shape the You Tiao
- Divide the dough in half and roll it into a long strip.
- You can use both hands to gently stretch the dough to help to shape it.
- Cut the dough into small rectangles
- Press half of the rectangles with a skewer (or the back of your knife)
- Place the unpressed rectangles onto the pressed ones
- Press the dough again.
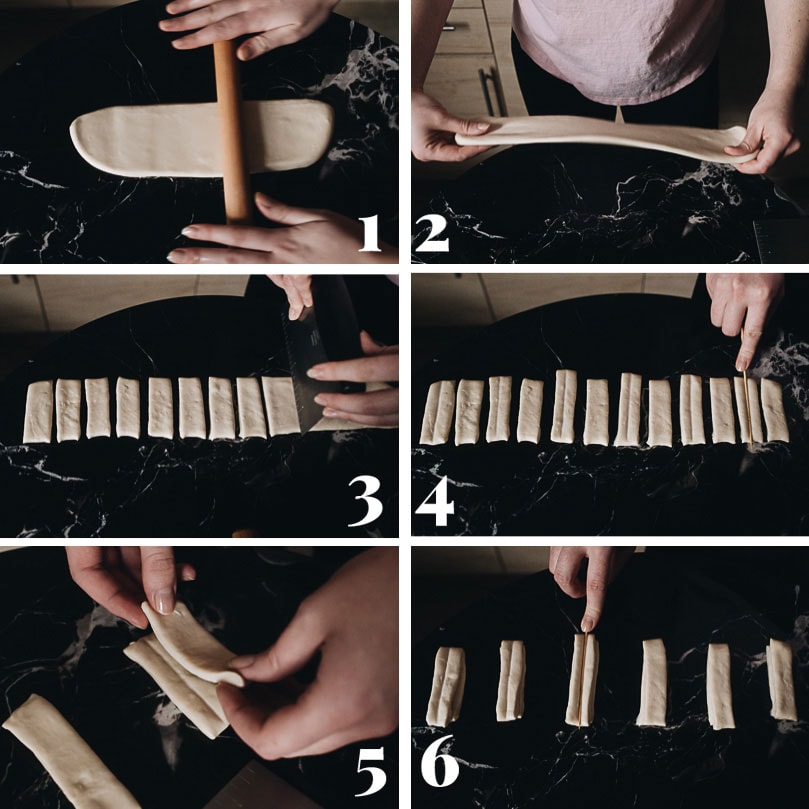
NOTE: You want to make the two rectangular dough pieces attach together when frying, but easily be torn apart once cooked. So you should press them together, but not too hard.
Step 4 – 3rd rise & cook
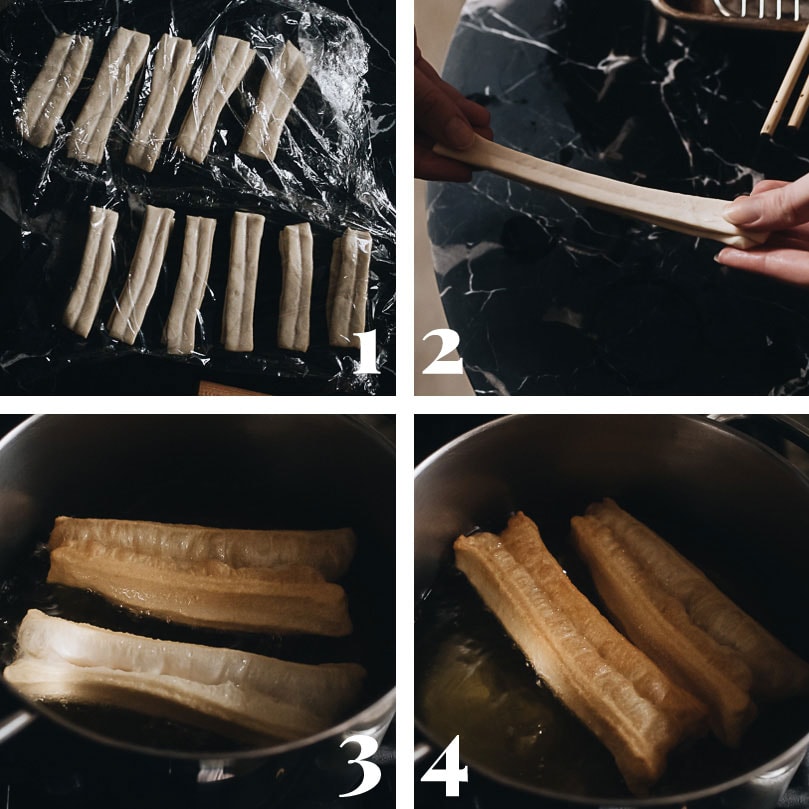
- Rest the shaped You Tiao again while heating the oil
- Stretch the dough pieces into long strips
- Fry the dough strips, 2 to 3 at a time
- The doughnuts are done once they are golden brown on both sides
Now you can enjoy these savory donuts with soy sauce or any breakfast beverage you like!
Storage
You Tiao taste best when served fresh. But you can store them and reheat them later. I’ve tried storing them at room temperature, in the fridge, and in the freezer. They all worked, but I think that frozen You Tiao have the best texture when reheated.
To get the fried dough crispy again, you should heat it up at 400 °F (200 °C) in the oven or use an air fryer. You can even overcook it a bit so the surface will be very crispy (in this case, the inside may become a bit chewy).
Afterthought
I admit that you’ll need to spend some time and effort to make this Chinese breakfast classic. But the result is so rewarding! The donuts will turn out crispy, fluffy, and airy. It tastes SO GOOD that it’s hard not to overeat. Traditionally it’s a breakfast item. But I can eat it any time of day, when I’m craving a salty snack.
I hope you enjoy it as much as I do!
Other delicious Chinese breakfast recipes
- 5-Ingredient Savory Oatmeal (Chinese-Style)
- Soft Cinnamon Rolls with Sesame
- Scallion Biscuits & Char Siu Gravy
- Easy Egg Foo Young
- Coconut Waffles (Gluten-Free, Vegan)
If you give this recipe a try, let us know! Leave a comment, rate it (once you’ve tried it), and take a picture and tag it @omnivorescookbook on Instagram! I’d love to see what you come up with.

You Tiao (Chinese Donuts) 油条
Ingredients
- 200 g (1 and 1/2 cup) all-purpose flour
- 115 g (1/2 cup) water , cool to room temperature
- 4 g (1 teaspoon) baking powder
- 2 g (1/2 teaspoon) baking soda
- 6 g (1 and 1/4 teaspoon) salt
- 1 egg white
- Vegetable oil for deep-frying
Instructions
Prepare the dough
- Prepare a large bowl with a mesh strainer on top. Sift the flour into the bowl.
- Combine the water, baking powder, and baking soda in a small bowl. Stir to mix well.
- Add the water mixture, egg white and salt into the flour. Stir with a fork until a coarse dough forms.
- Knead the dough for 5 minutes. Cover the dough with plastic wrap and let it rest for 30 minutes.
2nd Rise
- On a clean working surface, knead the dough the second time for another 2 minutes. Cover it with plastic again and let it rest for at least 2 hours or overnight in the fridge (*See Footnote 1).
Make donuts (see the blog post above for step pictures)
- While heating the oil, prepare the donut dough: Divide the dough into two even pieces. Work on them one at a time.
- On a lightly oiled surface, roll the dough into a long strip. You can use your hands to hold both ends of the dough and stretch it gently so it’s easier to form a long shape. Once the dough is 4” (10 cm) wide and 1/4” (0.5 cm) thick, cut off both ends so it forms a rectangle.
- Cut across the rectangular sheet, making 1” (2.5 cm) width 4” (10 cm) rectangles.
- Dip a skewer or the back of a knife into water. Press it into the center of half of the rectangles. Place the unpressed strips on top of the the pressed strips and press into the center again, so the two pieces of dough are attached to each other. (*Footnote 2)
- Once the donuts are formed, let them rest for another 10 minutes.
Fry the donuts
- Heat a tall medium-sized pot with 3” (7 cm) of oil over medium heat until it reaches 375 °F (190 °C).
- Line a cooling rack on top of a baking sheet.
- Work on the donuts one at a time. Use your fingers to pinch the two ends, and gently stretch it into a thin long strip that is about 8” (20 cm) long. Then gently lower it into the oil. You can cook 2 to 3 donuts at a time, depending on the size of your pot.
- Cook each side for 2 minutes or so, until it turns golden color for a soft crispy texture, or a golden brown color for a crispier texture.
- Use a pair of tongs to remove the donuts from the oil, gently shake off the excess oil, then transfer them onto the cooling rack.
- Enjoy the donuts while they’re hot or warm.
Store
- To store the leftover donuts, wait until they cool down completely, then transfer them into a ziplock bag. Store them in the fridge for 2 to 3 days or in the freezer for up to a month.
- To reheat the donuts, preheat the oven to 400 °F (200 °C). Place the donuts on a baking tray and bake until heated through, 5 minutes for refrigerated or 8 minutes for frozen donuts.
Notes
- We found that the flavor and the texture of the donuts will be slightly better if the dough rests in the fridge overnight. However, 2 hours’ resting works well enough.
- The goal is to attach the two pieces of dough to fry them together. But the dough shouldn’t be pressed too much, because you also want to be able to easily separate them after frying.
Nutrition
Lilja Walter is a part of the Omnivore’s Cookbook team and worked with Maggie closely to develop and test this recipe.





Dear Maggie, I love all your recipes and enjoy many of them
Concerning deepfrying oil in your doughnut recipes, what I do,is once the oil is cool,I use a paint Filter to strain it in a glass jar
that I keep in the refrigerator and that way, I can use it several times to deepfry other delicaticies
LOVE YOUR RECIPES
Hi Maggie, would I use a stand mixer to make the dough? Thanks.
Hi Becca, you can use a stand mixer. I didn’t because the dough is super easy to put together and it doesn’t require a lot of kneading. Happy cooking!
Hi Maggie, I am Amy and trying to do Yao Tiao. Is there any difference if we use 1 egg instead of 1 egg white. Please explain.
Hi Amy, it will slightly change the texture. We tested different dough and the one using egg white is more fluffy crispy, the texture we like the most.
Hi Maggie, your recipe was great. I just wanted to let you know that reheating oil can be carcinogenic and so to be on the safe side, I always get rid of my oil after cooking instead of keeping it to use again. I know it can be very wasteful, but it’s better to be safe than sorry 🙂 here are some links about it if you would like extra information:
https://consumer.healthday.com/vitamins-and-nutrition-information-27/food-and-nutrition-news-316/reheating-vegetable-oil-releases-toxin-study-525569.html
and
https://www.sciencedaily.com/releases/2012/02/120222093508.htm
Thanks for your recipe!
i couldn’t find any baking powder in the supermarket nearby and was wondering if substitutes would work for this recipe. what substitutes can i use to make up for not using baking powder?
Hi Alex, I think you might able to use baking soda with certain amount of vinegar (the vinegar will neutralize the alkaline), but the vinegar might mess up the dough texture, so you need to slightly increase the wheat flour amount. I’m afraid I cannot provide a more clear answer without testing the recipe.
Hello Maggi, your site looks delicious. Have pinned a few recipes to try out this weekend, I do have 1 comment and 1 question. The 1-1/4 tsp of salt on the ingredients list is not mention in your dough prepping . Question…can I combine H2O ,B/P, B/S, salt n egg white together…or do I need to separately mix them in the flour?
Thanks for noticing it! I just added the salt to the instructions. Re your question, the water helps activate the baking soda and baking powder so I wouldn’t mix it with the salt and eggs.
These turned out great, thank you, Maggie! It did take time but largely unattended. I didn’t see any significant “rise” in either of the two resting stages, but they did indeed puff up nicely when fried. Another great recipe, will share and make this again.
Stunning recipe! I tried to do it but I failed with that dough. I think quantities in grams are incorrect compared to “cups”. For example (6 units): 1,5 cup of flour and 0,5 (aprox) cup of water (so, x3 times) is not 100 gr of flour and 56 of water (less than x2)
Hi, I tried this recipe 2x and both yielded very wet and sticky dough which I needed to add so much extra flour to make it pilable. Is it meant to be wet and sticky? Or what went wrong? I tried second thinking perhaps I made a mistake first time round but I got the same sticky and wet dough. Nevertheless, with the additional flour, I still managed to make yummy chewy youtiao.
Yeah the dough is left quite wet intentionally so the you tiao texture will be fluffier after frying. That being said, the dough might be borderline too wet depending on the brand of flour you use. Glad to hear it still worked with the extra flour.
Hi Maggie, how long can it rest in the fridge for? I made some dough yesterday, and it’s been in the fridge but I don’t have time to make it today. Is it alright to leave it in the fridge and make them tommorow?
I’ve never tried refrigerate this one for two days but I think it should work.
i didnt try it yet, but can i make this in the air fryer?
I’m afraid this one won’t work in the air fryer.
I followed the recipe gram by gram put 6g of salt without questioning it and I ended up eating fried salt bread for dinner