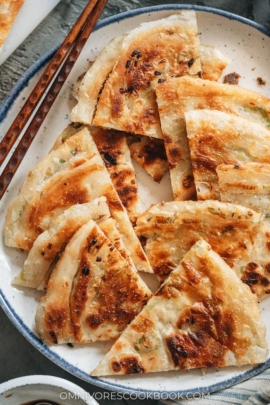
The Chinese meat pie is a classic northern Chinese savory pastry. It has a juicy beef filling with onion, carrot and aromatics in a crispy crust. It’s like a giant dumpling! It’s perfect for meal-prep to make ahead and serve later, so you can enjoy this dim sum delicacy at any time of day.
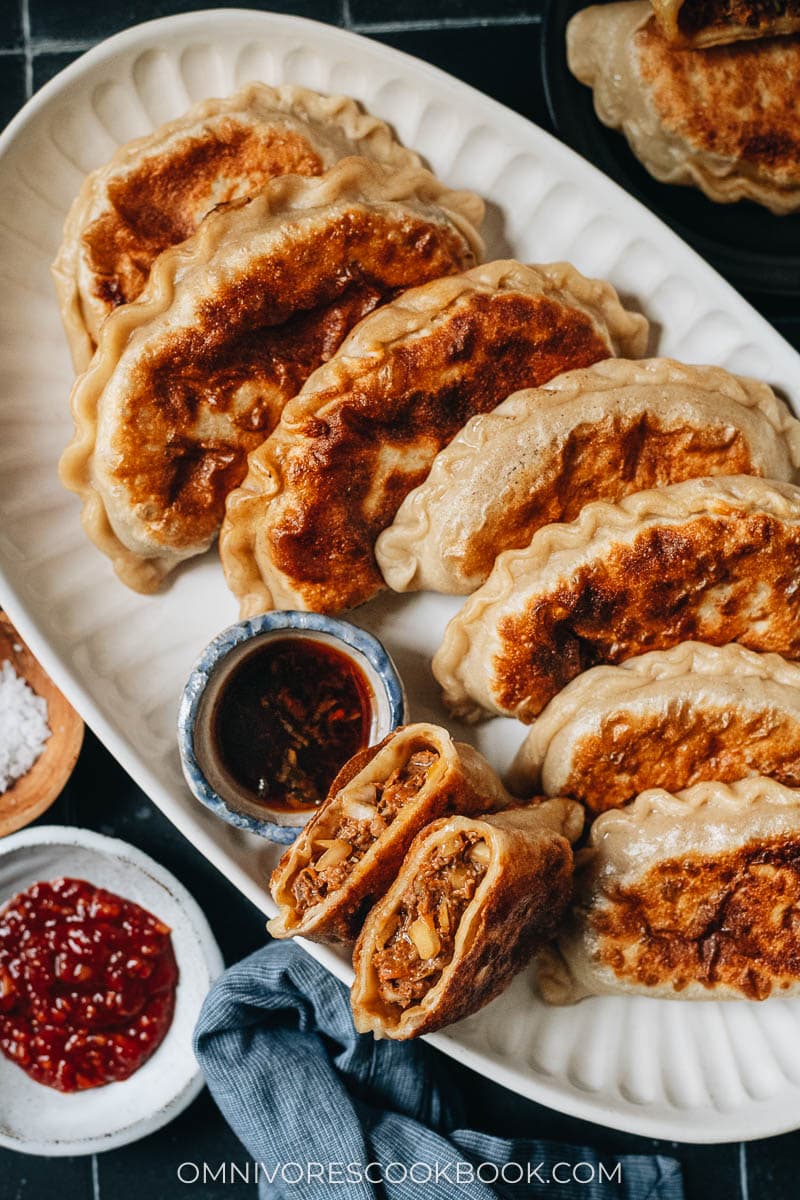
Chinese meat pie (馅饼, Xian Bing), sometimes called meat pocket or big dumpling, is a very popular and tasty comfort food in the northern part of China. The idea is similar to that of the potsticker, but you use a larger piece of dough to wrap in more filling. It has a super crispy crust and a juicy filling, like a giant dumpling.
While Xian Bing is a cheap street food in China, you can easily find it in restaurants, too. It’s typically listed with the staple foods, which include dumplings and rice. I was quite surprised that dumplings have become so popular outside of China, but not Xian Bing. To a Chinese northerner, Xian Bing is as great as dumplings, and much more common than potstickers. Especially when cooking at home, Xian Bing is slightly easier to make because you only need to make a couple of them to feed a family, with leftovers, too.
I like Xian Bing most of all, because it has a layered crispy surface, like pastry dough, with a meaty filling that is more substantial than in potstickers.
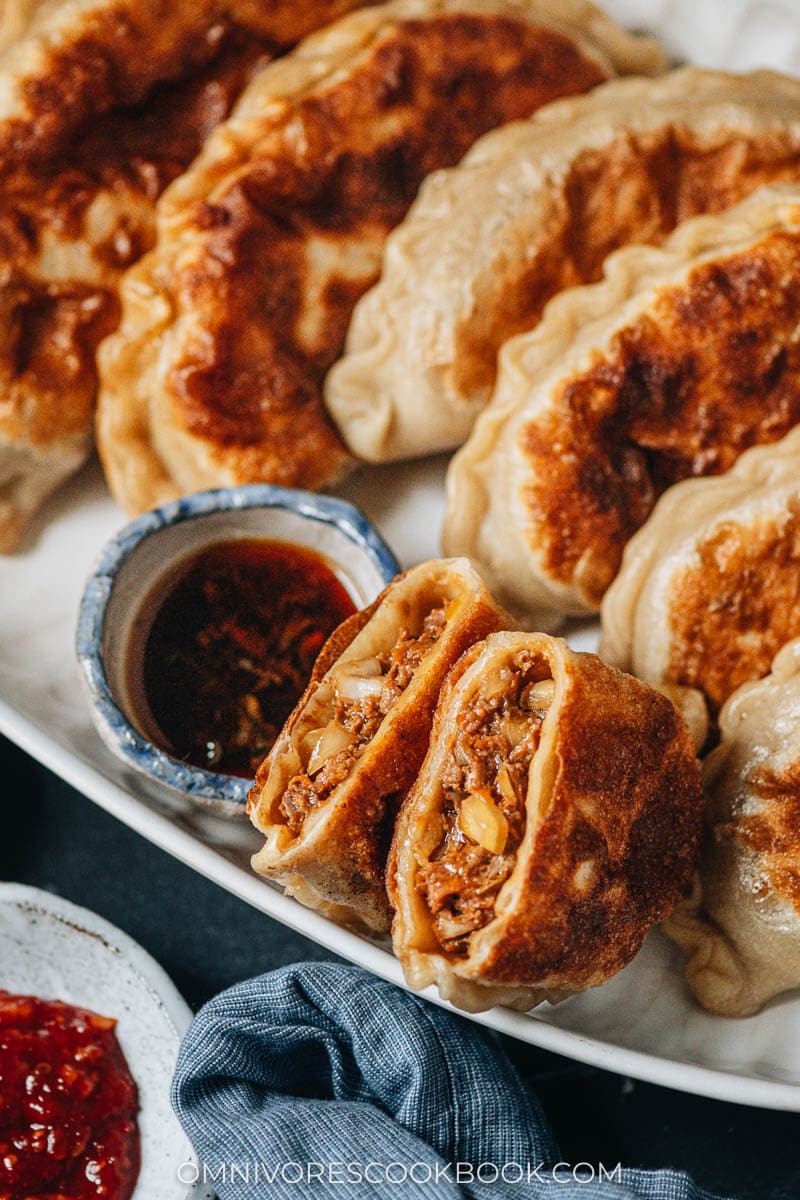
Xiang Bing Filling
There are countless ways to make a great Xiang Bing Filling, but some of the most popular ones are beef, pork, and chive and egg. To make the beef filling:
- Mix the ground beef with aromatics and spices.
- Since ground beef is usually quite dry in texture, I prefer to add 2 tablespoons of water to mix into the meat, to create a juicier result.
- Add the vegetables and mix again. I would do this if I plan to wrap the Xiang Bing as soon as the dough is ready. If you plan to use the filling later in the day or the next day, store the vegetables and the meat separately in the refrigerator.
- Add the salt and sesame oil. Mix again. Salt is usually added at the end, because it extracts water from the veggies if added too early. The final ingredient is sesame oil and it wraps around the ingredients to seal the moisture in.
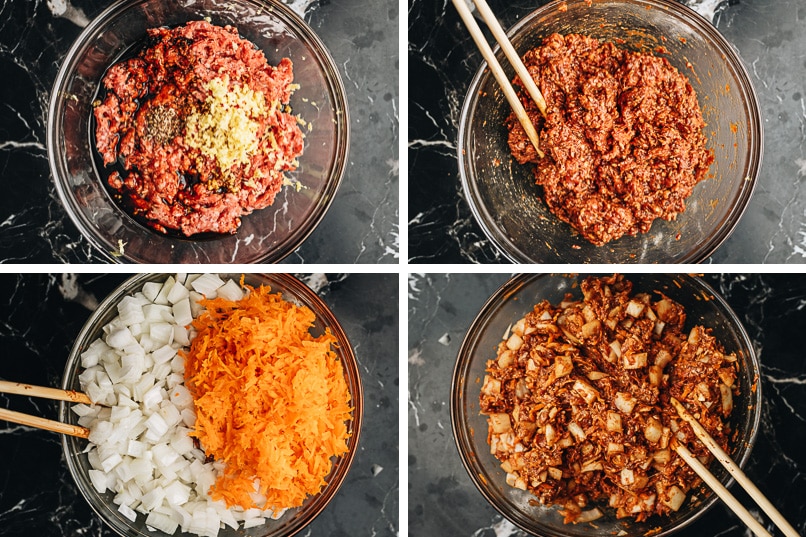
To make the juiciest Xiang Bing, make sure you use a ground beef that’s slightly fattier, and not the super lean type.
Xiang Bing Dough
The crucial part of making a tasty meat pie is the dough. Unlike potstickers and dumplings, it uses a layered oily dough to create a super crispy surface that also holds up the filling. The process is a bit similar to making scallion pancakes.
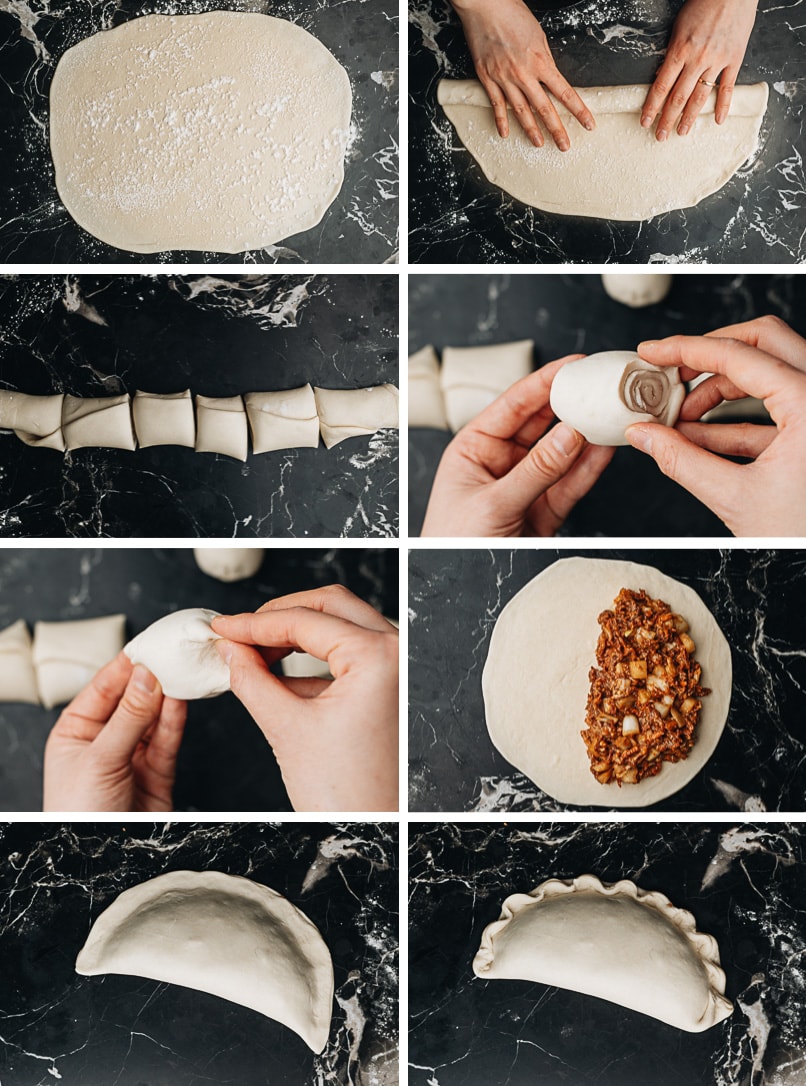
- Roll the dough into a large thin sheet, brush it with oil and sprinkle with flour
- Roll up the dough into a long stick
- Cut the dough into 6 pieces, so each of them looks like a cinnamon roll
- Use your hands to smooth the dough to cover the cut-sides
- Pinch the dough together to seal the oil inside
- Roll out the dough into a large round wrapper and place the meat filling on one side
- Cover the meat filling with the other side of the dough and press the dough edges together
- Use your fingers to crimp the dough to create a wavy look (see my video below for the process)
The process might look a bit daunting, but trust me, it is actually very easy and straightforward once you try it out. I personally like to serve meat pies instead of dumplings. They are larger in size, which means you will roll less dough and wrap fewer times than you would if you were making dumplings.
There are several ways to fold a meat pie. The recipe below uses the simplest, no-fail way, which will result in a pie with an even thin, crispy crust and lots of filling. The wrapping process is like making a quesadilla, but you take it one step further and press the edges of the dough together to seal the pie.
Cooking xian bing
The cooking method is similar to that used for potstickers, too – using a soft piece of dough to wrap raw filling and grilling it in a frying pan.
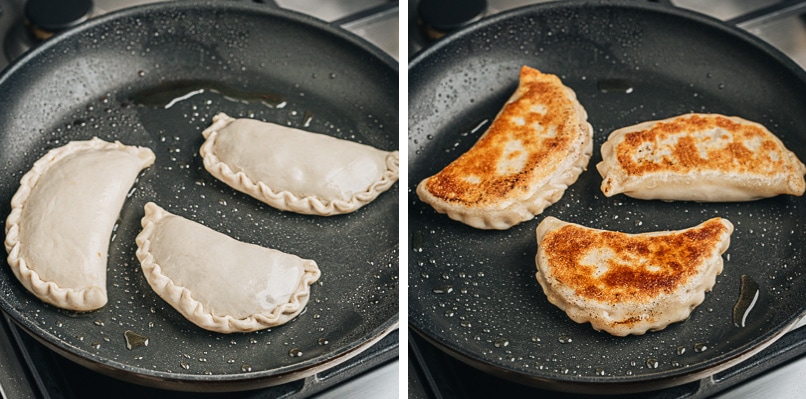
The key is to use a hot pan with low heat, so the surface will crisp nicely while cooking through the filling, without burning the dough.
How to serve Xian Bing
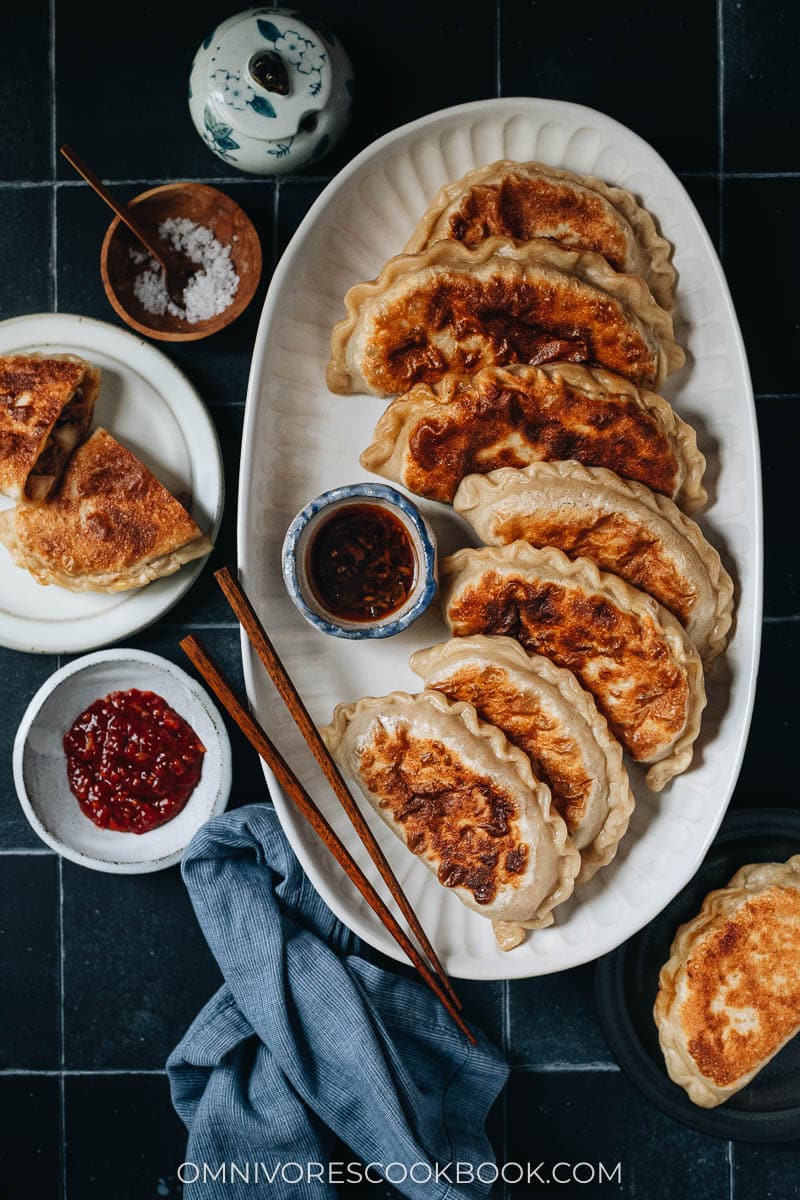
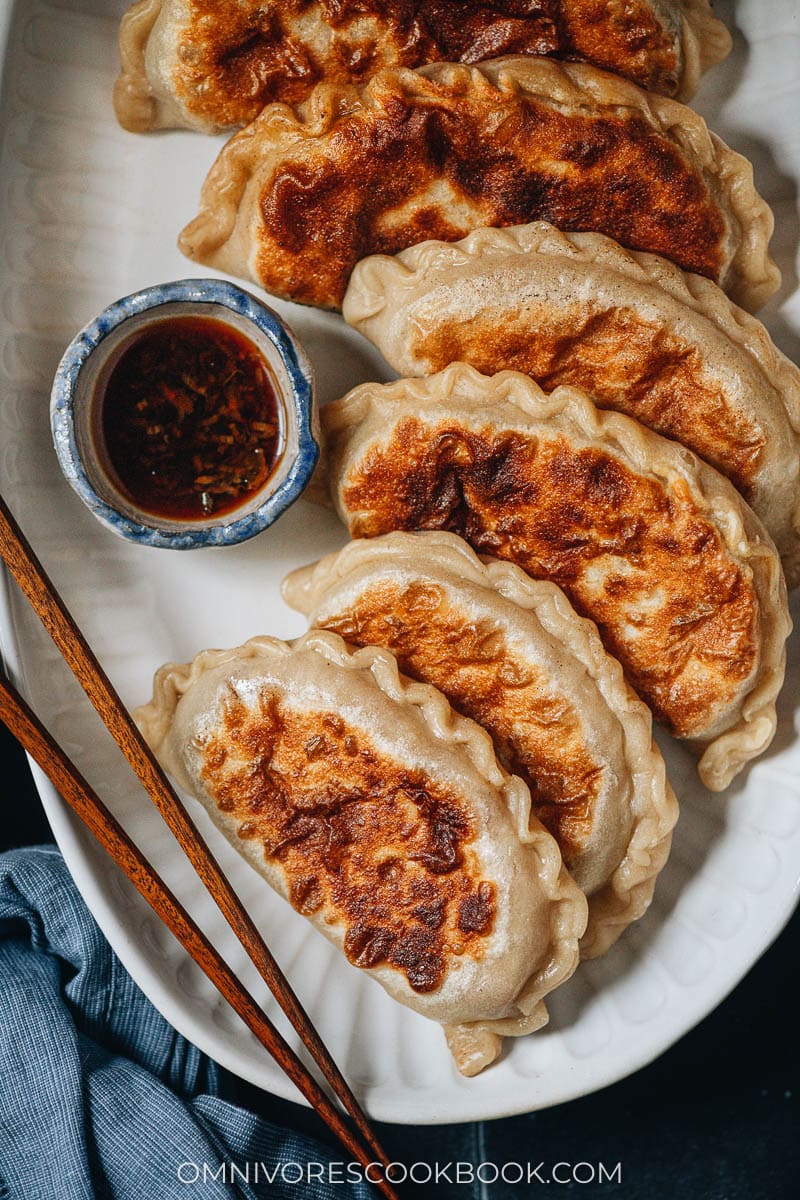
Xiang Bing is best served hot, when they’ve just come off the stove. Luckily, they hold up well (thanks to the layered dough) and will stay very crispy after reheating. The filling is well seasoned and can be served by itself. However I do like to serve it with some Chinkiang vinegar or a gingery dipping sauce (see the ginger soy sauce from this recipe). You can also use chili oil or a bit of hot sauce to spice it up.
In China, Xiang Bing is a staple that we eat at any time of day. In the morning, we might grab one from a breakfast vendor on the way to work. My mom likes to serve it with millet congee and cucumber salad for a full dinner. You can easily heat up one for lunch or a snack.
If you like Chinese dumplings, I recommend you try making Xian Bing once. You will definitely love it!
Dishes that go well with Xian Bing
- Plain Congee
- Millet Congee
- Tiger Salad (老虎菜)
- Cucumber Salad
- 4-Ingredient Baby Bok Choy Stir Fry
- Chinese Egg Drop Soup
- Chinese Pickled Cabbage (A Quick Pickle Recipe)

Chinese Beef Meat Pie (Xian Bing, 牛肉馅饼)
Ingredients
Dough
- 450 g (3 cups) all-purpose flour , plus extra to coat hands
- Pinch of salt
- 3/4 cup (180 ml) hot water
- 1/2 cup (120 ml) cold water
Filling
- 12 oz (350 g) ground raw beef (lean fat ratio 8:2)
- 1 tablespoon minced ginger
- 1 tablespoon Shaoxing wine (or dry sherry)
- 1 tablespoon light soy sauce
- 2 teaspoons dark soy sauce
- 1/4 teaspoon freshly ground Sichuan peppercorn (or black pepper)
- 1 (400 g / 14 oz.) onion , minced
- 1 (120 g / 4 oz) large carrot , grated
- 1 teaspoon sugar
- 1 1/4 teaspoon salt
- 1 tablespoon toasted sesame oil
Assemble & Cooking
- 1 tablespoon vegetable oil plus extra for cooking
Instructions
- Combine flour and a pinch of salt in a big bowl (or the bowl of a mixer if using) and stir to mix well. Slowly pour hot water onto the dried flour and use a pair of chopsticks to stir until the water is fully incorporated. Then slowly add the cold water onto the dry flour, and keep mixing, until the water is fully incorporated and it forms small dough pieces with no or little dry flour left.
- (Option 1) Using a mixer: Attach the dough hook and turn to medium speed (speed 4). Mix until a smooth and spring dough has formed, 8 minutes.
- (Option 2) Knead the dough by hand: Use your hand to gather and press the dough flakes together to form a dough. If there is too much dry flour in the bowl and it is difficult to blend into the dough, add a bit more water to the dry flour, 1 teaspoon at a time. Knead until there is no dry flour left. The dough should feel soft but you should be able to easily pick it up without it sticking to your hands and the bowl too much. If the dough is too soft, you can sprinkle it with more flour. Transfer the dough onto a clean working surface and keep kneading, until the dough turns smooth and springy, 10 to 15 minutes.
- Transfer the dough to a medium-sized bowl. Seal the bowl with plastic wrap. Let rest for at least 1 hour, or up to 3 hours. The longer you rest the dough, the easier it will be to work with later. If you plan to store the dough overnight, store the covered bowl in the refrigerator.
To make the filling
- Prepare the filling while resting the dough. Combine ground beef, minced ginger, Shaoxing wine, light soy sauce, dark soy sauce, and ground Sichuan peppercorn (or black pepper) in a big bowl. Mix well until the liquid ingredients are fully absorbed and the meat has turned into a sticky paste. If the paste feels very dry and is hard to mix, add 2 tablespoons of water and mix again until the water is fully incorporated. (*Footnote 1)
- Prepare and cut the vegetables, but do not add them to the ground beef yet.
- Right before assembling the pies, add the onion, carrot, salt and sugar to the beef filling. Mix well. Add sesame oil and mix again. (*Footnote 2)
To assemble the pies
- Add 1 tablespoon of oil into a small bowl. Prepare a small brush. And some extra flour on the side.
- Transfer the dough onto a clean working surface. The dough should now have turned a bit softer and smoother.
- Divide the dough into two equal pieces and put one piece back in the bowl and cover it with plastic wrap. Roll the other half into a ball. Press it slightly so it’s easier to roll out. Use a rolling pin to roll it into a thin round disc, about 1/8” (3 mm) thick, 12” (30 cm) long and 10” (25 cm) wide.
- Brush a very thin layer of oil on top. Sprinkle about 1/2 tablespoon of flour evenly over the dough and brush it again until evenly spread. Roll the round dough sheet from the bottom into a long stick. Cut the stick into 6 equal pieces.
- Work on the meat pies one at a time. Cover the rest of the dough with plastic wrap.
- Pinch the two ends of each piece of the roll to seal the oil inside. Place the dough on the working surface, with the two pinched ends pointing on the sides. Press the dough gently and form it into a round shape. Roll the dough until it forms a thin round disc, about 1/8” (3 mm) thick and 7” (18 cm) in diameter. This step helps to create a layered crust.
- Scoop 2 to 3 tablespoons of beef filling and place it on one side of the disc, in a half-moon shape.
- Fold the empty half over and press the edges together by hand. Turn the edge upward and press it again to further seal the pie.
- Set the pie aside on a large tray or plate, brush a thin layer of oil on top, cover with plastic wrap, and work on the rest of the dough in the same manner.
To cook the pies
- Heat a large nonstick skillet with 2 tablespoons of oil over medium heat until hot, but not smoking hot. Transfer meat pies to the skillet without overlapping and press down with a spatula gently, to flatten the bottom for maximum crispy crust. Cover the skillet and cook over low heat until the bottom side turns golden brown, 3 minutes or so. Uncover and check the meat pie after 2 minutes, to make sure it’s not browning too fast. Once browned, flip with a spatula and cook the other side. Cover and cook until the bottom side turns golden brown, 3 minutes. Then you can flip the meat pie again if you wish to brown any sides a bit longer. Cook without cover for another minute or so until both sides are golden brown. Transfer the meat pies to a larger plate. Cook the remainder of the meat pies the same way.
- Serve hot with Chinese black vinegar. If the meat pie is not salty enough, blend 1 teaspoon light soy sauce with 1 tablespoon black vinegar as a dipping sauce.
To store the meat pie
- Place meat pie in an airtight container. Store in the fridge for up to 3 days or in the freezer for 3 months.
- To reheat the meat pie. Heat oil in a skillet over medium heat until warm. Add meat pies and turn to low heat. When the skillet is hot, add 2 to 3 tablespoons of water and cover immediately. Flip once during the cooking. Cook until both sides are crispy and the inside is hot, 3 to 4 minutes. You can cook the frozen meat pies the same way, but you will need another 8 minutes to cook through the inside. You can also heat up the frozen cooked meat pies in a preheated oven, around 350°F (176°C) until crispy and warmed through, 15 minutes or so.
Notes
- The meat filling will feel dry if you use very lean ground beef. Adding water to the filling will help yield a juicier result.
- If you add the vegetables and salt too early, the salt will extract liquid from the meat and the vegetables. The filling will end up watery and hard to work with when you assemble the pies.
Video
Nutrition
The post was published Oct. 1, 2015 and was updated Apr. 26, 2022 with new pictures and video.




Great recipe, my dinner tomorrow for sure. I have just one question, maybe I missed sth in the recipe. Do you use raw gound beef in the filling or is it precooked?
Hi Ariana, I’m glad you like the recipe! 🙂
I used raw grounded beef in the recipe. Be sure you have the lid on and use low heat when cooking the meat pie in stove top skillet. This way, the raw fillings will be done just when the crust turns crispy. If you have some fillings leftover, just saute them directly and use as a snack. 🙂
How much oil do you use?
Hi Julie, I used about 2 tablespoons oil for every 2 pies to cook at one time. It’s similar to grill fish, you just need to slightly cover the bottom of skillet to keep the dough crispy. I suggest you to use a non-sticky skillet, otherwise, you might need to pour more oil (1 to 2 tablespoons, depends on how much oil is left) after one side of the meat pie is done, to keep the other side from sticky to the skillet.
These look so delicious, my mouth is watering! Love the photography, beautiful light!
oh my gawd Maggie! I love how big these Chinese beef meat pies are!!! delicious!!!!
These are like Chinese Cornish pasties 🙂 I love this recipe so much – my husband will be very happy – he’s Cornish 🙂
Oh my gosh, I totally want to eat a dozen of these. Before I even read your text saying “it’s like a big potsticker” or whatever, I was thinking, it looks like a giant potsticker! Only better! Thank you for sharing this incredibly wonderful recipe.
Maggie you are my hero. I had a lovely Vietnamese family as friends when I was a child. Dohnu (sp!) used to make these for me all the time. They were amazing. I have looked for a recipe, or what they were for 20 years, I found you. Thank you for giving that memory back to me so I can share it. Wonderful!!
You just made my day Robyn 🙂 I’m so glad to hear you like the recipe. I don’t know why these are not as popular as dumplings outside Asia. They’re super delicious, aren’t they?
Happy cooking and let me know how the dish turns out! Have a wonderful weekend.
I just made these tonight and they turned out fabulous – even on my first try! I look forward to trying more of your recipes. 🙂
I’m so glad to hear the dish turns out well Leandra! Hope you have a wonderful weekends. And looking forward to hearing how the cooking goes if you tried out other recipes 🙂
Black Vinegar?????
I was meant to say Chinkiang vinegar. I picked up the wording black vinegar somewhere and kept using it. Sorry about the confusion.
Made this last week. Rolling the dough is a bit of work but it’s all worth it. Will definitely make this again great for snacks to go or even breakfast!!! (made some, ate some, shared some and freeze some!!!
Sounds lovely! Yeah, it’s quite a bit work, so we only make this on the weekend. We always make a big batch, because they freeze very well. Serving the meat pies for breakfast? That is real Chinese style! 🙂
Hi Maggie,
Please could you advise. My mum is allergic to nuts, what can I use to substitute peanut oil, besides plain vegetable oil?
Thank you
Hi Bernadine, I would use sesame oil if you’re making the filling, and any plain oil for cooking these pies. I usually use grapeseed oil, but plain vegetable oil will work just as well.
Happy cooking!
this looks absolutely delicious with a unique dough (at least to me) that is wonderfully different than anything I’ve ever cooked with before, love how this is similar to empanadas, calzones, even Englush meat pie and even a burrito in concept, but then of course much different in ingredients, etc. unique to northern China, thank you for this!
Hi Sabrina, I believe the meat pie is quite similar to empanadas, but you’re right, the layered dough is quite different than those dishes you listed. Also, when you pan fry the meat pie, it creates a very crispy surface, which is a bit different than oven roasted crispy or fried crispy. This dish is quite a staple in northern China, so I’m surprised why it’s not very famous outside of China!
Wow – I had no idea there was such a thing as a Chinese meat pie! These very much remind me of British Cornish pasties! I’m sure these have a very different flavor, but they really do sound delicious!
Actually it’s quite a famous thing in China, as popular as empanadas in Mexico. It’s like a giant pot sticker, but with a different dough texture. I’m still wondering why this is not as famous as dumplings!
How big do you roll out the dough for one beef pie? Centimeters or inches is fine.
I have never heard of these here in a japan. They look wonderful.
I love the way the flaky crust is made.
Hi Pamela, I remember I roll out the dough about 5 inch-ish in diameter. You want to roll them out as thin as possible, so the pie has a crispy texture. But you won’t want to roll them out too thin to crush the layers. The thickness of the dough is between 1/16 inch and 1/8 inch.
It is a traditional northern Chinese staple that I’ve been eating growing up 🙂 My grandma could make a super thin crust that is crispy and flaky. Mine is not as perfect as hers.
Happy cooking and I hope you enjoy these meat pies!
I would love to try these with mushrooms in the beef too. The idea that you use salt with the oil between the layers must make the crispy dough so flavorful. That is a fabulous idea actually!!
I have not tried your recipe YET, but I can’t leave Shandong province without having a pork pie every year. They are excellent and I finally mastered eating them with chopsticks. Thanks for the recipe!
A friend and I had something similar in a little restaurant in one of the hutongs in Beijing, but it was called a door nail. We split them apart and drizzled spiced soy sauce in the middle. They were delicious – is this the same type of dough? I would love to try to recreate those flavors. Thanks so much!
Yep, they use the same type of dough. The door nail meat pie is smaller in diameter and has a much thicker filling, but the idea is the same.
Happy cooking and can’t wait to see the meat pies you cook 🙂
Hi,
I made these and they are delicious. But when I reheat with your instructions of the skillet with oil and water, they turn out soggy. Is there another way to reheat?
Hi Helen, if the meat pie turns out soggy after reheating, I suspect you added too much water. If you will try it again, cook the pies a bit longer if there is still some water in the pan after you remove the lid. Alternatively you can also heat them up in a 350F oven until it’s heated through, 10 to 15 minutes.
I’m glad to hear you enjoy the dish 🙂
Do you have any suggestions as to how to reheat with a stainless steel skillet? I’m trying to stay away from non-stick for health purposes.
I made this tonight. Had my son and my husband assisting as well! So delicious and just as you said, substantial. I am happy to have recently discovered these. Thanks!
Do you think I could use store bought dough as a substitute?
Hi Jane, I’m not sure what type of dough you’re looking at purchasing. This is a layered unleavened dough that is less complicated than a pastry dough. I think a pastry dough would definitely work. If using a unleavened dough that’s not layered, you will get a result this recipe but it should still taste delicious (https://omnivorescookbook.com/chinese-chive-pockets/).
Hey!! These look great and I want to make them except I don’t eat beef. Can I swap it for lamb mince? Also can we freeze them uncooked? Thanks!
Yes, the lamb filling will work really well here! You can freeze the uncooked. You can cook them the same method (no thawing needed), but need the heat a bit lower and cooking time a bit longer to cook them through while frozen.
I want to make Asian style pies or quiche to take to an informal function. I love this pie recipe. I’m wondering if you have a recipe for mini-quiches with Chinese red Sausage in them. What I’m thinking of doing is useing a muffin tin, cutting rounds of pastry & putting in the muffin holes, then adding a filling. And a pastry top. I’m wondering if you can suggest a recipe for the filling that includes chopped sausage. Most people at the BBQ will be Vietnamese. So I thought those flavours would be liked. What do you think? Could I just add some Chinese sausage to your filling? I’m in Sydney, Australia.
I would use a sauce with the sausage otherwise the filling might taste dry. For Chinese / Asian pastries, it’s quite common to add some mayonnaise and chopped up green onions to the meat filling so it’s more moist (like this: https://www.zojirushi.com/app/recipe/ham-and-corn-mayo-buns)
I made these this evening. Actually I made some ’round’ ones yesterday and was looking for a way to not have the lump of glutinous dough that I got when sealing. ‘Pasties’ I thought, and lo and behold there was your version! I liked it and, it is more flavoursome and, stays crispy. I did run out of filling (given I was using stuff up) and experimented with cheese, mushroom and a little harissa: they were a hit too 🙂
So happy to hear you tried out this one! Yes, I prefer this folding much better because the wrapper will be thin throughout and you can stuff a ton of filling 🙂 Thanks for leaving a positive review!
what can i do with a ton of leftover dough?
You can freeze or refrigerate them to use later. It’s a dough that’s similar to scallion pancakes. So you can make it if you wish: http://omnivorescookbook.com/chinese-scallion-pancakes/ (you pretty much just need to do the filling. And if the dough is relaxed enough in the fridge, it’s easy to roll out)
Odd question.
Could you make these using frozen then thawed Scallion Pancakes?
I suppose you could! It’s essentially the same type of dough (without the scallion). Maybe you can scale down the recipe and try 1 or 2 at a time. Pretty much you can roll out the thawed scallion pancake, put the filling on one side, then fold it up, cook according to this recipe. I think it should be tasty!
I think it would be tasty too!
And it opens up thoughts about using the scallion pancake with other fillings as well! Thanks for the inspiration!
made this for the 3rd time yesterday, it has never disappointed once 🙂 delicious and delightful!
So happy to hear you made this and enjoyed it! Thanks for leaving a positive review 🙂
Lovely but how is this Asian? More like a classic English meat pie would you say
It is a very classic Northern Chinese dish that I ate growing up. I’m not super familiar with English meat pie, but I think their ingredients are cooking methods are different.
This one uses a dumpling dough and it’s pan fried, so the crust is chewy, like fried dumplings (I believe English meat pie uses pastry dough and it’s baked).
The seasoning has ingredients like ginger, sesame oil and Sichuan peppercorns, making it very savory with distinctive fragrance.
I loved the recipe, I had to change me meat to ground chicken. So delicious! I’m tired after all the dough rolling though lol. So worth it! Thanks