Try slow-roasting to create melt-in-the-mouth tender and juicy siu yuk with a perfect, crispy crackling. It is way easier than you thought!
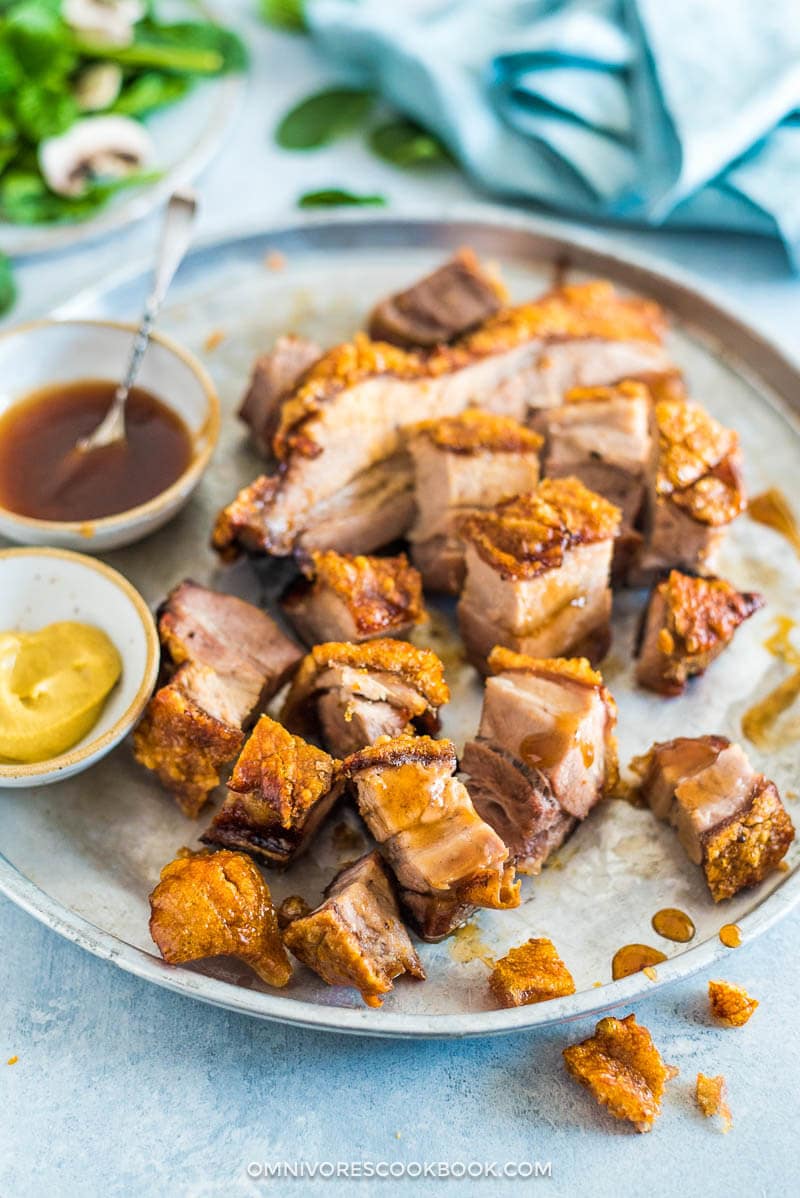
In the past, I’d always choose crispy roast duck over crispy pork whenever I dined at a Cantonese restaurant. Although both taste heavenly when done right, the roast pork was usually a hit or miss. More often than not, the cuts were too fatty and the meat too bland. The skin might be crispy, but not to the degree of snap-in-your-mouth perfection. I wouldn’t be able to eat more than one piece because it was often too rich for my taste.
When developing a recipe for crispy pork, I decided to find a method to solve all these problems: aiming for a less greasy dish with flavorful pork with a perfect, crispy skin.
I chose to go the low and slow route. Just like I did with the Perfect Roast Duck. I hoped that the slow-cooking process would thoroughly render the fat and produce extra tender meat while making the skin brittle.
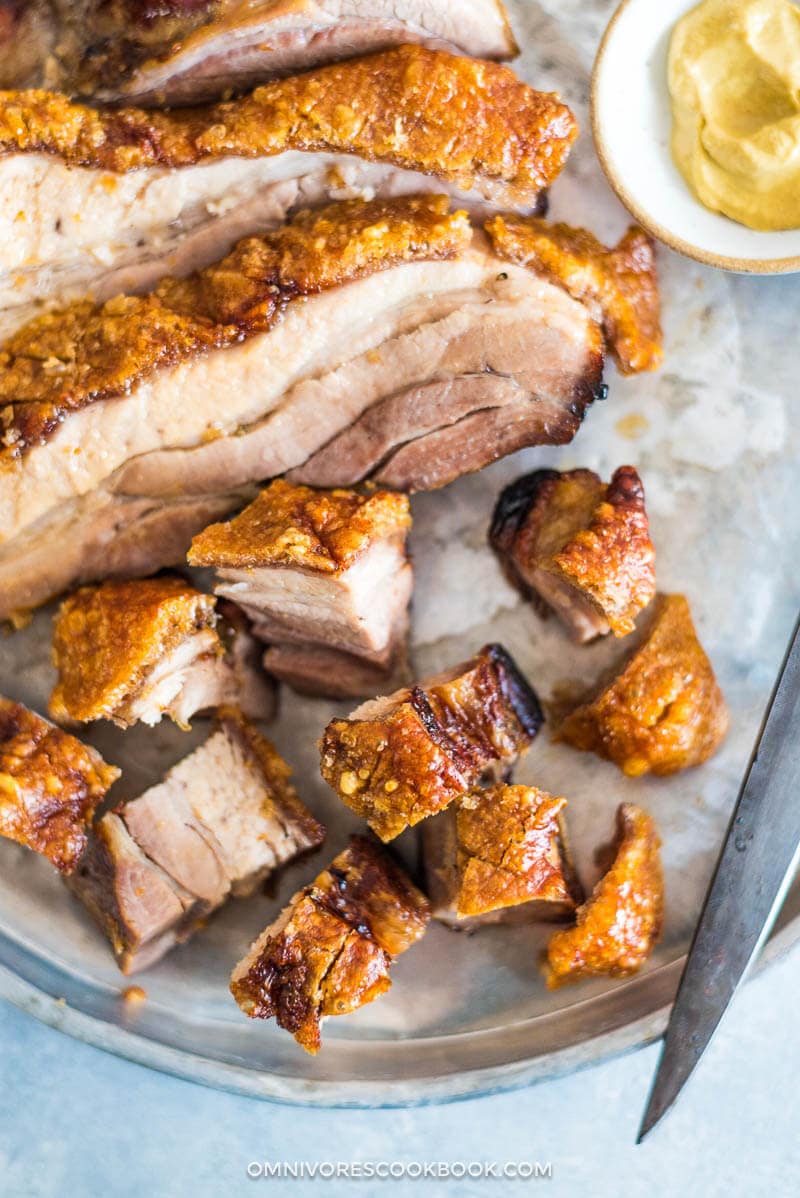
Slow-Roasted Siu Yuk
I used the method from Three-Hour Pork Belly by BBC Good Food with a few modifications. This is definitely not the traditional approach to cook siu yuk, but I love how the result turns out.
Below are the key elements that show why this recipe is unique.
(1) Marinate the meat overnight.
Although most traditional recipes use a five-spice dry rub or no marinade at all, I used a Cantonese-style liquid marinade instead. It produces an extra flavorful meat without affecting the crispiness of the skin.
(2) Score the skin instead of using the traditional way of piercing it with pointed sharp tool, to create a surface that is crispier than deep-fried egg rolls.
The reason is simple: the pork skin has a super tough texture that requires a serious workout if you want to pierce it properly, with thousands of small holes next to each other. Plus, the piercing depth needs to be perfect — right through the pork skin, but without piercing the fat and meat.
In my first roast, I tried using a meat puncher, tooth pick, and sharp nail. None of them worked. Eventually I pierced the skin using the point of a super sharp paring knife, which resulted in extremely sore muscles the next day. There have been a couple of times my knife went too deep and penetrated the fat, which resulted in a few soggy spots that didn’t crisp up as I’d hoped.
Then I switched to the scoring method, by slicing a 1/4-inch (1-cm) diamond pattern onto the skin. Not only does it take way less work, the skin will be cooked to cracklin’ perfection.
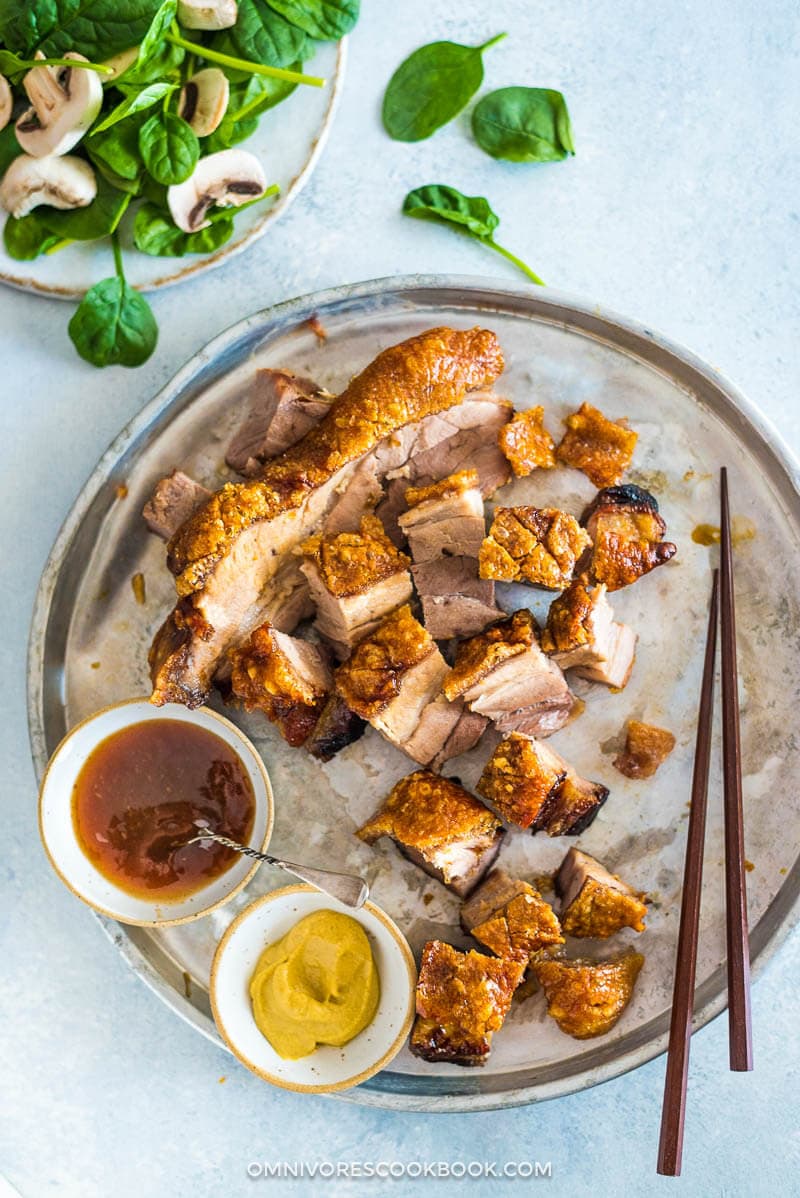
(3) Roasting – low and slow.
Roast at a high temperature first. Switch to a low temperature and roast for 2 hours. Bump the heat to high again to finish up.
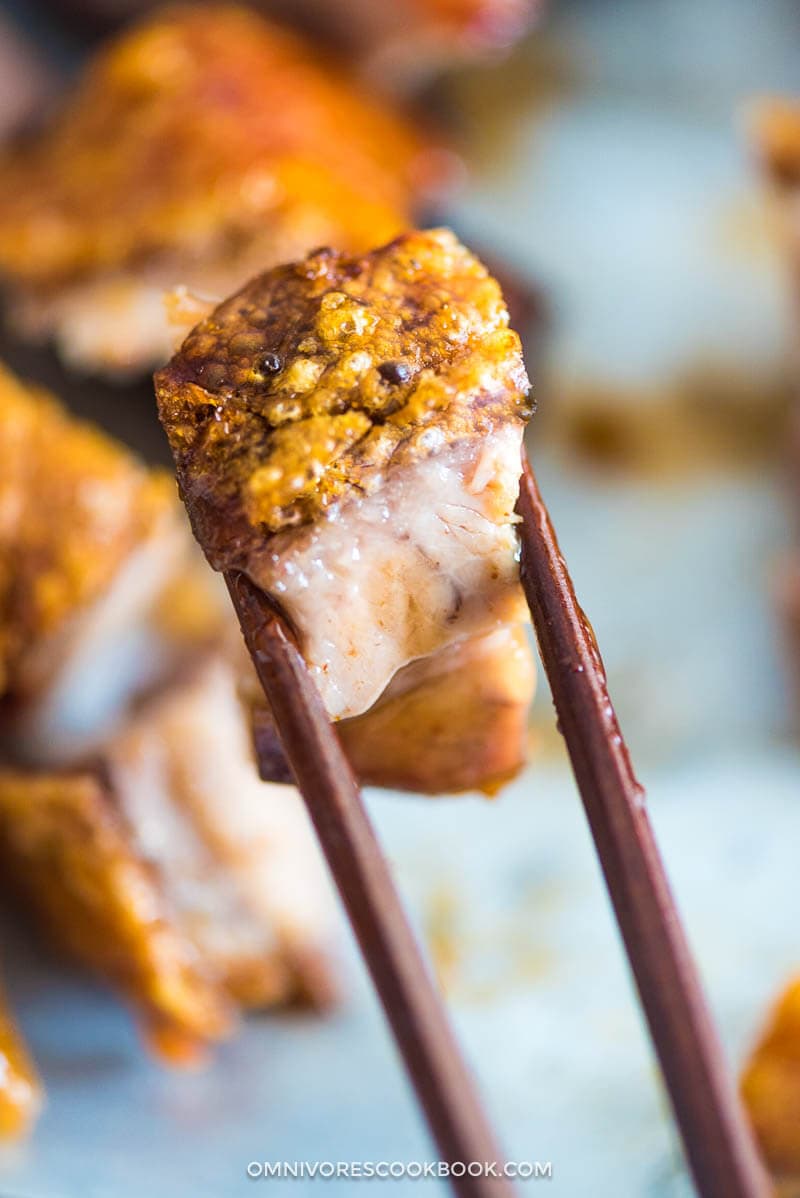
The slow cooking process will thoroughly tenderize the fat layers – about 90% of the fat will be gone at the end of cooking, making the pork way less greasy. The melted fat keeps the lean meat juicy and tender, which creates a melt-in-the-mouth texture. The slow-roasting also makes sure the skin is properly dried and ready for crisping-up.
High-temperature cooking creates a wonderfully browned surface on the lean meat. The skin will turn to a beautiful golden-brown that is evenly cracked. Though I say so myself, the siu yuk from my own oven tastes a ton better than some of the pork I’ve had in restaurants.
More cooking notes
(1) Purchase the right cut
I highly recommend you visit an Asian market to purchase the pork belly. Although I see the cut in other grocery stores occasionally, it is usually very fatty without the skin attached — this type of cut does not work for this dish. Choose a cut that has thin fat layers between the lean part, so the result is tender without being too greasy.
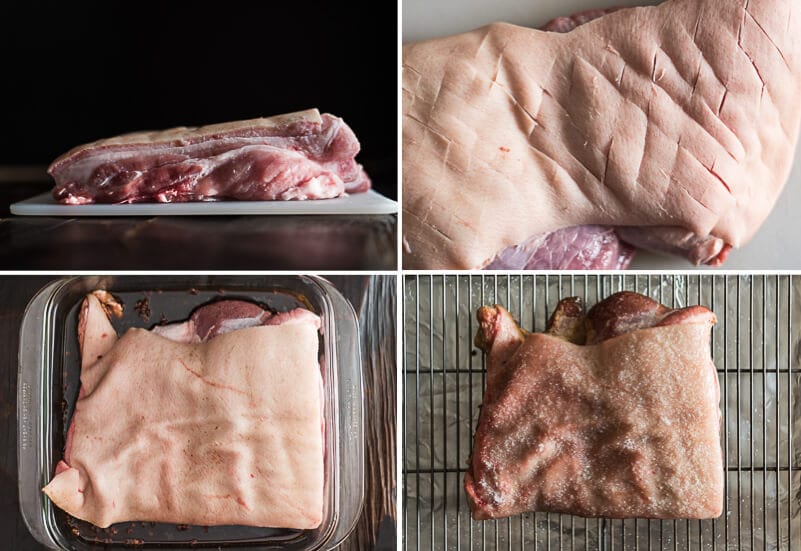
(2) Roasting time and temperature
The roasting time and temperature vary depending on the individual oven and the size of the pork belly. The recipe below records the time and temperature I used for cooking a 3-pound pork belly. You might need to shorten or prolong the roasting time for the final stage (450F / 230C) of roasting, so the skin will crisp up properly.
This recipe is rather forgiving, so it wouldn’t be a big problem if you slightly overcook the meat.
(3) Dipping sauce
Although the pork is so flavorful that you can totally serve it without, a touch of sauce will take the dish to new heights.
What is even better than crispy pork belly? When it’s lathered in sweet plum sauce! For a less sweet taste, serve with some mustard instead.
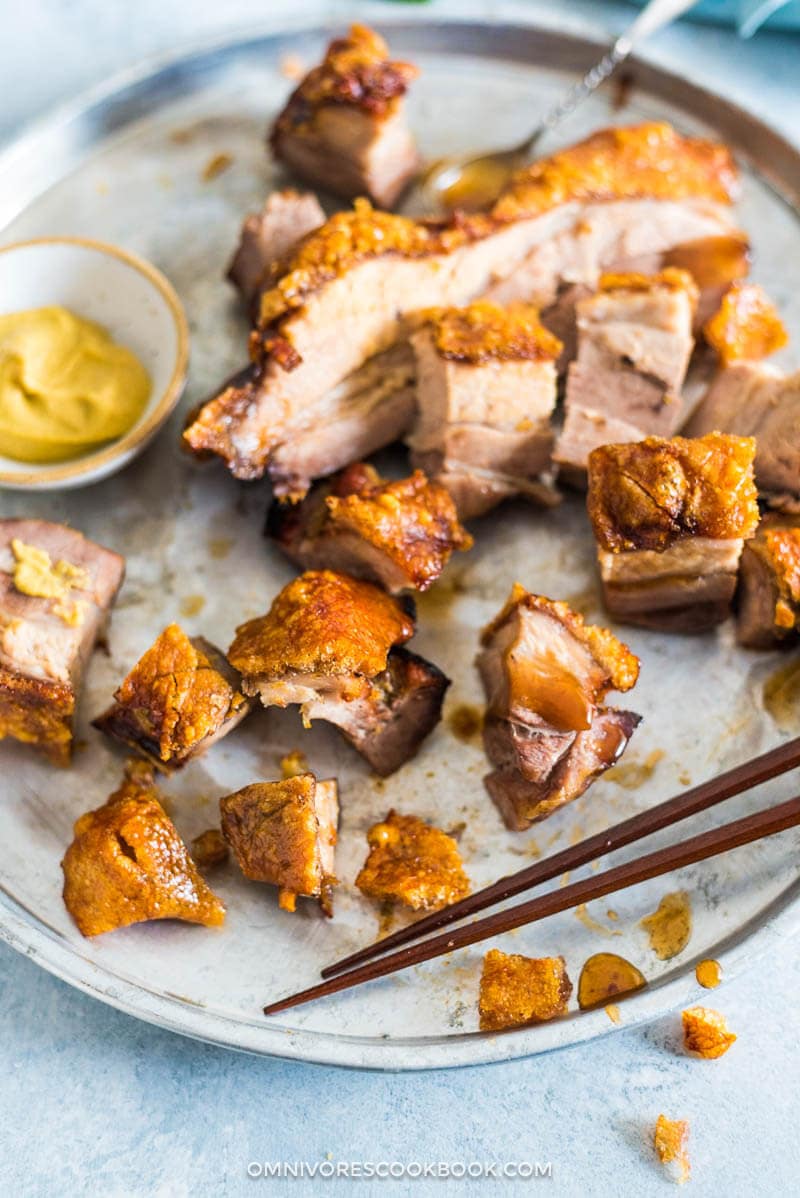
(4) How to serve
In Cantonese cuisine, siu yuk is usually served warm, standing alone as an appetizer. However, the slow-cooked version makes a perfect main course.
A piece of 3-pound pork belly can serve 3 to 4 people as a main course, and a 4-pound cut serves 4 to 6 people. For sides, a light green vegetable is a must. It cuts the richness of the main course and cleanses your palate. Opt for blanched Broccoli with Oyster Sauce or baby bok choy in garlic soy sauce. A small bowl of steamed rice makes a good addition, or Mashed Potato also makes an ideal side to absorb the juices.
(5) How to reheat
Siu yuk tastes the best when is right out of the oven, and you can keep it warm in the oven on the lowest setting for hours before serving.
When you store it in the fridge, the skin will become soggy. BUT I did find a great way to reheat leftovers. Here is what you should do:
- Preheat the oven to 400 F (200C).
- Separate the skin from the meat. Place the skin in a baking dish without overlapping; place in the middle or upper section of the oven. Wrap the meat with aluminum foil and place in the lower part of the oven.
- Bake for 10 to 15 minutes, or until the skin is bubbling and starts to turn dark.
By reheating the skin and meat separately, the skin will properly crisp up again while the meat remains tender.
That’s it!
For your next family gathering or holiday celebration, try out this dish instead instead of your usual roast chicken or turkey. I guarantee it’ll be a hit!
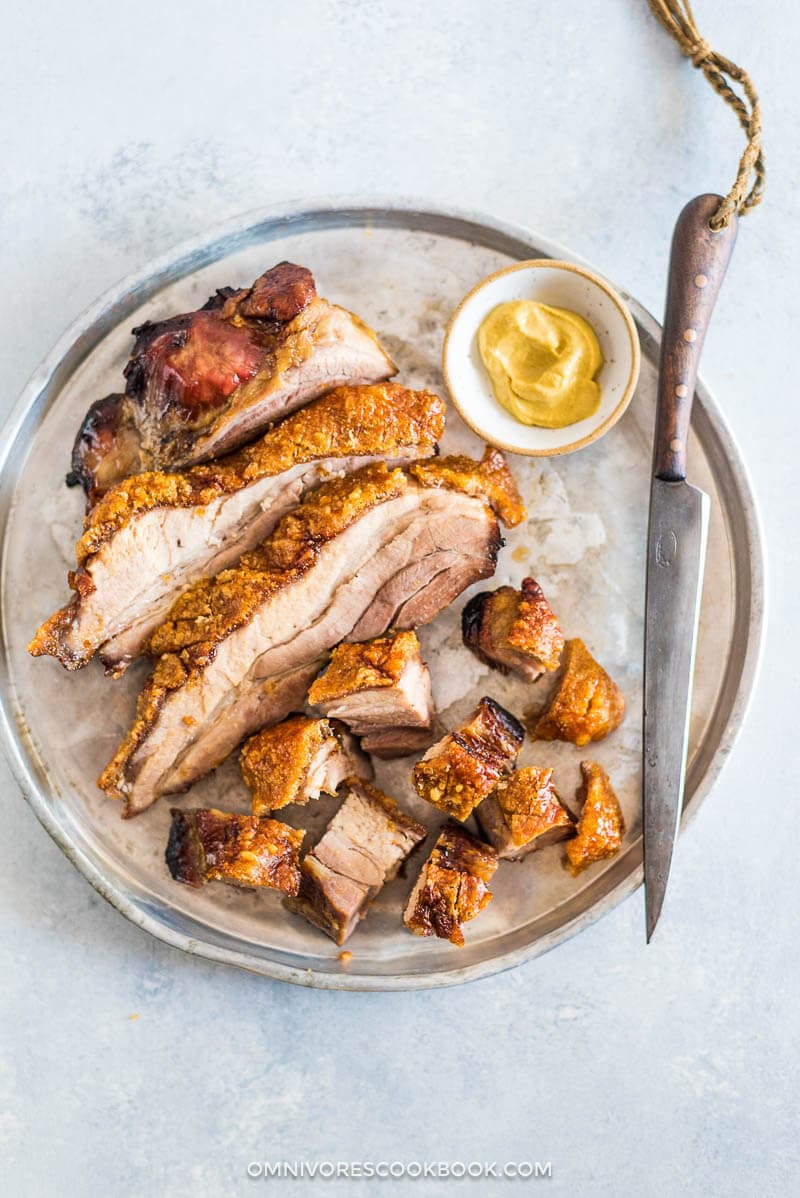
More holiday main courses
- The Best Cantonese Roast Chicken
- The Best Slow Roast Duck
- Chinese BBQ Pork (Char Siu Pork)
- Chinese Brined Turkey
If you give this recipe a try, let us know! Leave a comment, rate it (once you’ve tried it), take a picture and tag it @omnivorescookbook on Instagram! I’d love to see what you come up with.
Slow Roasted Crispy Pork Belly (Siu Yuk, 脆皮烧肉)
(2) The prep time below does not include the overnight marinating time.
(3) A piece of 3-pound pork belly can serve 3 to 4 people as a main course, and a 4-pound cut serves 4 to 6 people. Alternatively, a 3-pound pork serves 6 to 8 people as an appetizer.
Ingredients
- 3 to 4 lbs (1.4 to 1.8 kg) whole slab of skin-on pork belly (*Footnote 1)
- 1/2 to 1 teaspoon salt depending on the size of the pork belly (*Footnote 2)
Marinade
- 1/2 cup light soy sauce (or soy sauce, or tamari for gluten-free)
- 1/4 cup oyster sauce (*Footnote 3)
- 1/4 cup Shaoxing wine (or dry sherry for gluten-free)
- 2 cloves garlic , minced
- 1 tablespoon sugar
- 1/2 teaspoon coarsely ground black pepper powder
- 1/2 teaspoon five-spice powder
Serving options
- Mustard , Sriracha hot sauce (or other hot sauce), or plum sauce
Instructions
Marinate
- Choose a shallow dish large enough to hold the pork belly (I used a baking dish). Add all the marinating ingredients and stir to mix well.
- Pat the skin of the pork belly with a paper towel to dry completely. Score the skin into a crosshatch pattern using a sharp knife. Try to cut through the skin without piercing the fat.
- Carefully transfer the pork into the shallow dish with the marinade. The marinade should come up to the sides of the pork but not touch the skin. Let it marinate in the fridge uncovered overnight or for up to a day.
Cook
- Preheat oven to 400 degrees F (200 C). Line a baking sheet with aluminum foil for easy cleaning. Place a wire rack on top and then place the pork on the rack.
- Evenly spread a layer of salt to cover the pork skin entirely.
- Cook at 400 F (200 C) for 30 minutes. Then lower the oven temperature to 300 F (150 C). Bake for another 2 hours.
- Raise the oven temperature to 450 F (230 C) and roast for another 30 to 45 minutes, until the skin completely crisps up.
- Move the pork onto the kitchen counter and loosely cover with aluminum foil. Slash a cross on top of the foil to let out steam so the crackling will remain crispy. Rest for 10 to 15 minutes before serving. Alternatively, you can place the pork in the oven on the lowest setting if you won’t serve it immediately.
- Serve the pork hot or warm with preferred dipping sauce (*Footnote 4).
Store and reheat
- Store the leftover pork in fridge for 3 to 4 days.
- To reheat, preheat the oven to 400 F (200C). Separate the skin from the meat. Place the skin in a baking dish without overlapping, in the middle or upper section of the oven. Wrap the meat with aluminum foil and place in the lower part of the oven. Bake for 10 to 15 minutes, or until the skin is bubbling and starts to turn dark.
Notes
- You can find skin-on pork belly at large Asian markets. Try to select a cut that has very thin fat layers so the finished dish won’t be overly rich.
- Some of the salt will form a crust during the roasting. Simply brush the salt crust off before serving so the pork won’t be too salty.
- To make this dish gluten-free, use 3 tablespoons gluten-free hoisin sauce to replace the oyster sauce.
- The pork will taste the best served hot, but it’s OK to serve it warm as well. Since 90% of the pork fat will be rendered during cooking, the meat still tastes good without being greasy when it cools down a bit. The skin will remain crispy.
Nutrition





This recipe is gorgeous Maggie! And I love how informative and extensively researched it is 🙂 Have you tried salt crust without piercing or scoring? It’s pretty amazing – and so simple! I’m thinking of using that method for a non Asian version, like fennel or something like that!
Glad to see you here Nagi! Actually a lot of research comes from you site because you’ve done all the heavy lifting! 😉
Yes I’m pretty sure the salt curst method will work. Actually that’s something I’ll try soon (I posted this one without waiting because I love how the pork belly turned out). The slow cooking method should work well for pork belly or bone-in pork shoulder. So you can do a beautiful dry spice rub version with perfect tender pork and blistered skin! Imagine serve that on some mashed potato with gravy, and colorful salad on the side (or charred cabbage with mustard)!
Omg! Easy to prepare and soooo crispy and good. Even the leftovers, followed your heating instruction for the skin and it was still good and crispy. Thank you will definitely make it again.
This looks lovely, I have always avoided cooking belly pork due to its naturally fatty nature,
this method has changed my mind and I will definitely give it a go , So much information
in the recipe is really helpful, Thanks.
Hi Tricia, indeed I share the same thought as well. I had been reluctant to develop pork belly recipes because the cut is too fatty. Cooking this dish totally changed my mind! I found out you can create quite lean pork belly by slowly render the fat (of course you want a cut on the lean side to start with).
Let me now how the pork turns out if you decide to cook it.
Have a great weekend and happy cooking 🙂
my mouth is watering looking at those fabulous photos.
I will definitely have to try this method of cooking the pork belly.
Normally I score the skin, and then pour boiling water on it so that the skin puckers.
Then I cook in the oven. Sometimes it is still a little rubbery ,which mean I didn’t pour enough boiling water on it.
Hi Karen, thanks for sharing your method to cook pork belly! I saw some recipes call for pouring the boiling water, but I never tried it since it sounds like a lot of trouble.
Definitely let me know if you try out this one at home. I’d like to hear your thought on this, and whether the method produces crispier skin.
Hope you have a great weekend 🙂
hi Maggie,
So I tried the recipe, but it was on a week night, so there was no way to do a 3 hour cooking fest.
However I did the marinade overnight, then cooked on 400F for 20 mins, switched to 300F for 45 mins, and then used the broiler to crisp the skin (3 mins). The pork was fantastically flavoured and soft. And the skin under the broiler was perfectly crunchy.
I definitely will be changing my method to cook on the lower heat, as the pork meat was delicious.
Only problem was that there were no leftovers for the next day 🙁
Hi Karen, wow I can’t believe you made the dish on a week night! That’s quite a bit work, so I’d consider it a major achievement 😉
I’m curious about your cooking time – it sound really short. Do you remember the size (or weight) of the pork you cooked? I would definitely want to try out a shorter cooking time and then broiler, if the result is as good.
If you used a small cut this time, I’d highly recommend you to cook a bigger piece if you want to cook this dish again. We had some leftover lean parts and it tasted so good no matter adding in the soup or fried rice!
Thanks for your detailed feedback and have a great week ahead 🙂
The pork was just under 3 lbs.
I was using the convection part of the oven.
Next time for sure I am getting a bigger piece!
Excellent! I have just cooked this today for the in-laws and had great feedback, ‘best crackling iv ever had!`. Very easy to follow, I used the pork marinade afterwards to cook pak choi and other veg. Will definately be cooking again! 😊😊🍳🍳
Husband wanted to try doing this with pig feet (the fat, meaty part). Can that be used with this recipe or is the skin too thin there (meaning the meat won’t be cooked enough)?
I think the fatty part has great fat/skin ratio but I’m worried the surface is not even and they won’t roast evenly. Then on another though, if you have the trotter split to halve, this method actually can work. I wouldn’t worry the skin being too thin. That will actually work really well.
Hi, so after the first half an hour at 200c do you remove the salt crust or leave it until the end before the increase in temperature at 230?
Hi Kendrick, I do not remove the salt because it’s a part of the seasoning. The recipe only uses up to 1 teaspoon (depending on the size of the pork cut you use), until some recipe that calls for a thick layer of salt crust.
I made this today & it was fabulous! Hands down as good, if not even better, than restaurant bought! Served it to others & all agreed 5 star! Thank you!
Tried this recipe 2 nights ago and love that the lower temperature cooking rendered the fat from the pork belly that made it less greasy when eaten! The pork belly skin did not blistered up under the 450 degree heat, but still very cripsy and tasty though. Next time, I will use the broiler to crisp up the skin like others recommended. I marinated the meat for about 4 hours at room temperature and it was still very flavorful…I think it would be overly salty if I leave it overnight. I never thought I would make Siu Yuk at home, and I live in Los Angeles where we can get this quite easily! I will definitely make this recipe again considering how easy it is!!
Hi Maggie, if the size of my pork belly is about 800gram. May I know what will be the cooking time?
I think you should reduce the cooking time by 1/3. 400 F (200 C) for 20 minutes, 300 F (150 C) for 1.5 hrs, 450 F (230 C) for 20 to 30 mins until it crisps up.
Thank you Maggie for your guidance, my siew yuk turn out beautifully. 😋😋😋
Super Rezept
My parents loved it the first time I made it. Doing it a second time for testing consistency. If all goes well, this is now my go to, even for potluck.
Is the pork covered at all during the cooking process? ( Im going to try this on the weekend)
The pork is not covered during the cooking, so it will release the steam and crisp up.
I made this yesterday and it was absolutely perfect. I only had 800 grammes of belly so I reduced the cooking times accordingly. The crackling was delicious. I used some of the marinade as sauce, far too greasy but excellent. Do you have any suggestions on how to quickly get rid of the grease so that the marinade can be used? That would make it even more perfect. Thank goodness we still have some for tonight.
Excellent, I only had 800 grammes and slightly reduced the cooking times. The crackling was perfect. I used some of the marinade as sauce, far too greasy but delicious. Does anyone have an idea For the marinade can be made less greasy? The taste is so good.
Amazing!!!
Going to LOVE this! Just ordered PB from butcher. When I visited my Asian grocery, I always brought home roast duck & crispy pork. Every single time, I have to reheat the pork to make the skin crispy.
Now with the help of your recipe, Maggie, I’ll be sure to get back to this about the outcome.
I’m prepping my p.butt in a sec to do separate Peking & Char Siu dishes. Heaven on our Lunar NY.