This is the ultimate guide on how to cook rice. In this guide, you will find detailed information on how to cook short grain, medium grain, long grain, and jasmine rice in a rice cooker, on the stove top, or in an Instant Pot. I also included the rice-water ratios and a cooking time chart, plus notes on how to adjust the rice texture, storage, and more!
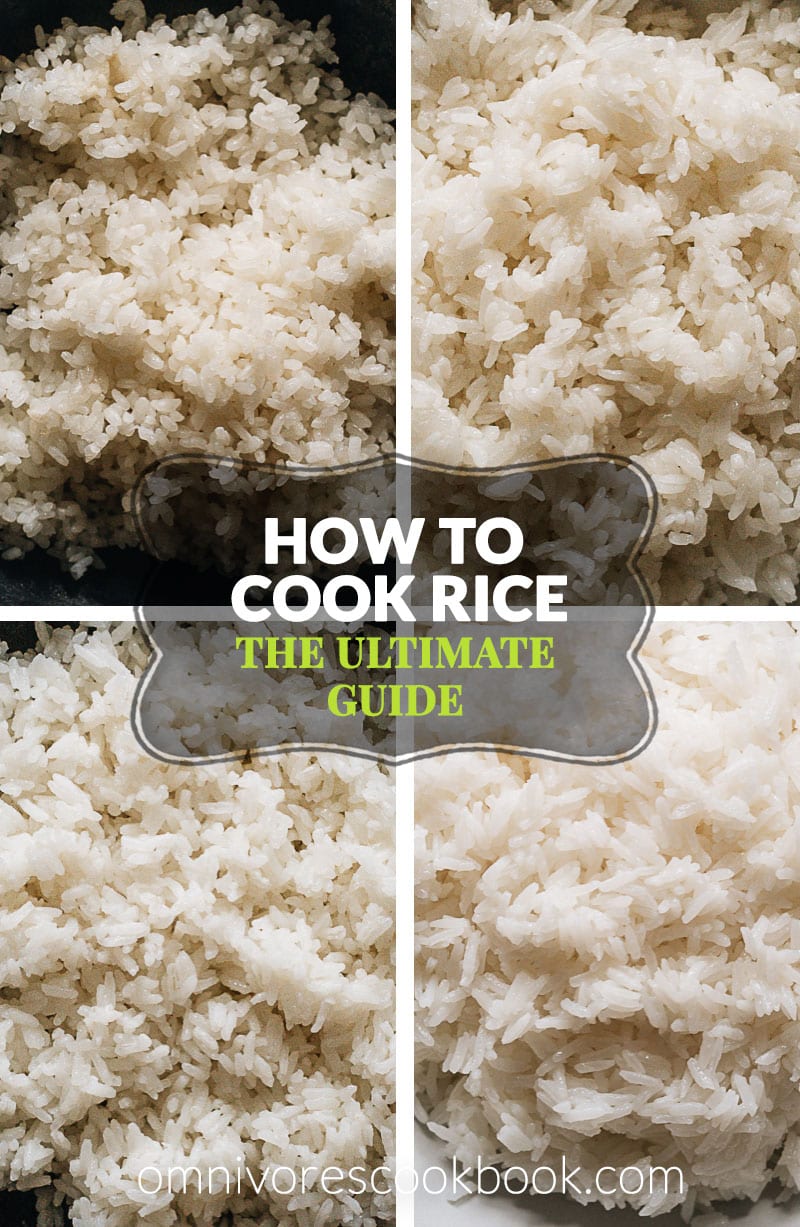
I realized it seemed weird that on a Chinese food blog I had never written about the most basic aspect of Chinese cuisine: how to cook rice!
For all my life, rice (米饭, mi fan) has always been there on the table, no matter what other dishes may come and go. I kept telling myself that the reason I’ve never written about rice cooking is that it seems so basic and there’s not much to talk about. But the truth is, I grew up cooking rice in a rice cooker and do not know another way! Yep, if you go to any Chinese family’s home, you’ll see a rice cooker sitting on the kitchen counter. And it’s probably used almost every day.
After I moved to the US, I kept using the rice cooker. But occasionally, I needed to cook rice on the stove top. For example, when I decided to make sushi for a family gathering and had to cook in another kitchen, there was no rice cooker to use! I had to google “how to cook rice” and follow the steps very carefully.
I’ve also noticed that people cook very different types of rice. Back in Beijing, the only rice we ate was short-grain rice. In the US, I find that grocery stores usually sell long grain, medium grain, and jasmine rice.
That’s why I decided to make this ultimate guide on how to cook rice. It includes the rice-to-water ratios, cooking times, and directions for different types of rice. I’ve also included the methods for a rice cooker, stove top, and Instant Pot.
How to use this guide (please read, very important!)
There are a few different factors that affect how you should cook rice, depending on the outcome you’re looking for and the equipment you have on hand.
1. The texture of the rice
Depending on personal taste, you might want your rice fluffy and soft, sticky, or with a little bite to it. Personally, I like my rice to have a little bite. That means that when you fluff the rice once it’s cooked, you should be able to see the grains separate from each other without getting mashed together. The texture of the rice is not too soft, but it’s softer than risotto and al-dente pasta. My recipe was tested based on this texture, so you might find it uses a bit less water than other recipes.
2. No soaking needed
Some recipes ask you to soak the rice before cooking, I found it unnecessary if you’re cooking with white rice.
Some recipes also suggest using a mesh strainer to strain the rice properly once you’ve washed the rice. It’s a more accurate way to cook. But in reality, I find it less practical and it requires more time.
My recipes ask you to drain the rice in the cooking container, and then cook it directly. It saves time and cleanup.
3. My setup
There are many factors that might affect the water ratio and cooking time. For example, they type of stove you use (electric or gas), the heat output of your stove, the type of pot, and the freshness and the amount of your rice you use.
This recipe uses a gas stove. And the Calphalon 2.6 qt stainless steel saucepan for the stovetop recipe. And the standard 6-quart Instant Pot for the Instant Pot recipe.
For each recipe, I used 1 cup of rice to test. The cup here is the US standard cup, which is 240ml. Note, it is not the rice cup (that usually comes with a rice cooker). A rice cup is 180ml, which equals 3/4 of a US cup.
4. Guidelines
The recipes in this post should be used as a guideline. They should be quite accurate and you should get great results by following my instructions. However, sometimes you might find that the rice tastes a bit harder or softer than you were hoping. I will discuss how to adjust the doneness of the rice at the end of the post.
Decide on the type of rice you plan to use
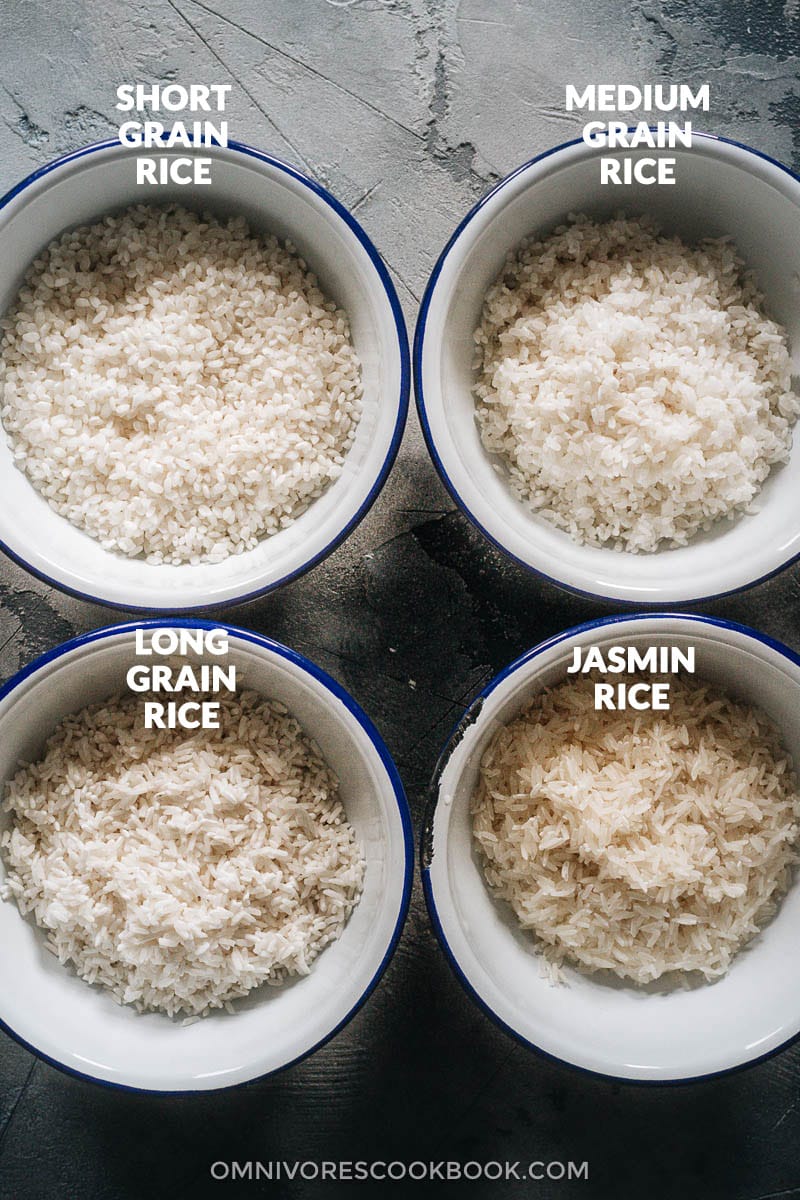
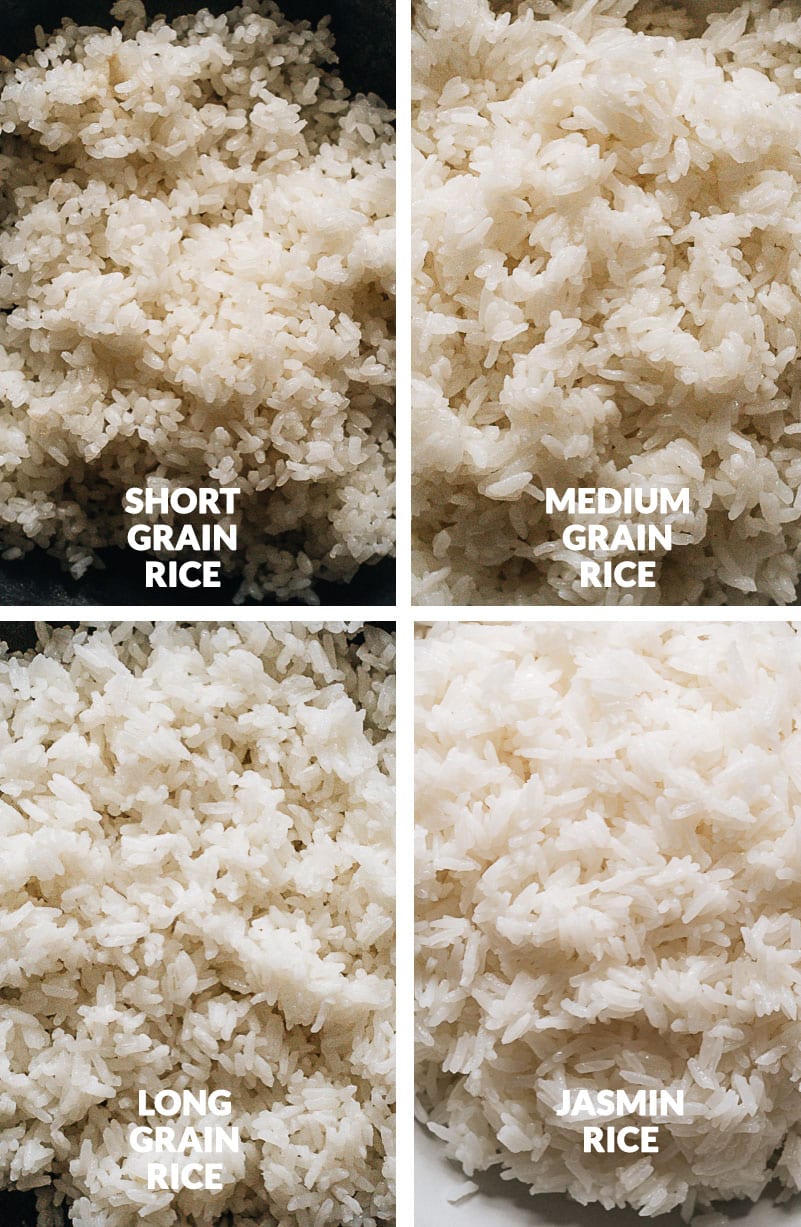
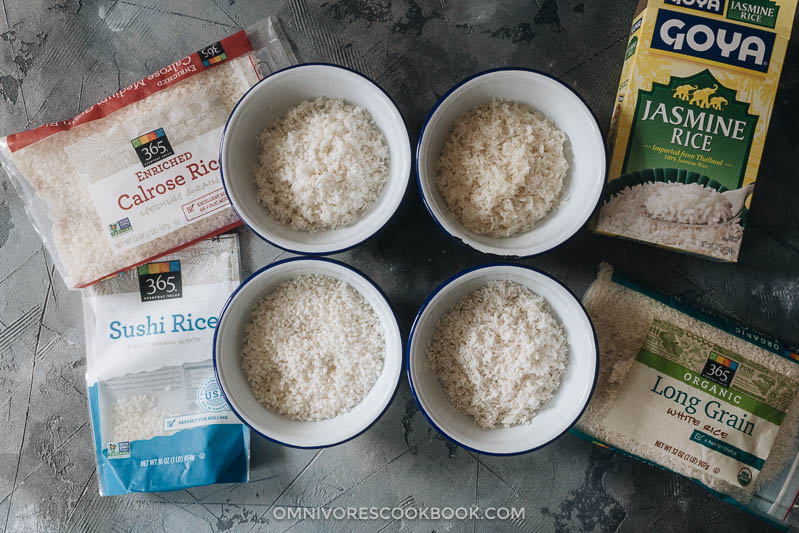
This guide focuses on the types of white rice that are commonly used in Chinese and Asian cuisine and are easy to find in the US. That is, short grain rice, medium grain rice, long grain rice, and jasmine rice. Note, sometimes short grain rice is also labeled as sushi rice, although it’s commonly served in Asian restaurants as regular steamed rice without being made into sushi. These are the types of rice that you can find in many grocery stores without running to an Asian market.
When you purchase the rice, make sure you’re buying raw unprocessed rice that requires regular cooking. Some packaged rice is processed and designed for the microwave. Avoid this type! It does not have a pleasant texture.
If you’re making a lot of rice (like me), your best option is run to an Asian market to get rice in a bigger package. You’ll find rice with great quality at a very cheap price.
These days you can even buy rice in bulk on Amazon. Here are two Japanese brands I love: Nishiki and Kokuho Rose.
Choose your cookware
In this post I’m introducing how to cook rice in a rice cooker, on the stove top, and in an Instant Pot. For the Instant Pot method, you can also use the same cooking time and water ratio if you’re using a pressure cooker.
The three methods all produce good steamed rice.
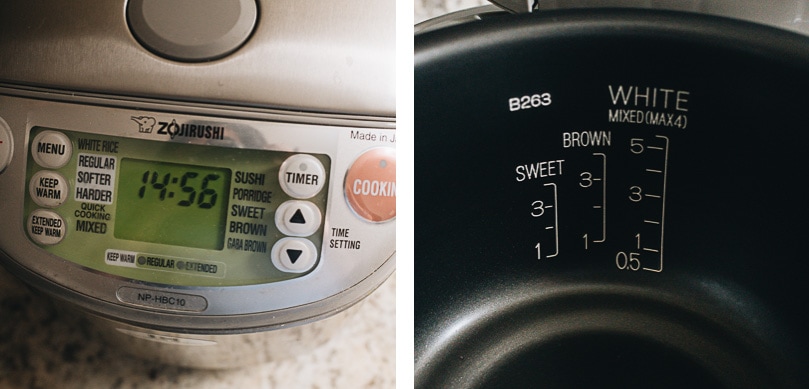
The rice cooker method is the easiest one. Because it usually comes with a removable cooking pot that has rice and water measurement markings inside. So you can rinse the rice in the bowl, and add water without taking out your measuring cup. You can also start the rice by pushing a button and then forgetting about it, because the cooking time is programmed into the rice cooker. Some high-end rice cookers have programs to cook different types of rice to different donenesses. Such as the one I have – Zojirushi multi-function rice cooker.
The stovetop method is the common method and doesn’t require any special equipment. Make sure you use a pot with a tight-sealing lid. And the pot should have some weight to it and not be super thin. This will ensure the rice cooks evenly and the steam is sealed in. I love using my Calphalon 2.6-quart stainless steel saucepan to cook rice.
The Instant Pot method yields slightly stickier rice. If you’re looking for that texture, it’s the best way to go. Like using a rice cooker, you can set it and forget it, without constantly monitoring the cooking. From adding pressure to steaming, it also takes slightly less time than the stovetop method.
How to prepare rice before cooking
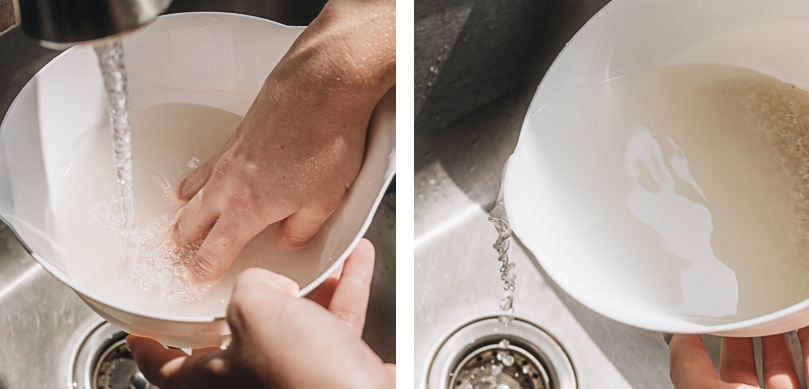
Rinsing the rice before cooking will remove the extra starch, so the end product will have a better mouthfeel without the rice clumping together. It’s also an important step to removing any impurities from the rice. For example, sometimes the rice might be mixed with very small stones that were introduced during the milling of the rice. You will be able to spot the stones easily and discard them when you wash the rice.
To rinse the rice, place the rice in a big bowl and add tap water to cover the rice for 1” (2.5 cm). Insert your fingers into the rice and gently swirl it in circles a few times. Drain the water. And repeat the process 1 to 2 times. Once done, use your palm to block the rice from falling to the sink, and drain off as much as water you can. Now you can add the rice to any cooking device you plan to use.
How to cook rice on the stove top
The truly old-school way. If you don’t own a rice cooker, this is probably the way you will cook your rice. It requires a little more supervision, but don’t be scared – it’s easy peasy if you follow these instructions.
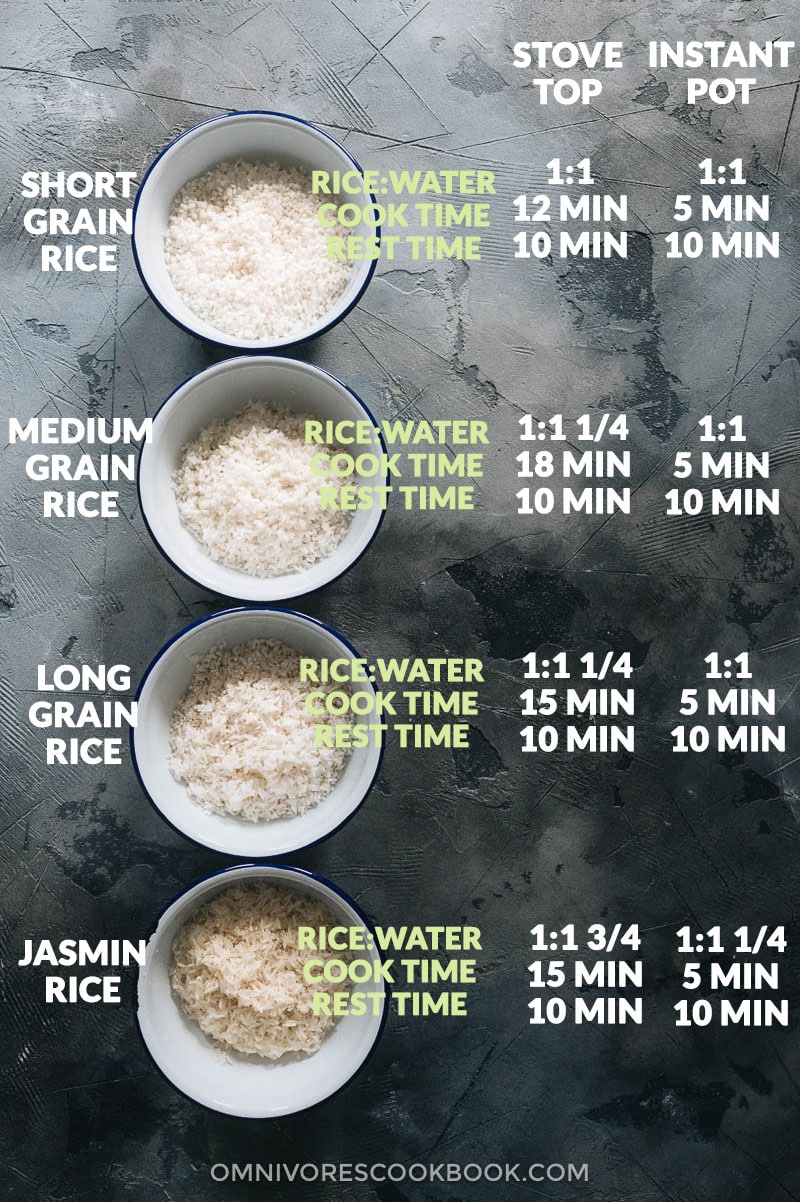
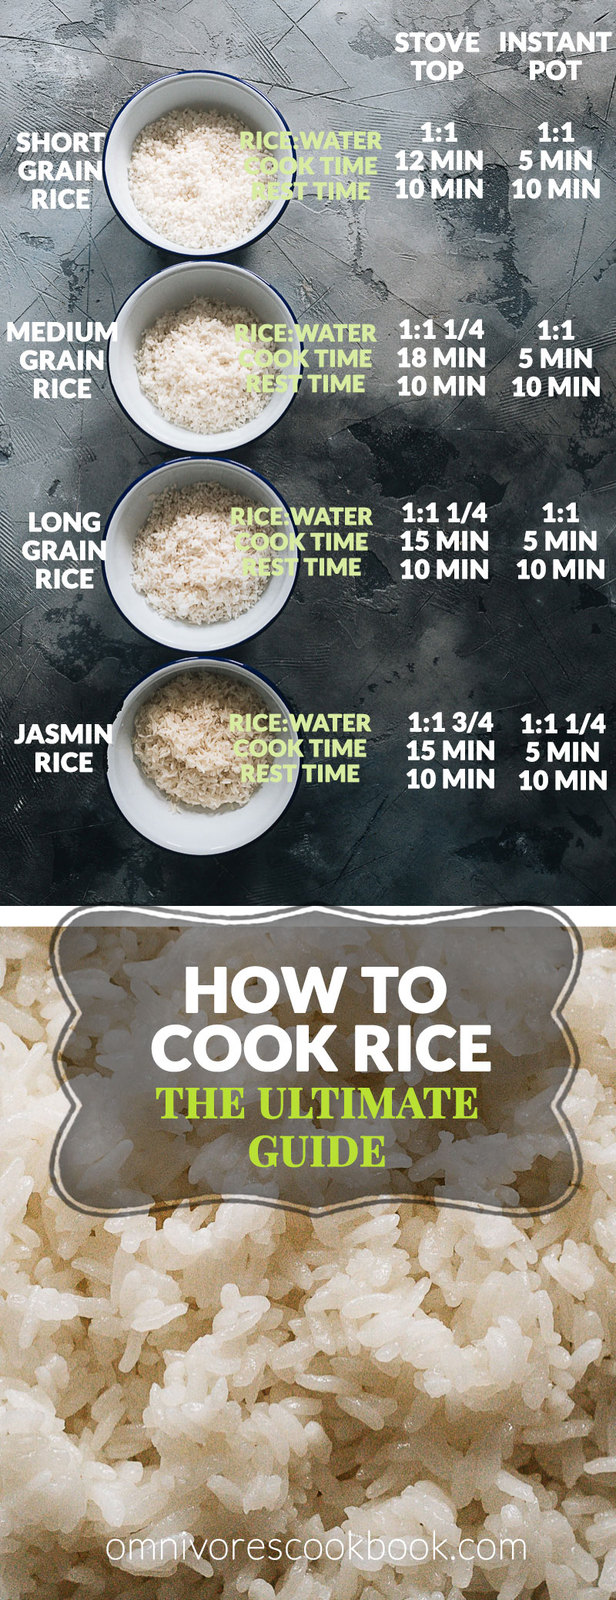
Rice-to-water ratios & cooking times for the stovetop method
The rice-water ratio and cooking time will vary depending on the type of rice you use. Here is a general guide.
| Type of rice | Rice:water ratio | Steaming time | Resting time |
| Short grain | 1:1 | 12 mins | 10 mins |
| Medium grain | 1: 1 1/4 | 18 mins | 10 mins |
| Long grain | 1: 1 1/4 | 15 mins | 10 mins |
| Jasmine | 1: 1 3/4 | 15 mins | 10 mins |
Cooking method
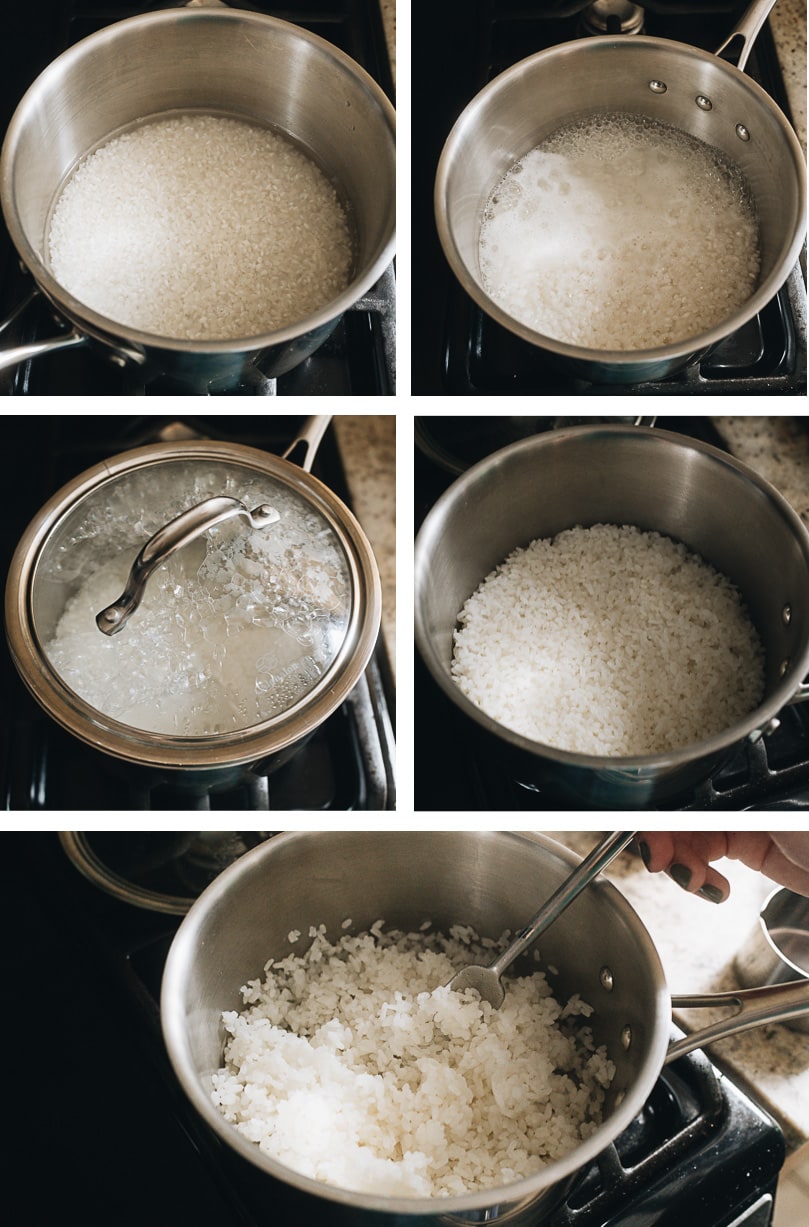
- Once you’re done washing and draining the rice, transfer the rice into the pot. Add water according to the chart above and gently shake the pan so the rice forms an even layer, with water fully covering the rice.
- Turn on medium heat and cook until the water comes to a full boil. Cover the pan and turn to low heat immediately.
- Set the cooking time according to the chart above. Do not uncover the pot during steaming.
- Once it’s done cooking, remove the pan from the stove. Let it sit, covered, for another 10 minutes.
- After resting the rice, use a fork or spatula to fluff the rice. If there’s a bit of moisture left in the pot, you can cover the pot again and let it rest a bit more.
- Keep the cover on until you’re ready to serve the rice.
Things to note
- Make sure your pot has a tight-fitting lid so moisture won’t escape.
- Your pan should be spacious enough to allow the rice to expand about 3 times. But it should be small enough so the rice will form a layer on the bottom that’s at least 1/2” (1.5 cm) thick.
- A heavy duty stainless steel or nonstick saucepan is highly recommended, so the heat will be distributed evenly and so there is better heat retention. The rice will be cooked evenly without being burned on the bottom. But you don’t need a dutch oven to cook perfect rice.
- Don’t uncover the rice while it’s cooking! Remember that the retention of steam is vital to getting perfectly cooked rice.
How to cook rice in an Instant Pot
A great way to cook rice if you want to be more hands-off while cooking the rice and create consistent results. The rice will have a slightly stickier texture using this method, which I love.
Rice-to-water ratio & cooking times for the Instant Pot method
You might have noticed, the rice-water ratios and steaming times don’t change much depending on the rice type. I was pretty surprised by the results when I was testing the recipe. I think it might be caused by they way high-pressure cooking works.
| Type of rice | Rice & water ratio | Steaming time | Resting time |
| Short grain | 1:1 | 5 mins | 10 mins |
| Medium grain | 1:1 | 5 mins | 10 mins |
| Long grain | 1: 1 | 5 mins | 10 mins |
| Jasmine | 1: 1 1/4 | 5 mins | 10 mins |
Cooking method
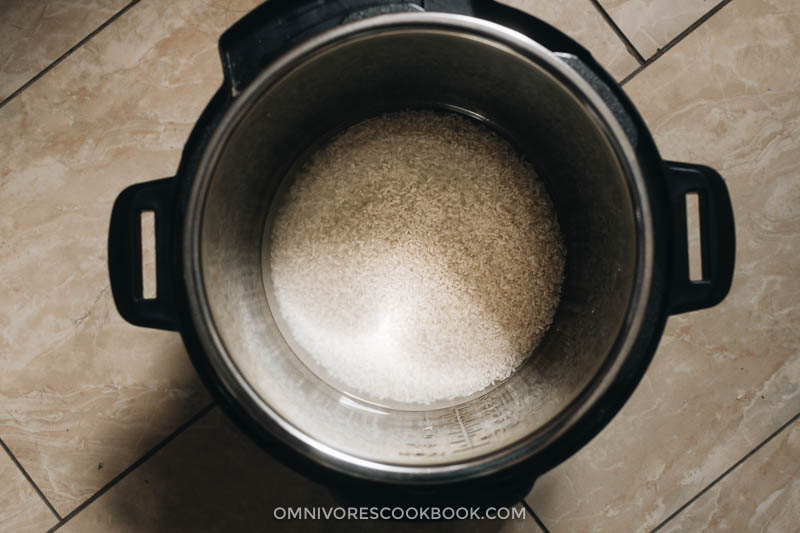
- Once you’re done washing and draining the rice, transfer the rice to your Instant Pot. Pour in water according to the chart above and gently shake the inner pot so the rice forms an even layer, with water fully covering the rice. Cover the pot and twist the lid to lock it. Make sure the valve is pointed to seal.
- Click manual, set the pressure to high, and the timer to 5 minutes.
- Once it’s done cooking, let the rice steam for 10 minutes, then use fast release. Uncover the pot and use a fork or spatula to fluff the rice.
- Keep the lid on until you’re ready to serve the rice.
Things to note
- The time needed to add pressure depends on the amount of rice you’re cooking. When I cook 1 cup of rice, it only takes 5 minutes to add pressure. If you’re making 3 cups of rice or more, it will take longer to add pressure, and your rice might form a crispy layer on the bottom. It’s perfectly natural.
- Do not fill the rice over 1/3 of the inner pot. The rice will expand a lot while cooking and cooking too much rice might end up clogging the valve.
How to cook rice in a rice cooker
The first thing I purchased for my American home was a Zojirushi multi-function rice cooker. It has multiple programs built in so I can cook perfect brown rice and mixed grain rice. I can also adjust the rice texture by selecting different programs. It’s a cooking device I highly recommend if you love Asian food or simply like rice.
I didn’t list the water-rice ratios or cooking times, because most rice cookers come with a dedicated measuring cup and the pot markings show the relevant water levels. If yours doesn’t, you can use the same measurements as listed for the stovetop version.
Cooking method
- Once you’re done washing and draining the rice, transfer the rice to your rice cooker. Pour in water according to the markings on the rice cooker pot or the instructions that came with the rice cooker. Gently shake the inner pot so the rice forms an even layer, with water fully covering the rice.
- Press the start button and let it cook. Don’t open the rice cooker lid as this will allow steam to escape, which affects the cooking process.
- Your rice cooker will usually beep to let you know the rice is ready. It will automatically keep the rice warm until you switch off the machine. Fluff the rice using the rice paddle that came with the machine or a spatula, once the rice is done. Cover it again until you’re ready to serve.
Things to note:
- Never fill the rice cooker to the brim, as rice will expand up to three times when it is cooked. Always leave a lot of space to let it grow.
- As a rule, one to two cups of rice is normally a good amount for 2 to 4 people respectively.
How to adjust rice doneness
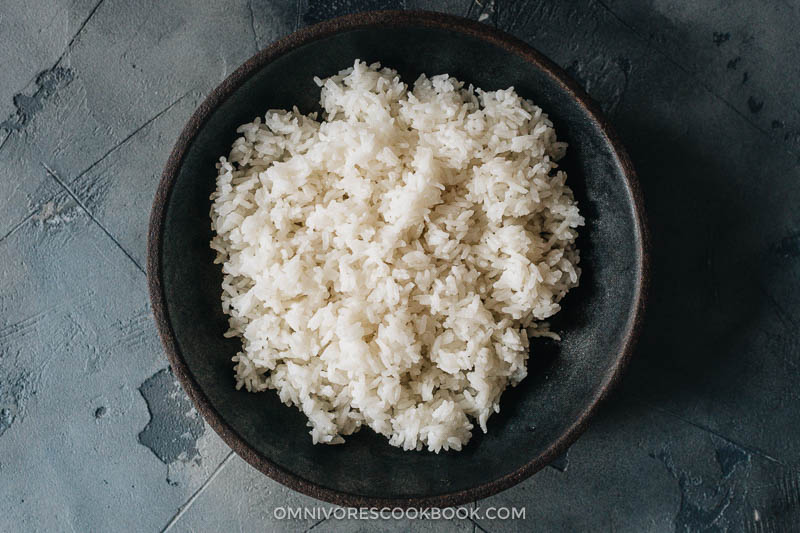
Like I mentioned above. This guide produces slightly chewy rice that can be separated into grains without tasting mushy. If you like your rice a bit softer, you might need to adjust the water ratio and cooking time.
To make softer rice with the stovetop method, you can add 1/4 cup more water than indicated in the chart above for each cup of rice, and increase the cooking time by 2 to 5 minutes (depending on the rice type). The best way to judge the cooking time is to use a pot with a glass cover. The rice is done when the water is absorbed completely.
To get softer rice with the Instant pot method, you can use the same approach and add an additional 1/4 cup water for each cup of rice, but keep the cooking time the same or add 1 extra minute than indicated in the chart above.
Clean-up and storage of rice
1. The clean-up after making rice
Once you’ve made the rice, the pot will be coated with a layer of starch. You can easily scrub it off with a sponge if you immediately transfer the rice to another container. But more often than not, you might leave the rice sitting in the pot for a while before serving it. In this case, the starch will harden and become difficult to clean. You should always soak the pot with plenty of water. After an hour or two, the starch will soften again and you can rinse it off with a gentle scrub.
It’s much easier to clean up the rice cooker’s inner pot because it’s usually made with a nonstick coating. So you usually don’t need to soak it.
2. How to store cooked rice
Cooked rice is prone to spoiling and you should store it properly to avoid foodborne illness. If you’re serving the rice soon after making it, you can let it sit in the covered pot to keep warm. However, if you won’t be serving the rice within an hour, you should open the pot, fluff the rice, and let it cool as soon as possible. Once the rice has cooled, transfer it to an airtight container and store it in the fridge for 3 to 4 days, or in the freezer for up to a month.
3. How to store uncooked (raw) rice
If you purchased a small package of rice that has a resealable zipper, you can simply store the rice in its original bag.
If you purchased a larger amount of rice and won’t use it immediately, you can store it in an airtight plastic or glass container.
Always store raw rice in a cool, dark area. Avoid direct sunlight on the rice. If you aren’t able to use your rice within 3 months, you should store the rice in the fridge to maintain freshness.
Once in a while, you might notice small black bugs appearing in your rice. This might be because the rice was already contaminated when you bought it. Discard the rice immediately and wash your container with detergent thoroughly if you’re using one. If you store the rice with other grains in the same area, also examine the other bags of grains. These bugs can chew through the bags and contaminate others.
More rice recipes
- Pressure Cooker Brown Rice
- 3-Ingredient Egg Fried Rice
- Instant Pot Congee
- Seafood Congee
- Yunnan Style Pineapple Rice
- Mango Sticky Rice
If you give this recipe a try, let us know! Leave a comment, rate it (once you’ve tried it), and take a picture and tag it @omnivorescookbook on Instagram! I’d love to see what you come up with.
How to Cook Rice - The Ultimate Guide
Ingredients
- 1 cup ((250 ml) white rice
- Water (see the chart in the post above for the quantity)
Instructions
Prepare the rice for cooking
- Add the rice into a big bowl and add tap water to cover the rice by 1” (2.5 cm). Insert your fingers into the rice and gently swirl in a circular motion a few times. Drain the water. And repeat the process 1 to 2 times. Once done, use your palm to block the rice from falling into the sink, and drain off as much as water you can.
Cook rice on the stove top
- Transfer the washed rice to a pot. Pour in water and gently shake the pan so the rice forms an even layer, with water fully covering the rice.
- Turn on medium heat and cook until the water comes to a full boil. Cover the pan and turn to low heat immediately. Set the cooking time according to the chart above. Do not open the pot during steaming.
- Once done cooking, remove the pan from the stove. Let sit, covered, for another 10 minutes.
- After resting the rice, use a fork or spatula to fluff the rice. If there’s a bit of moisture left in the pot, you can cover the pot again and let it rest a bit more.
- Keep the cover on until you’re ready to serve the rice.
Cook the rice in an Instant Pot
- Transfer the rice into your Instant Pot. Pour in water and gently shake the inner pot so the rice forms an even layer, with water fully covering the rice. Cover the pot and twist the lid to lock it. Make sure the valve is pointed to seal.
- Click manual, set the pressure to high, and the timer to 5 minutes.
- Once done cooking, let the rice steam for 10 minutes then use fast release. Uncover the pot, then use a fork or spatula to fluff the rice.
- Keep the lid on until you’re ready to serve the rice.
Cook rice in a rice cooker
- Transfer the washed rice into your rice cooker. Pour in water according to the markings on the rice cooker pot or the instructions that came with the rice cooker. Gently shake the inner pot so the rice forms an even layer, with water fully covering the rice.
- Press the start button and let it cook. Don't open the rice cooker lid as this will allow steam to escape, which affects the cooking process.
- Your rice cooker will usually beep to let you know the rice is ready. It will automatically keep the rice warm until you switch off the machine. Fluff the rice using the rice paddle that came with the machine or a spatula once the rice is done. Cover it again until you’re ready to serve.



I like rice and eat it often, have experimented with many techniques but never really found a best way to prepare it. This recipe has changed that! I tried both short and long grain, followed the exact time and temperature, and the result was a perfectly cooked and fluffy rice. Thank you for a wonderfully detailed and easy-to-follow recipe.
Thanks for your article, when power failure, I can cook rice on the stovetop. If eating rice regularly, people should buy a rice cooker. Cooking rice will become easier.
This is quite helpful. Being in self isolation quite a distance from home, I inevitably needed a culinary companion. This site has been the guide I so much needed. Cooking rice is the combination of art and science. I sometimes see chefs sprinkling salt and olive oil when preparing rice, what’s your take on this?
And would you get the same results if you used short or medium grain variety?
You can season your rice according to your taste (it’s possible to use broth, and add ingredients like veggies), but for everyday cooking, I usually keep my rice plain, so I can serve it with varies types of food. You don’t need to use oil and salt to get a great result.
As for the type of rice, yes the result will be slightly different. For example, short grain produces slightly stickier rice, while long grain and jasmine rice is less sticky. Medium grain is somewhere in between.