Authentic Chinese bakery style Hong Kong egg tart that features flaky crumbly pastry crust filled with a sweet creamy custard that you’ll want to eat morning, noon, and night!
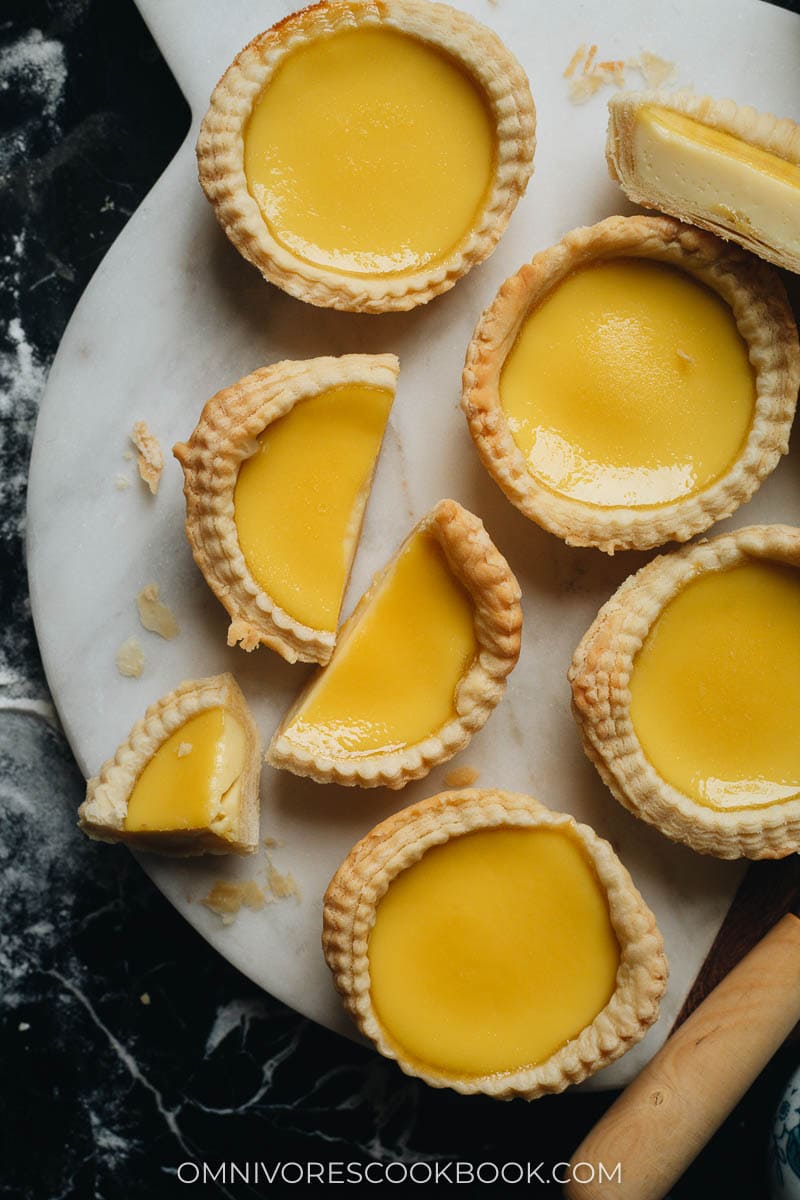
What is a Hong Kong Egg Tart
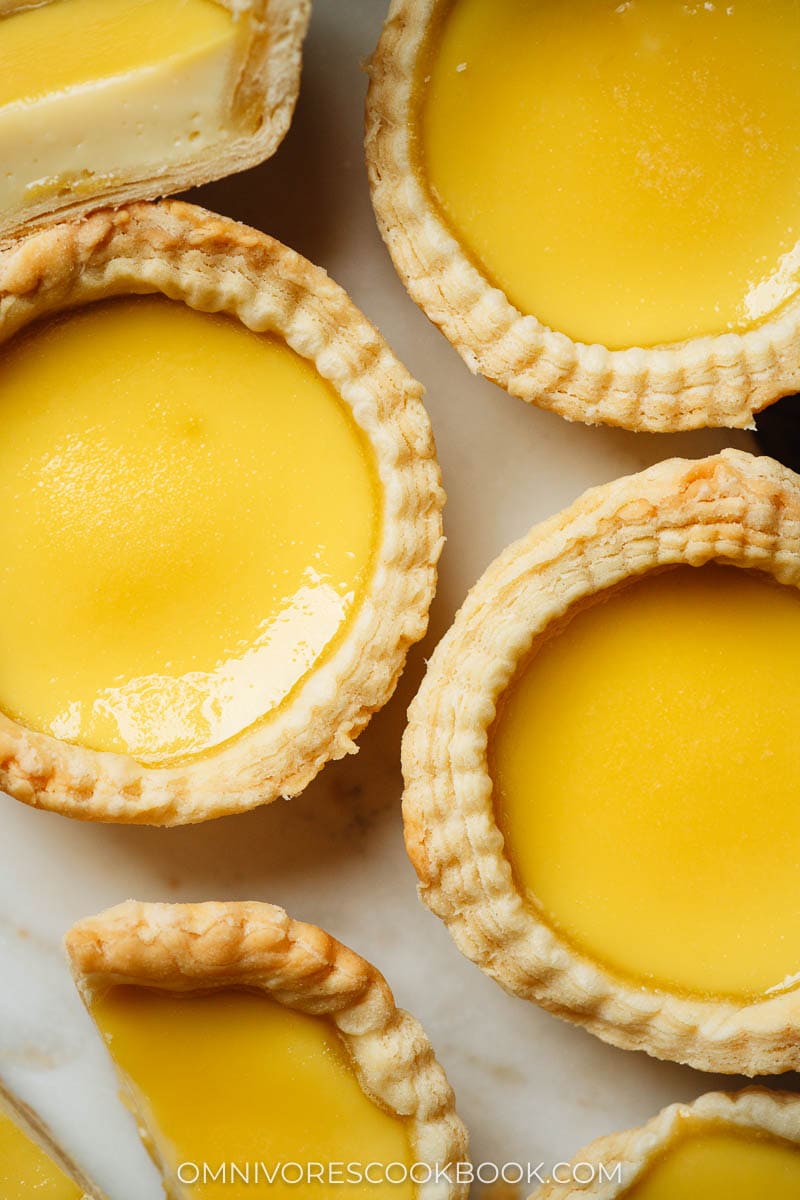
Have you tried a Hong Kong egg tart? In China, there are two kinds of egg tarts that are very popular. There’s the Portuguese egg tart which has a caramelized top and a thin layered crispy pastry shell. And then there’s the original, the Hong Kong egg tart that has a milder filling and a pastry crust that is flaky and crumbly.
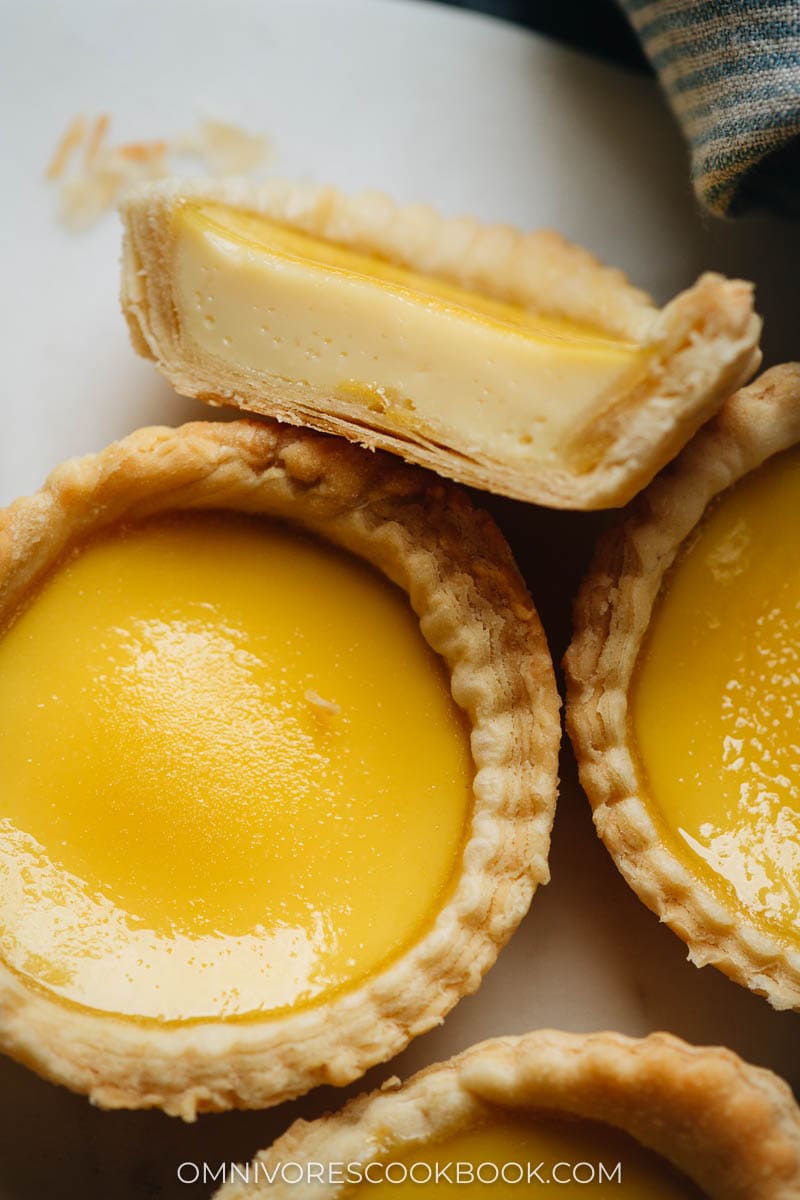
For Hong Kong egg tarts to taste amazingly delicious, you need to get a few components right. I came across my favorite Hong Kong egg tart in a Chinatown bakery. The tart crust is beautifully layered and super thin. It has just the right amount of cripiness, yet it’s tender and moist. The filling is mild, creamy, and just sweet enough to be washed down with a glass of milk.
Back in the kitchen, our goal is to recreate the perfect Hong Kong egg tart that resembles what you can get at the Chinese bakery.
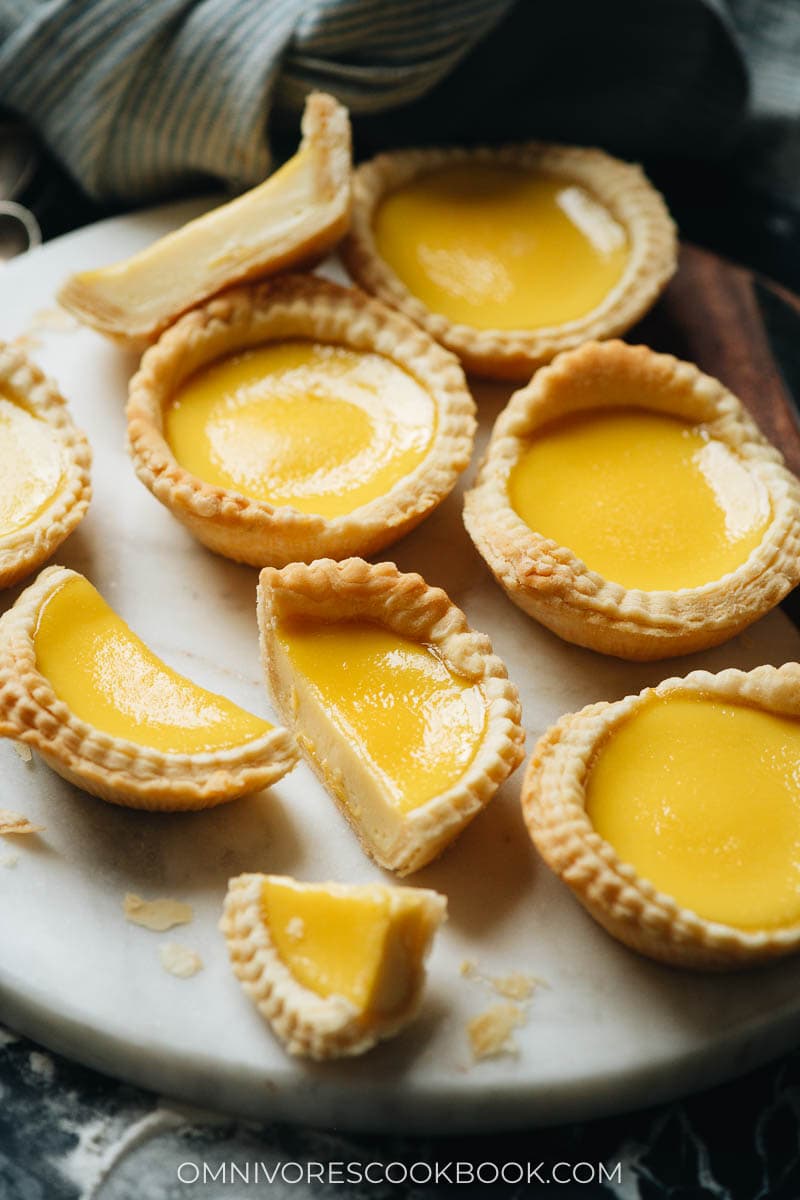
Why this recipe
We spent numerous hours testing this recipe with lots of trial and errors. After testing out different methods, we came up with this recipe.
This recipe helps you get that layered pastry crust, nice and flaky and crispy. Inside, the custard filling is mildly sweet enough to satisfy while having a luxurious, creamy texture.
Compared to other egg tart recipes that simply use pie dough, this dough will take you longer, but you will be rewarded for your efforts.
This Chinese pastry dough recipe doesn’t require chilling like regular pie dough does. And it’s pliable and very easy to work with.
And as a result, it recreates the crispy yet moist texture of the authentic Chinese pastry.
Read this before you start cooking
General workflow
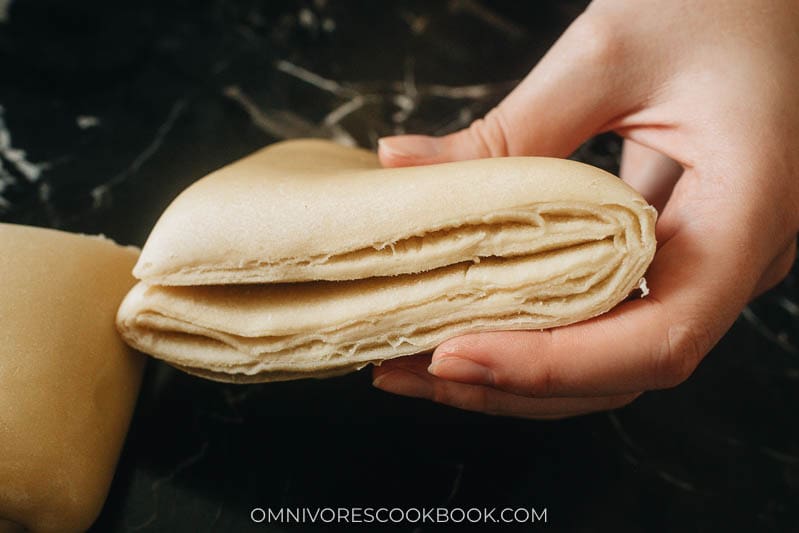
The recipe might look super long and the folding method can be a bit hard to understand at a glance. That’s why I took a lot of photos and made a video to help you work through the process.
To sum things up, you will need to:
- Make a water dough (you will need a stand mixer for this)
- Make an oil dough
- Wrap the oil dough with the water dough
- Then roll it out and fold it up
- Repeat the process again, rolling out the dough and folding it up
Then you will get a pastry dough that has super thin layers, does not require refrigeration, and is easy to work with!
Special equipment
Before you begin, you need to get the tinfoil egg tart molds for this recipe. It’s also handy to have a pastry cutter (4 1/2” or 11.5 cm). I recommend it because it will make the whole thing much easier, plus you will have a prettier result.
But if you don’t have a pastry cutter, look below to see my method for forming the tart base without it.
Storage
Feel free to make the Hong Kong egg tart dough a few days in advance and then bake it later, depending on when you plan to serve the tarts.
However, you should always make the filling fresh (it’s super easy) and assemble the tarts right before cooking.
Cooking process
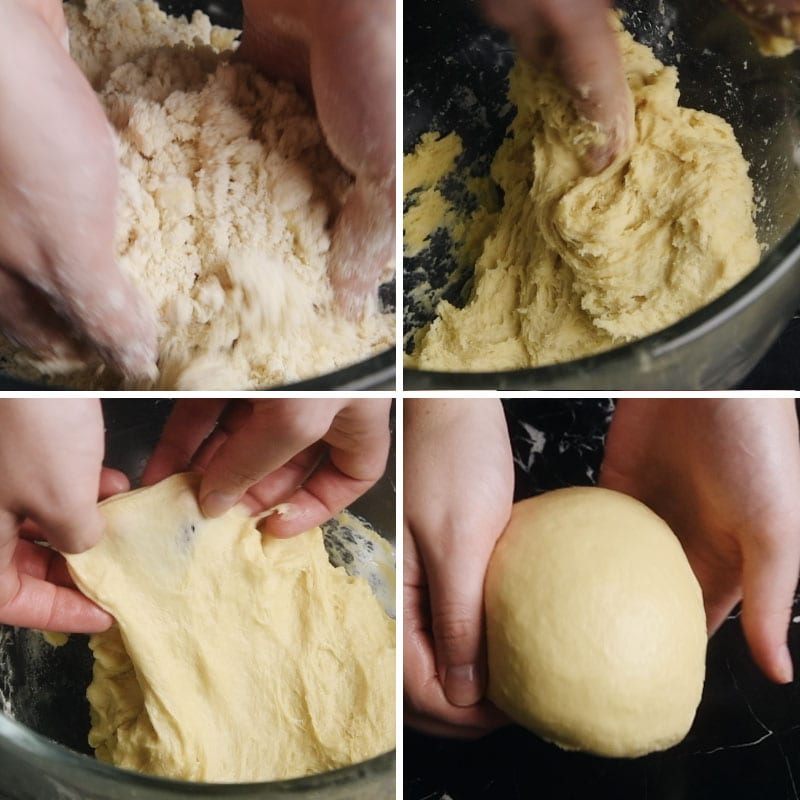
Prepare the water dough
- Use your hands to work the butter into the flour
- Add the rest of the ingredients and keep mixing by hand until it forms a dough-like paste
- Knead with a stand mixer until you can pull apart the dough to form a semi-transparent sheet
- Shape the dough, then cover it with plastic wrap to rest
NOTE: the water dough will be very moist and sticky when you mix it at the beginning. That’s why it’s best to use a mixer. You might be able to use a pastry cutter to knead it on the counter too, but that method requires some experience and will take a lot longer.
Prepare the oil dough
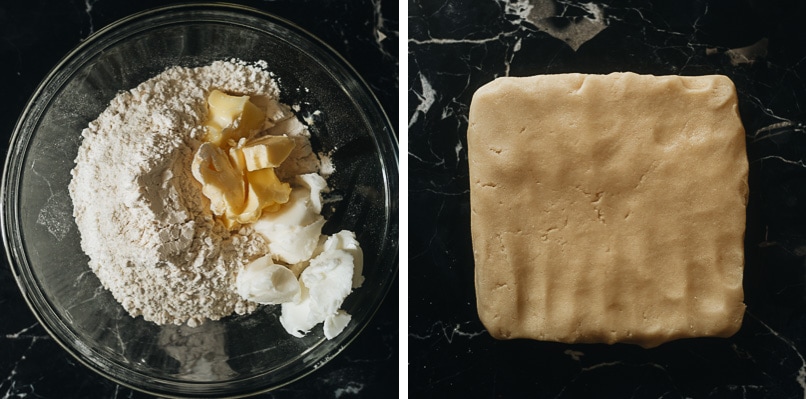
- Add all the ingredients together
- Mix with your hands until it forms a dough
- Let it rest
The oil dough is super easy to put together so no mixer is required.
Assemble the pastry dough
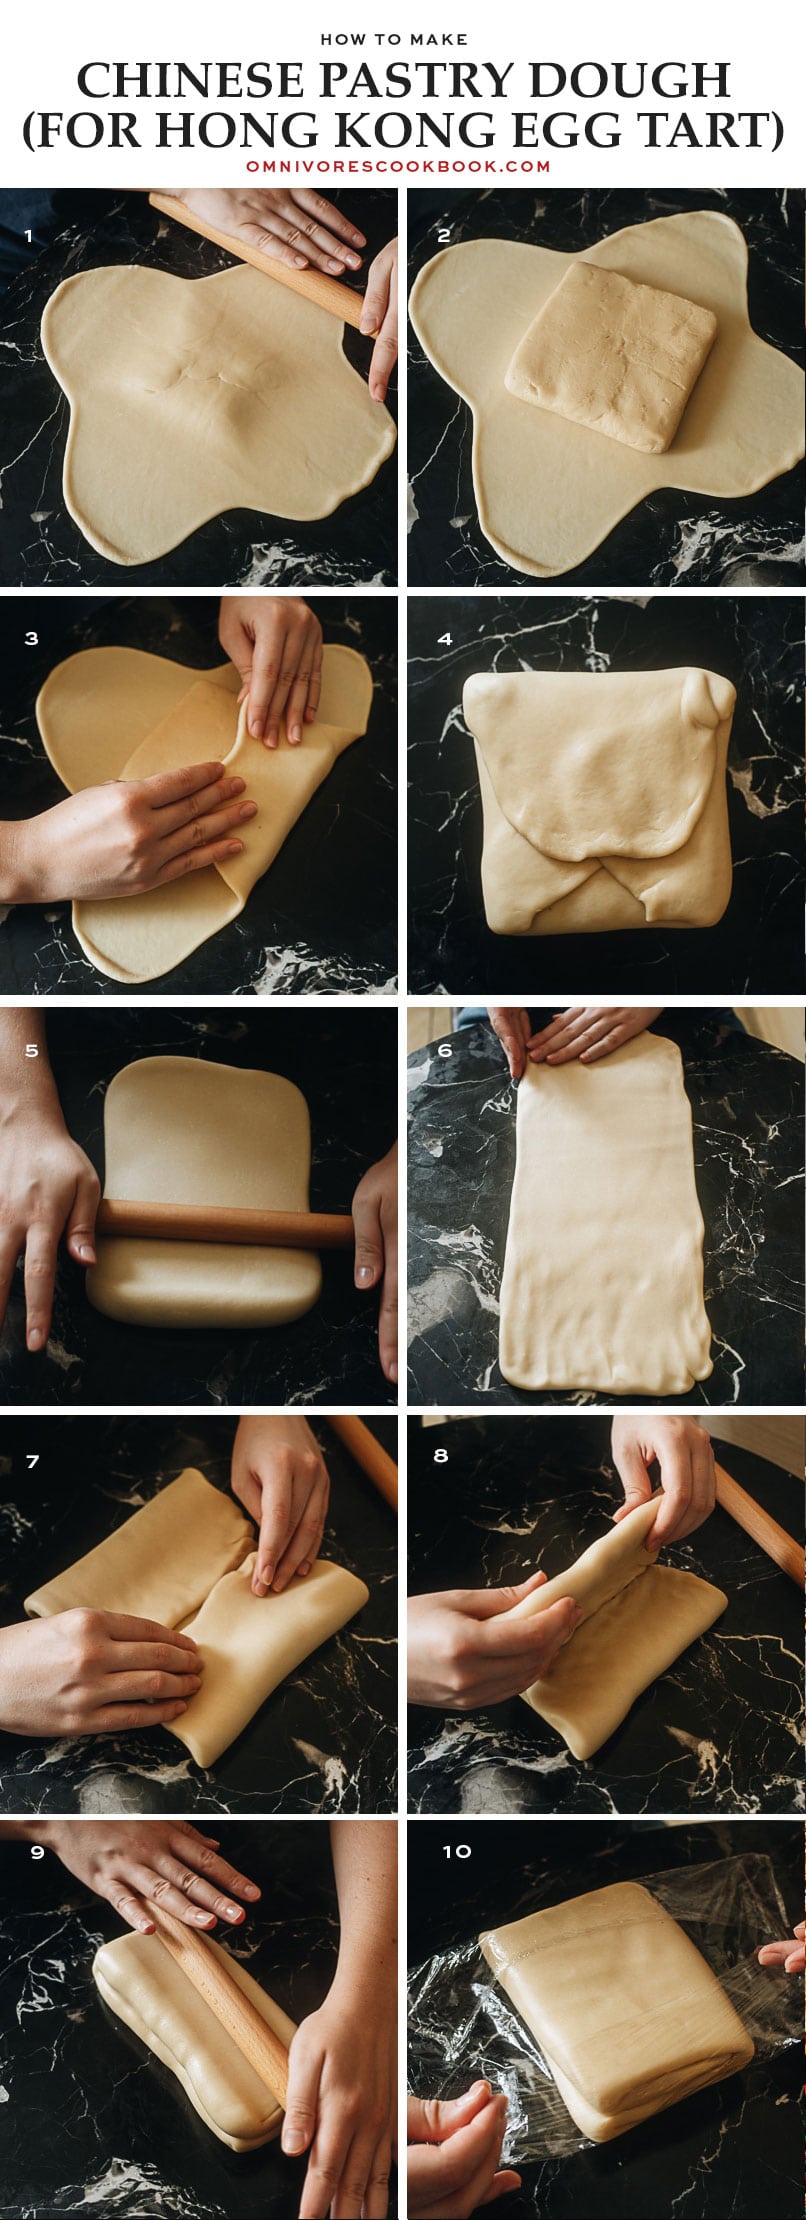
This is the fun part! It is quite straightforward if you look at the pictures below or watch the video.
- Roll out the water dough, so it forms a cross shape, with the center part thicker than the wings
- Plae the oil dough in the center of the cross
- Fold the wings over to cover the oil dough
- It should form a square once folded. The folded part should be almost as thick as the bottom.
- Roll it into a long rectangle
- Fold the two short sides towards the center
- Fold again so it forms a small thick rectangle
- Repeat steps 5 to 7: roll out the dough into a big rectangle, then fold it
- Then cover with plastic wrap and rest
NOTE: This pastry dough does not require chilling but you might need to rest it in the fridge if your room is hot. On the other hand, if you chill the dough while it rests, it might become a bit too stiff to work with and might require a few minutes at room temperature to loosen up.
It might sound daunting to make a pastry dough from scratch. But since this process does not require refrigeration or working with a chilled dough, it’s so much easier and faster to put together.
And once it’s done, you can either refrigerate it or freeze it for future use.
Prepare the filling
- Dissolve sugar in hot water to make a syrup
- Once it’s chilled, add the evaporated milk to it
- Beat the eggs until just mixed
- Add the syrup milk mixture to the egg mixture, then mix again
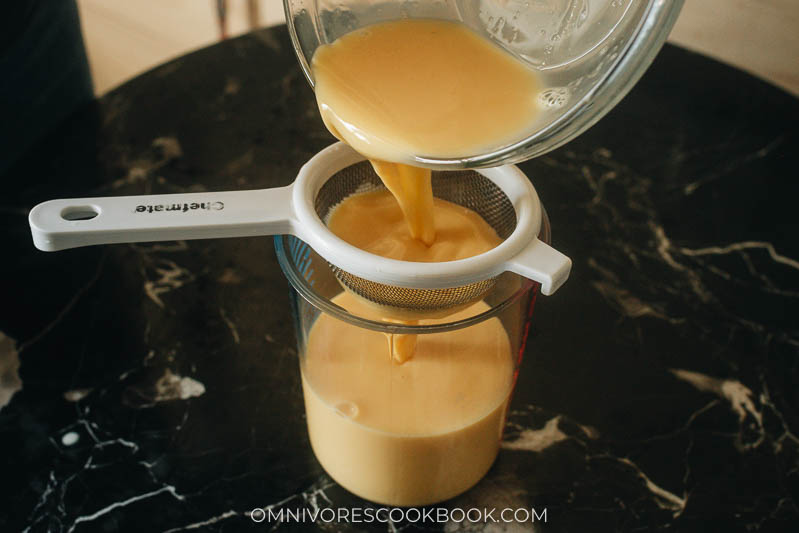
- Drain the mixture through a sieve
It’s very easy to put together the tart filling. The only thing to note is, do not beat the eggs or the mixture too hard, so it’s frothy. You want as few air bubbles as possible so the egg tart will come out smooth.
Assemble the tart
When you’re ready to bake:
- Cut the tart dough into halves and work on one at a time (to prevent from drying out)
- Roll out the dough into a large thin sheet
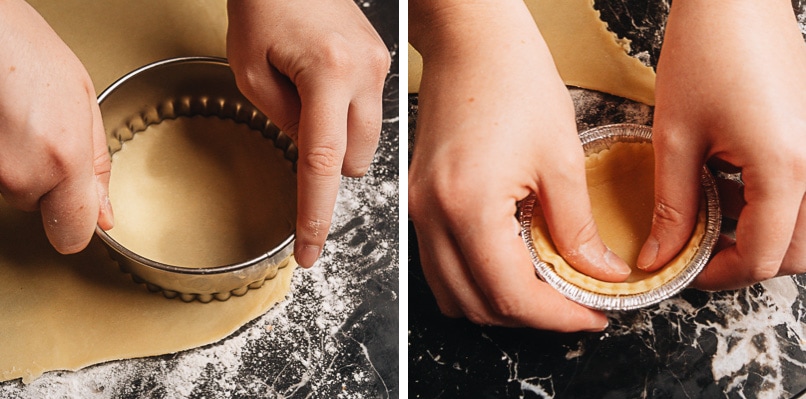
- Use the pastry cutter to cut 8 pieces
- Move each piece into a tart mold, then gently press it so it covers the mold
- Pour the filling into the tart crust
Once you’ve assembled all the tarts, bake them until the custard sets and the crust is crispy.
How to serve
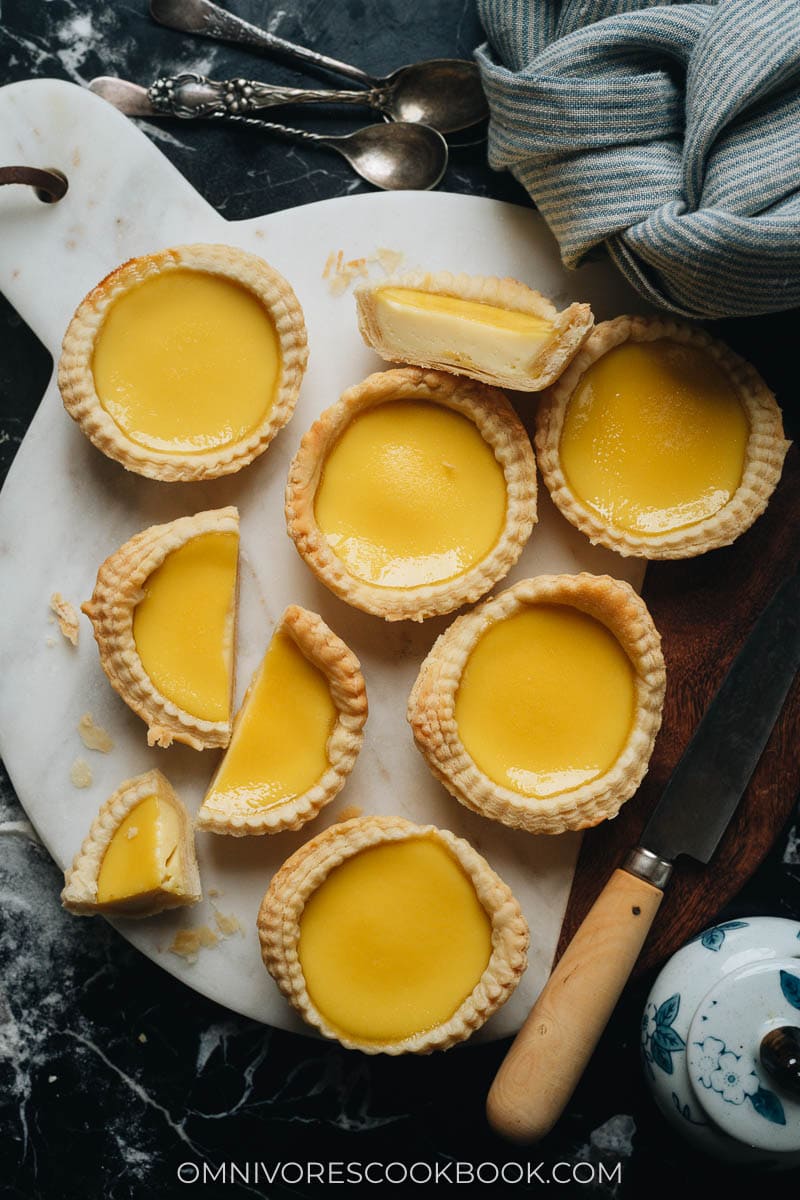
These Hong Kong egg tarts are SO delicious when you serve them fresh and slightly warm. They’re still good at any time when fully cooled, but nothing beats having one that’s freshly baked.
You can serve them in the morning with milk or coffee. Or anytime of day as a snack paired with tea.
Hong Kong egg tarts are the perfect dessert for any occasion, too. Easter and Mother’s Day are coming up and these tarts would be perfect for your brunch. And you can make them as finger food for holidays such as Thanksgiving, Christmas, and Chinese New Year.
Storage
If you cannot finish all the tarts, you can store the leftovers in an airtight container in the fridge. I highly recommend finishing them the next day, but I’ve tried storing them for 2 days and they tasted totally fine. The tart crust will start losing its crispiness on day 3.
I’ve also tried storing the tarts at room temperature in a sealed container overnight (I thought the crust would stay crispier that way). However, the tarts somehow dried up a bit.
In comparison, I prefer the fridge storing method better because the crust stays crispy and the filling more fresh.
Afterthought
Don’t miss out on making Hong Kong egg tarts because they really are so much fun to make. Their tiny size and wonderful flavor make them fun to eat at any time, and they’ll be a sure hit for small gatherings.
This recipe uses a delicate pastry dough and I highly recommend using a scale for measurement instead of cups to achieve the best result.
Hong Kong Egg Tart (港式蛋挞)
Ingredients
Water Dough
- 220 g (1 1/2 cups) all-purpose flour
- 100 g (7 tablespoons) chilled unsalted butter , cubed
- 50 g (4 tablespoons) sugar
- 1 g (1/4 teaspoon) salt
- 1 large egg
- 60 g (1/4 cup) ice water
Oil Dough
- 150 g (1 cup) all-purpose flour
- 60 g (1/3 cup) shortening
- 40 g (3 tablespoons) unsalted butter , softened
Filling
- 200 g (3/4 cup + 3 tablespoons) hot water
- 60 g (1/4 cup) sugar
- 4 large eggs
- Pinch of salt
- 120 g (1/2 cup) evaporated milk
Equipment
- 4 1/2 ” (11.5cm) Fluted pastry cutter (not required but highly recommended) (*Footnote 1)
- Egg tart mold (Scantily over 2″ on the base, 3″ top for the inner edge, and 3.3″ top for the outer edge)
Instructions
Prepare Water Dough
- Combine the flour and chilled butter in the bowl of a stand mixer. Break the butter into the flour using your fingers until it resembles wet sand.
- Add the sugar, salt, egg, and water. Keep mixing together the ingredients with your hand until a wet dough paste comes together.
- Knead with the dough hook attachment on setting 4 for 15 minutes, or until the dough is smooth and elastic. (*Footnote 2) Carefully pinch the dough with your fingers and it should form a thin semi-transparent sheet.
- Cover the dough with plastic wrap and rest for 15 minutes.
Prepare Oil Dough
- Add the ingredients for the oil dough into a medium-sized bowl.
- With a spatula or by hand, mix until a smooth dry paste is formed.
- Transfer to a clean working surface. Press into a 6” x 6” (15cm x 15cm) square. Cover with plastic wrap and rest for 10 minutes.
Assemble the pastry dough
- Once both doughs are rested, dust the work surface with flour. Gently knead the water dough for a few times until it forms a 6” (15 cm) smooth round ball.
- Use a rolling pin to flatten the dough into four directions about 4” (10 cm), forming a cross shape, leaving the center thicker and shaped like a 6” (15 cm) square. Once done, it should create a 4-sided cross shape. Gently roll the square center a few times to smooth it out.
- Place the oil dough in the center aligned with the square. Fold the four sides over the oil dough, one side at a time, so they are overlapping, while using your palm to press the dough gently to press out as many air bubbles as you can. Gently smooth out and pinch the dough together to seal.
- Dust the working surface again. Flip the dough over. Gently roll into a 8” x 18” (20cm x 45cm) rectangle.
- Fold the short sides of the rectangle inward, leaving about one finger’s width in the middle. Fold the dough in half again along the short side, as if closing a book..
- Dust the dough with flour again. Place the short side of the folded dough towards you. Repeat the rolling and folding from the step above.
- Cover the folded dough with plastic wrap. Let rest for 15 to 30 minutes at room temperature, or in the refrigerator if the dough feels soggy or loose.
- At this stage, the dough can be stored in the refrigerator for a few days for later use. Just make sure it is well wrapped and sealed (you can store the wrapped dough in a ziplock bag or a container).
Make the Filling
- While the dough is resting, make the filling: Combine the hot water and sugar in a medium-sized bowl. Stir until the sugar is dissolved. Set aside to cool.
- Add the eggs to a medium-sized bowl with a pinch of salt. Beat the eggs gently with a fork until it is consistent but not frothy.
- Add the evaporated milk to the cooled sugar syrup. Stir to mix well.
- Then pour the syrup mixture into the eggs. Gently mix again until everything is well combined.
- Strain the egg mixture through a fine mesh strainer (or a regular mesh strainer lined with cheese cloth) into a container or measuring cut that’s convenient for pouring.
Assemble the Egg Tart and Cook
- Preheat the oven to 325°F (162°C).
- Cut the dough into two equal pieces. Wrap the half not in use with plastic wrap and store it in the fridge.
- Roll the other half of the dough into a 1/8” (3 mm) thick rectangle.
- Using a large, round pastry cutter (5 3/8”, fluted if possible) cut out 8 circles of dough.
- Work on one piece of dough at a time. Carefully lift each circle and place it into a pastry cup. Gently drop and tap the cup to help the dough fall into place. Once the dough is mostly in place, gently press the bottom and sides into the cup, until the edges are slightly over the top of the pastry cup. Don’t press the sides too hard as it can damage the layers. Aim to have a small lip over the side of the cup, since the dough shrinks as it cooks.
- If you plan to make the full batch, repeat the shaping method to work on the second half of the dough. Meanwhile, cover the assembled pastry cups with plastic wrap to prevent them from drying out.
- Right before baking, place the assembled tart shells on a baking tray. Fill each cup with the filling, leaving a 1/4” (0.5 cm) space at the top, about 2 1/2 tablespoons.
- Bake the tarts at 325°F(162°C) for 25 to 35 minutes, until the custard is set and does not jiggle when moved.
- Let the egg tart cool off a bit before serving. You should serve them as fresh as you can.
Storage
- Once the egg tarts have cooled completely, you can store them in an airtight container in the fridge for 2 to 3 days. Their taste will diminish the longer you store them, but mine tasted quite nice the next day. During the first two days, the crust will keep quite crispy in the fridge and the filling moist.
Notes
- If you do not have a pastry cutter, use a bowl or cup with a similar size opening. Place the bowl over the pastry, and carefully cut around it with a knife.
- If the dough starts to stick to all sides of the bowl, stop the mixer and scrape off the dough to ensure proper kneading.
Video
Nutrition
More Chinese bakery recipes
- Chinese Egg Cake (鸡蛋糕)
- Baked BBQ Pork Buns (Char Siu Bao)
- Pineapple Buns (Bolo Bao)
- Steamed Custard Buns (nai wong bao, 奶黄包)
- Dan Huang Su (Pastry Mooncake with Salty Egg Yolk, 蛋黄酥)
Lilja Walter is a part of the Omnivore’s Cookbook team and worked closely with Maggie to develop and test this recipe.




These are my favorite desserts at a dim sum restaurant. I always thought they were not typically Chinese/Cantonese until I found out that they are in fact a Portuguese dessert PASTEIS DE NATA. They were made on the Great British Baking Show. I think the early days of Portuguese trading in the Macau/Hong Kong area found a home on dim sum menus!
Mimi, the pastries are similar, but are NOT the same. The Portuguese tarts are purposely burnt on top and do not taste the same as the supple HK egg tarts.
Hi Maggie, I have a question. Are you sure you have linked the correct size tinfoil tart pan on Amazon? I ordered them and they seem far too tiny for the 4.5 inch cutter. They are less than inches in diameter from edge to edge I’d post a picture but there’s no way to do that. I did a test and the little pans seem way too small for the 4.5 inch cutter. Can you measure your tart pans and post the diameter, please?
Oops. I meant to write that the tart pans are less that 3 inches in diameter.
Hi Robin, I’m so sorry that I included the wrong tart mold link by mistake. The Inches in their description was wrong after I double checked with the mm measurement in their picture.
My tart mold is: Scantily over 2″ on the base, 2.9-3″ top for the inner edge, and 3.3″ top for the out edge
I bought mine from a store and I found out later that all the egg tart molds on Amazon are slightly different…
The one that is similar to mine: https://amzn.to/3e0Trtf (Top Diameter – 3 3/8 Inches)
Hi, for the oil dough, can I replace the shortening with butter, as I don’t want to use shortening
You could try it but the ratio will be affected since butter contains water. The recipe should still work.
Hi ! Thanks for the recipe! What do you do with the left over dough? can you re-fold it and make more crusts?
You can. It will be a little denser but still tasty.
Hi Maggie, is the shortening used in the recipe a vegetable or meat shortening ? Thanks…
I used a vegetable shortening.
Hi, the grams and volume measurements on the filling don’t match up. For example 3/4 Cups and 3tbsp water is not 200g. Which is the correct measurement?
You should always follow the grams because it’s more precise. I had to round up the number when converting it to cups and tablespoons otherwise it’s gonna be very difficult to measure.
Wowzers, I am a newbie at baking but I attempted your recipe and it was Amazeballs! You propelled me to rockstar status with my family! Thank you so much. PS, I also tried your turnip cake recipe! Brilliant results. 🩷
Great recipe! Delicious flaky crust and very mild filling. I realized my shortening had gone bad, so I substituted it with roughly 60%/40% coconut oil and butter. Turned out great.
Could I add matcha to this recipe, to make matcha egg tarts?
I’m sure you can! I have not tried it myself, but matcha powder should work really well with them.